Aligning Cylinder Drive
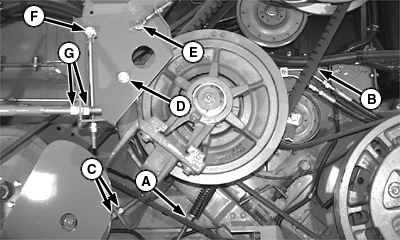
Loosen nuts (A) to remove tension from drive belt (B). Loosen countershaft assembly with nuts (C). Loosen cap screw (D). Loosen cap screws (E) and (F). Loosen nuts (G).
|
|
AG,OUO1035,1110 -19-11OCT99-1/3 |
|
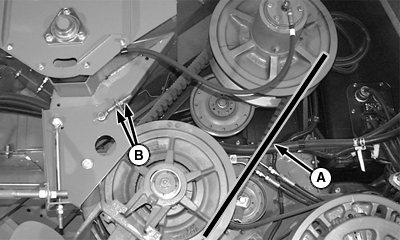
Using a straight edge (A), check the alignment of the countershaft sheaves to the sheaves on the primary countershaft. The countershaft sheaves should be within +/- 2 mm (1/16 in.) of the primary countershaft. Make adjustments with nuts (B). After making adjustments, tighten nuts (B).
|
|
AG,OUO1035,1110 -19-11OCT99-2/3 |
|
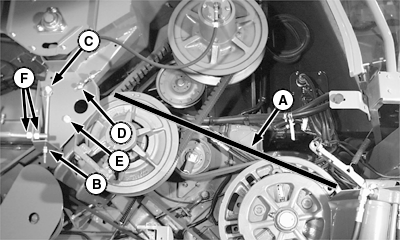
Using a straight edge (A), check the alignment of the countershaft sheaves to the sheaves on the cylinder shaft. The countershaft sheaves should be within ± 2 mm (1/16 in.) of the cylinder shaft. Make adjustments with nuts (B). After making adjustments, tighten nuts (B). Tighten cap screws (C), (D) and (E). Tighten nuts (F). Readjust cylinder drive gap. See "ADJUSTING CYLINDER DRIVE GAP".
|
|
AG,OUO1035,1110 -19-11OCT99-3/3 |
 CAUTION:
Shut off engine, remove key, and set parking brake.


