Using the Radio

|
|
|
|
|
|
Finding a Station
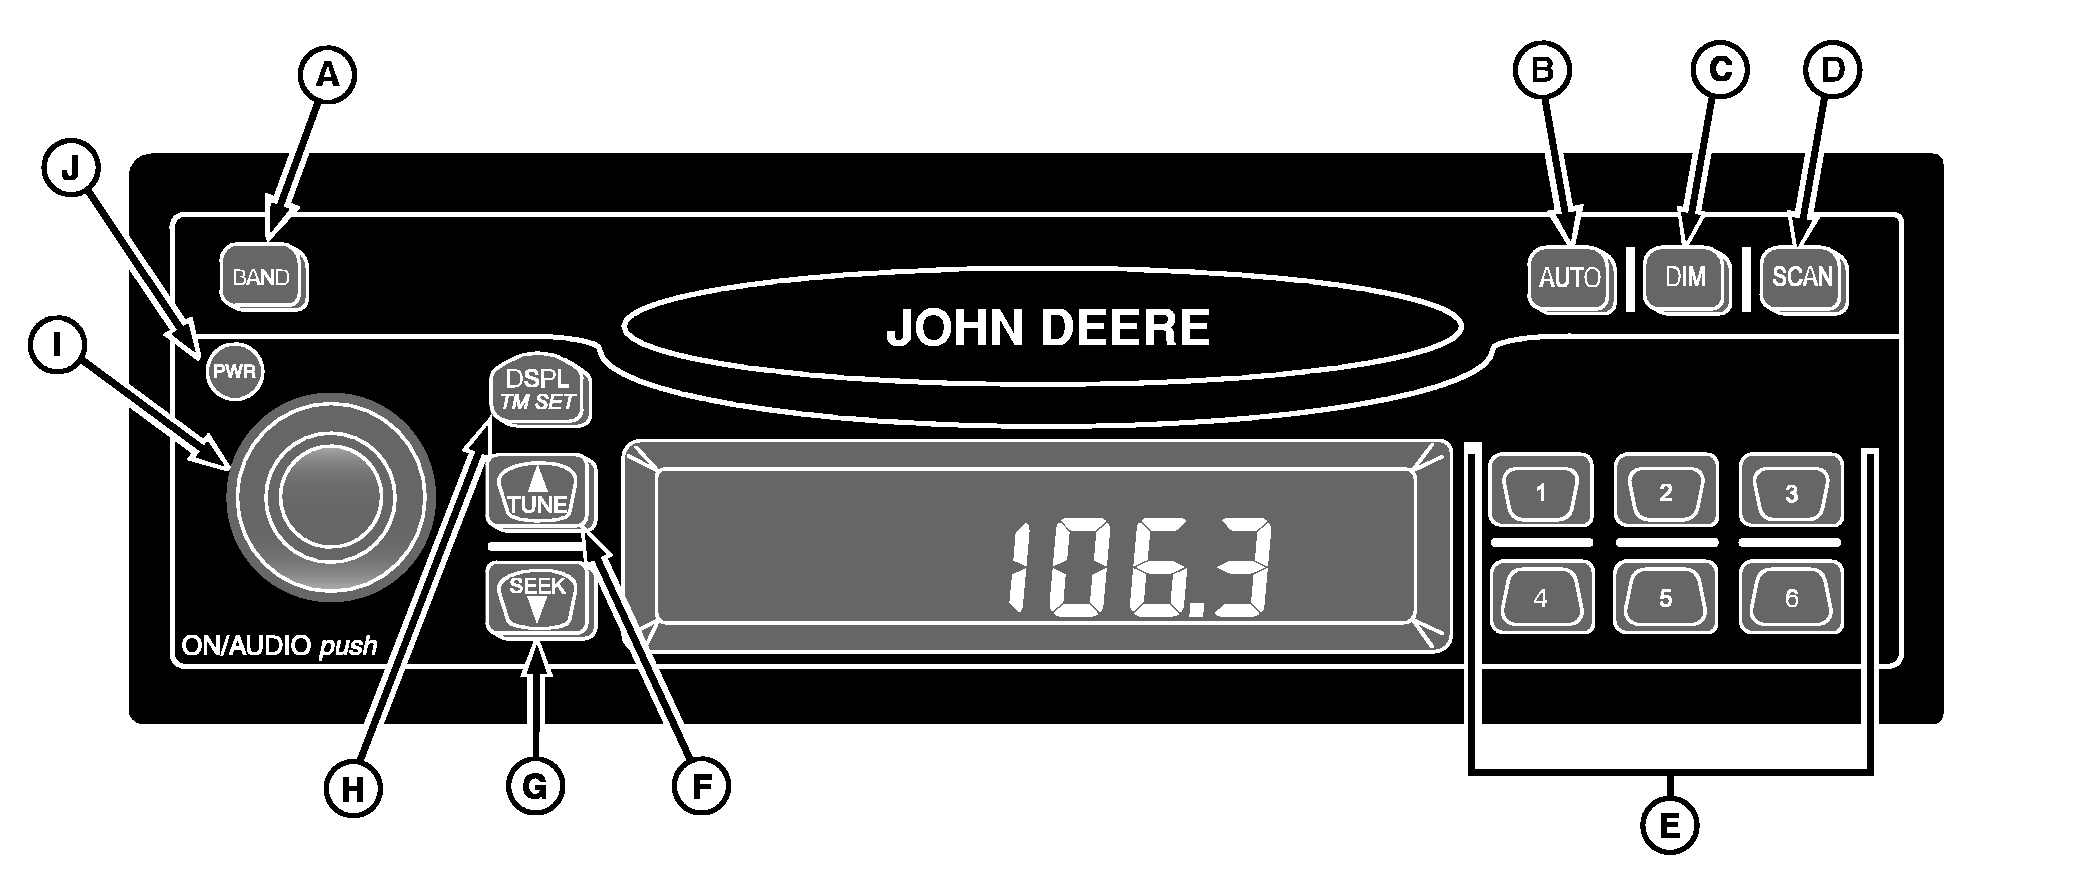
Band - Press button (A) to switch between FM, FM2, AM and Weather (WX). The receiver display will show your selection. Tune/Seek - Press and hold both TUNE (F) and BAND (A) for two seconds to switch between manual tune and seek modes. The display will show either "MANUAL" or "SEEK" to indicate the mode. Manual Tune - Press the TUNE (F) button once to tune to the next higher or lower station one frequency at a time. The display will show "TUNE" and the frequency. Holding TUNE or SEEK button for more than 0.5 seconds begins fast tuning. Seek - Press the SEEK button (G) once to tune to the next higher or lower station. Holding SEEK for more than 0.5 seconds begins the Seek function. ("SEEK" will appear on the display.) When a station with a strong enough signal is found, the Seek function will |
stop and the station will play. If a station is not found with a strong enough signal after going through the band twice, the Seek function will stop and the current station will continue to play. Seek may be cancelled by pressing SEEK again.
Auto Store - To automatically store the six strongest stations onto pushbuttons 1-6, press AUTO button (B) until "AUTO" and the "AS" icon appear on the display. AUTO only presets the band to which you are listening. In other words, if you pressed AUTO while listening to FM1, the presets on AM, FM2, and WX would not change Auto Store may be cancelled by pressing AUTO again. The original presets will be restored. Scan - Press SCAN button (D) to scan all stations on the band you are using. When a frequency of sufficient strength is found, the radio will play for five seconds and then continue scanning until you press SCAN again. The display will show "SCAN" and the frequency being scanned. |
AG,OUO1035,1329 -19-04JAN00-1/2 |
|
Setting the Presets
The six numbered pushbuttons (E) allow you to preset six of your favorite stations per band and easily return to them with the touch of a button. 1.
Turn the receiver on.
|
5. Repeat steps 1-4 for each pushbutton. Pressing a preset button in the future will tune the radio to the station that you selected. |
AG,OUO1035,1329 -19-04JAN00-2/2 |