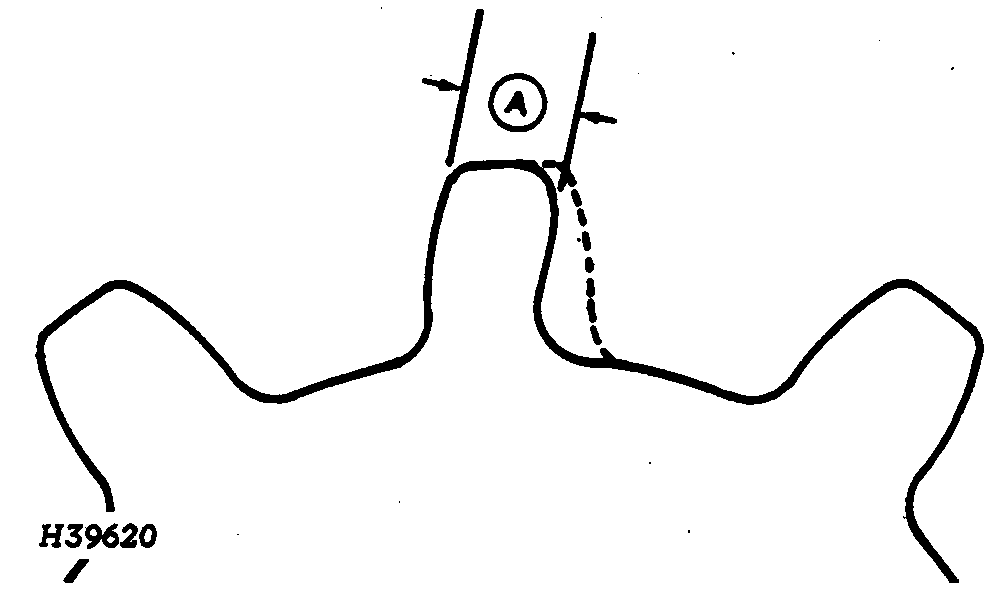
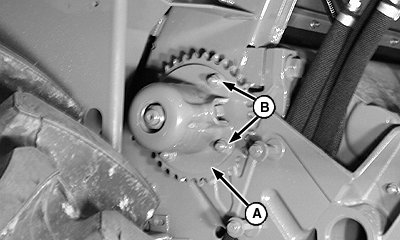
Reverse Feeder House Top Shaft SprocketsAfter 1000 hours, depending on the crops being harvested, check the upper shaft sprockets for wear. If these sprockets are worn past 12 mm (1/2 in.) (A), sprockets can be reversed for additional wear. To reverse sprockets:
|
|
OUO6075,0000122 -19-01DEC00-1/11 |
|
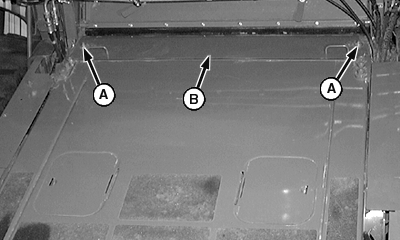
Lower feeder house, remove nuts (A) and top door (B).
|
|
OUO6075,0000122 -19-01DEC00-2/11 |
|
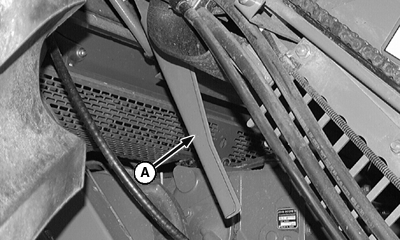
Pull lever (A) and lower bottom feeder house door.
|
|
OUO6075,0000122 -19-01DEC00-3/11 |
|
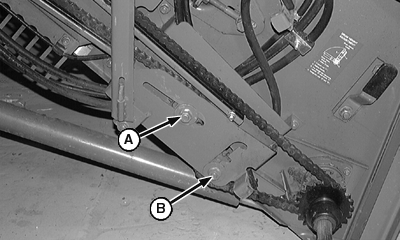
Open front shield. Loosen nut (A) and push sprocket rearward. Loosen nut (B) and move sprocket to upper position
|
|
OUO6075,0000122 -19-01DEC00-4/11 |
|
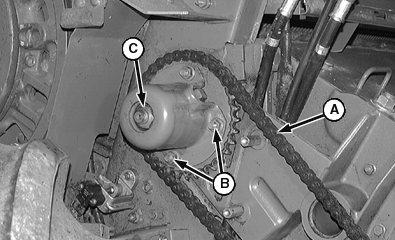
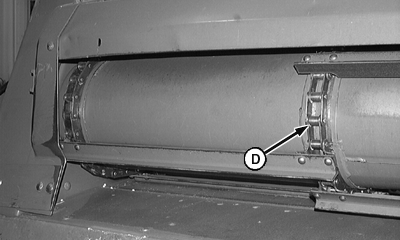
Remove right-hand side drive chain (A). Remove nuts (B) holding cover and remove clutch (C) and pipe spacers. NOTE: To ease removal and installation of chain, tie a rope onto the conveyer chain (D) to control chain. Relieve tension on feeder house conveyor chain and remove chain (D).
|
|
OUO6075,0000122 -19-01DEC00-5/11 |

|
|
Loosen set screws (A) in sprockets. Move outer sprockets (B) inward away from the bearing housings about one inch. Remove bolts (C) from left-hand bearing housing. Pull left-hand bearing housing away from mount and lower left-hand side of shaft. |
Pull shaft with bearing housing and sprockets away from right-hand side bearing. Reverse or replace sprockets. |
OUO6075,0000122 -19-01DEC00-6/11 |
|
NOTE: When reversing sprockets worn on one side only, the right-hand side and left-hand side sprockets change places and the inner sprocket is reversed (9650 has two inner sprockets). To install new sprockets or to reverse sprockets: Install sprockets onto shaft. |
|
OUO6075,0000122 -19-01DEC00-7/11 |

|
|
Install left-hand side bearing housing (A) on left end of shaft. Install opposite end of shaft into right-hand side bearing and swing left-hand side up to align bearing housing with bearing mount. Attach bearing housing to mount with cap screws. Tighten cap screws to specification. |
Specification
|
OUO6075,0000122 -19-01DEC00-8/11 |
|
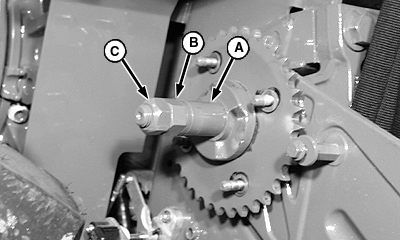
Assemble pipe spacer (A), clutch, outer spacer, flat washer and nut (B) to top shaft. Tighten nut to specification. Specification
Install clutch lock nut (C) against nut and tighten to specification.
|
|
OUO6075,0000122 -19-01DEC00-9/11 |
|
NOTE: Flat Washers are installed between sprocket and clutch canister. Install jaw, spring and canister (A). Retain canister with clutch bolts, flat washers and flange nuts (B). Tighten nuts to specification. Specification
|
|
OUO6075,0000122 -19-01DEC00-10/11 |

|

|
|
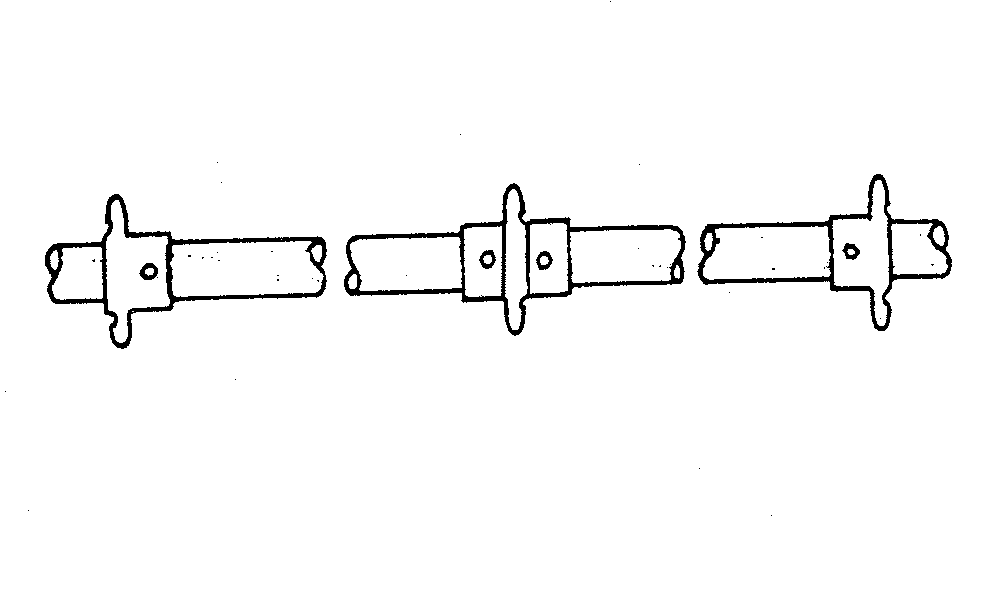
Position center of sprocket teeth 56 mm (2-1/4 in.) from bearing housing. (9450 and 9550 Combines) Position remaining sprockets 603 mm (23-3/4 in.) apart. (9650 Combines) Position remaining sprockets 493 mm (19-3/8 in.) apart. Sprockets should cover keys. Tighten set screws in sprocket to specifications. Specification
|
Install conveyor chain and right-hand side drive chain. Adjust chain tension (See "ADJUSTING FEEDER CONVEYER DRIVE CHAIN"). Install feeder house top door and close bottom feeder house door. |
OUO6075,0000122 -19-01DEC00-11/11 |
