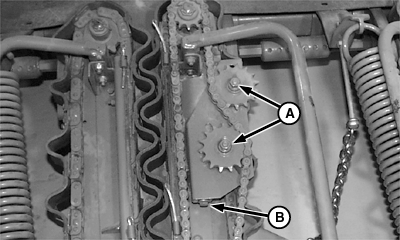
Replacing Rotary Knife SectionsNOTE: Procedures are shown with shields removed for photographic clarity. 1. Loosen nuts (A) on sprockets and adjustment bolt (B). 2. Remove connecting link (C) and drive chain (D).
|
|

ROCPHD,50ASE,B -19-03MAR92-1/6 |
|
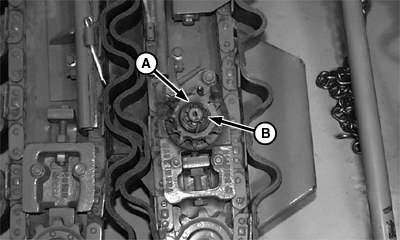
3. Remove cotter pin (A), slotted nut (B), washer, and bearing cap.
|
|
 CAUTION:
Rotary knife with shaft may drop down when slotted nut is removed.
CAUTION:
Rotary knife with shaft may drop down when slotted nut is removed.
ROCPHD,50ASE,B -19-03MAR92-2/6 |
|
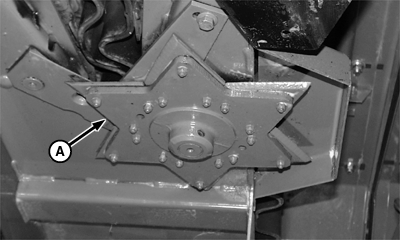
4. Remove rotary knife (A). IMPORTANT: Replace knife sections with special high carbon steel sections having hard surface treatment on bevel edges. 5. Remove spring and spacer from base of shaft. Clamp shaft in vise to inspect or replace all worn or broken knife sections.
|
|
ROCPHD,50ASE,B -19-03MAR92-3/6 |
|
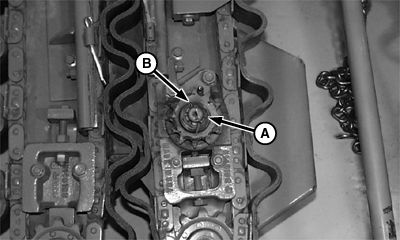
6. Install rotary knife and bearing cap. Retain with washer, slotted nut (A) and cotter pin (B) 7. Tighten slotted nut until a slight drag or shearing action is felt as rotary knife is rotated across stationary knife. 8. Align slot in nut with first available hole in rotary knife shaft and install cotter pin (A).
|
|
ROCPHD,50ASE,B -19-03MAR92-4/6 |
|
9. Install chain (A) onto sprockets and retain with connecting link (B).
|
|

ROCPHD,50ASE,B -19-03MAR92-5/6 |
|
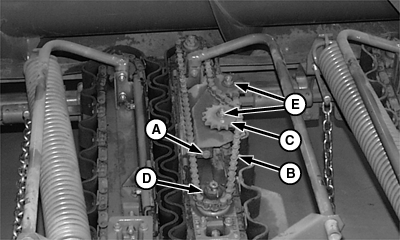
10. Tighten adjusting bolt (A) until specified force applied midway at (B) between sprockets (C) and (D) deflects chain to specification. Specification
Torque nuts (E) to specification. Specification
11. Run row crop header for a short time. Shut off engine, remove key and lower safety stop. Knife must be warm to the touch, never hot. Repeat adjustment as needed. |
|
ROCPHD,50ASE,B -19-03MAR92-6/6 |