Preparing Platform for Transport (If Equipped with Slow Speed Integral Transport System)
Towing with an underweight tractor can result in loss of control during towing or braking, resulting in serious injury or death. Transport only with a tractor having adequate ballast and drawbar strength. See Specifications Section in this manual for platform weight. Do not transport if the weight of the platform is more than 1.5 times the weight of the tractor. Transporting at speeds greater than 32 km/h (20 mph) can result is loss of control and serious injury or death. Always travel at a reasonable and safe speed. Use additional caution when transporting under adverse surface conditions, when turning and when on inclines. NOTE: Slow Speed Integral Transport System is optional for the 930D and 936D draper platforms. Lower platform down slightly on gauge wheels. (BOTH SIDES): Remove pin (A) from storage position (C) and install in lock-out hole (B) as shown. Retain pin (A) with previously removed spring clip. |
|
 CAUTION:
Do not transport the header with a truck or other motor vehicle. Loss of control of the platform or motor vehicle may result in serious injury or death to the vehicle operator or a passing motorist.
CAUTION:
Do not transport the header with a truck or other motor vehicle. Loss of control of the platform or motor vehicle may result in serious injury or death to the vehicle operator or a passing motorist.
OUO6075,0000059 -19-25JAN01-1/17 |
|
Raise feeder house completely and lower safety stop (A) onto hydraulic cylinder rod. Set parking brake, shut off engine and remove key.
|
|
OUO6075,0000059 -19-25JAN01-2/17 |
|
Left Side: Remove pin (C) and gauge wheel (A) from gauge wheel frame (B). Roll gauge wheel to front right side of platform. Right Side: Remove pin (C) and gauge wheel (A) from gauge wheel frame (B).
|
|
OUO6075,0000059 -19-25JAN01-3/17 |
|
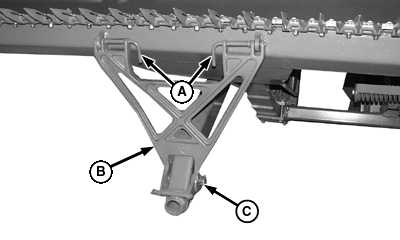
Remove pin (C) from transport frame. Disengage pins (A) from frame brackets. Remove spring clip and pin (B). Swing transport frame assembly under platform. Rotate casting 180° and lift back up on other side.
|
|
OUO6075,0000059 -19-25JAN01-4/17 |
|
Reinstall spring clip and pin (C) through transport frame (B). Lift transport frame (B) to align latches with frame brackets. Release spring pins (A), making sure pins are fully seated.
|
|
OUO6075,0000059 -19-25JAN01-5/17 |
|
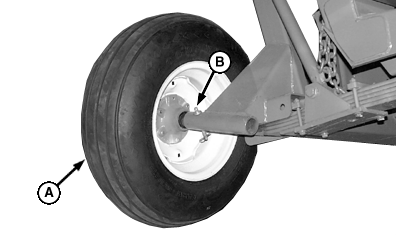
Install left-hand gauge wheel (A) into transport frame as shown. Install pin (B) and retain with previously removed spring clip.
|
|
OUO6075,0000059 -19-25JAN01-6/17 |
|
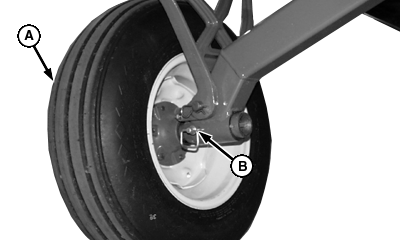
Install right hand gauge wheel (A) into transport frame and retain with pin (B) and previously removed spring clip.
|
|
OUO6075,0000059 -19-25JAN01-7/17 |
|
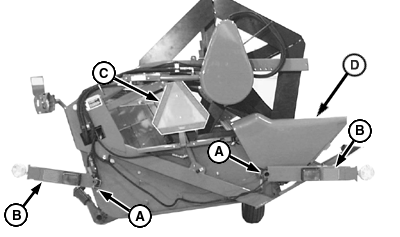
Remove right-hand end cover. Lift and hinge (SMV) sign (C) to transport position. Raise divider (D). Remove and quick lock pins (A) (both sides). Move lights (B) to transport position and reinstall quick lock pins. Install end cover.
|
|
OUO6075,0000059 -19-25JAN01-8/17 |
|
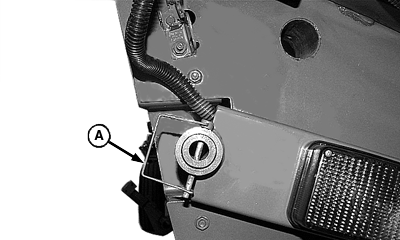
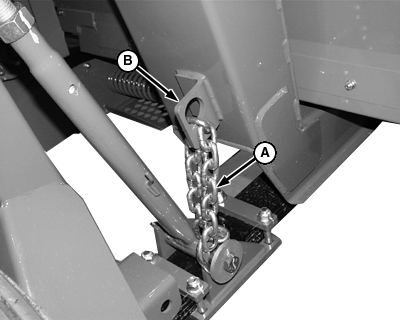
Unhook tow chain (A) from storage bracket (B).
|
|
OUO6075,0000059 -19-25JAN01-9/17 |
|
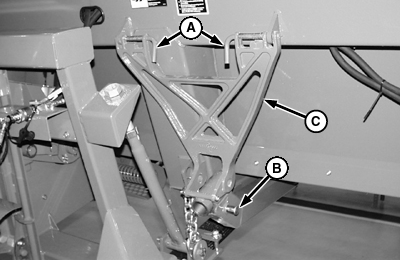
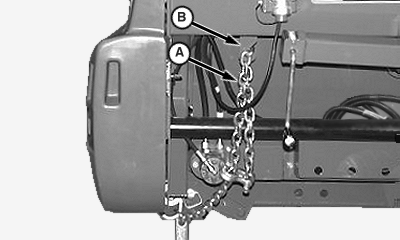
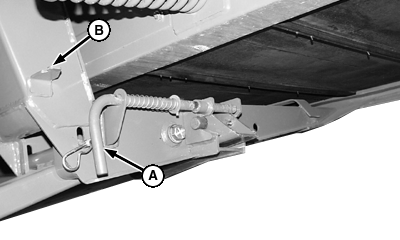
Remove spring clip (A) and pin (B). Lift and pull hitch (C) out until it stops.
|
|
OUO6075,0000059 -19-25JAN01-10/17 |
|
Align holes and retain with pin (B) and spring clip (A).
|
|
OUO6075,0000059 -19-25JAN01-11/17 |
|
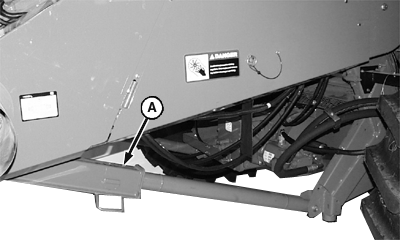
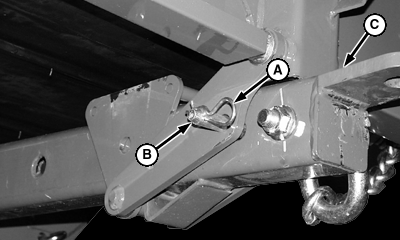
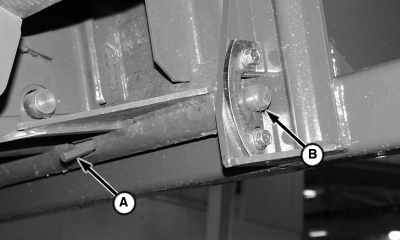
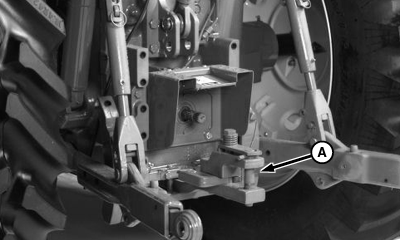
IMPORTANT: Make sure pin is engaged fully through brackets, locking rear of hitch in transport position. Damage will result if not properly latched. Pull pin (A) out from catch bracket (B) and release.
|
|
OUO6075,0000059 -19-25JAN01-12/17 |
|
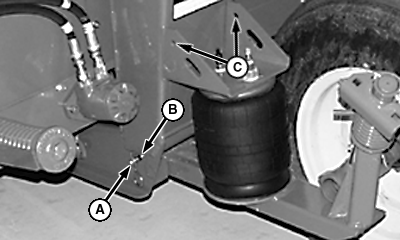
IMPORTANT: (BOTH SIDES): Before lowering platform, make sure the attachment frame lockout chains (A) are latched between the leveling screws and the main frame bracket (B) or the frame will lower to the ground making transport and reattachment very difficult.
|
|
OUO6075,0000059 -19-25JAN01-13/17 |
|
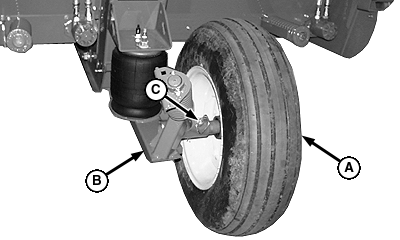
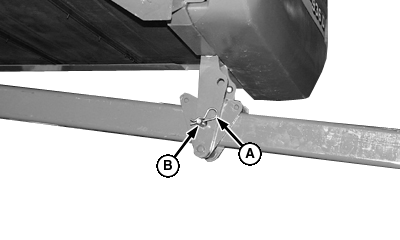
(BOTH SIDES): Push locking pin handle (A) in and up so locking pin (B) will unlock from platform.
|
|
OUO6075,0000059 -19-25JAN01-14/17 |
|
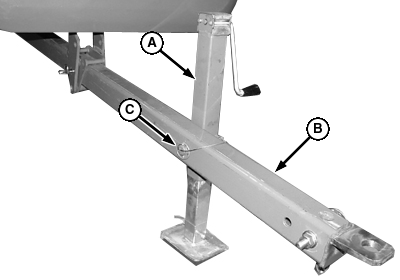
Remove jack (A) from rear of platform and attach to hitch (B) as shown. Retain with spring clip (C). Raise feeder house safety stop and lower platform down carefully onto tires and jack stand. Disconnect electrical harness and hydraulic connections (see Attaching and Detaching Section in this manual). Start engine and lower feeder house until platform is on the ground and pivot blocks are free. Drive combine slowly rearward until feeder house is clear of platform. |
|
OUO6075,0000059 -19-25JAN01-15/17 |
|
Connect platform hitch to tractor using hitch pin (A). Attach safety tow chain to the tractor drawbar.
|
|
OUO6075,0000059 -19-25JAN01-16/17 |
|
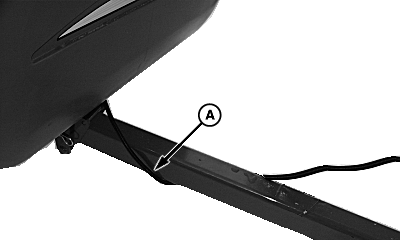
Route electrical harness under left-hand side panel. IMPORTANT: Due to different draw bar lengths and tractor configurations the draper harness may have to be adjusted to length. Wrap harness as required. Damage will result if harness is secured tightly to hitch or harness is allowed to drag. Secure electrical harness (A) by wrapping harness once around draper hitch. Use multiple wraps if harness is too long. Connect platform electrical harness to tractor harness connector (B). Once platform hitch has been attached to tractor, remove jack and stow in storage position on main frame.
|
|
OUO6075,0000059 -19-25JAN01-17/17 |