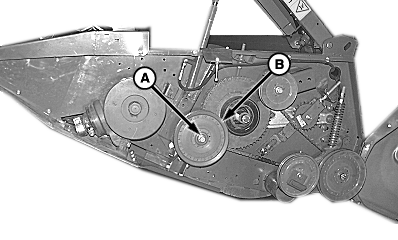
Adjusting Cutterbar Fore/AftNOTE: Rigid platforms are shipped from factory in the extended cutterbar position. To reposition cutterbar requires a different knife drive belt, see your John Deere Dealer for proper belt. 1. Raise feeder house and set safety stops on combine. NOTE: All rigid platforms are originally setup with the cutterbar in the extended position. 2. Pull up on tensioner arm sheave handle (A) and remove cutterbar drive belt (B). |
|

OUO6035,000148F -19-06AUG01-1/11 |
|
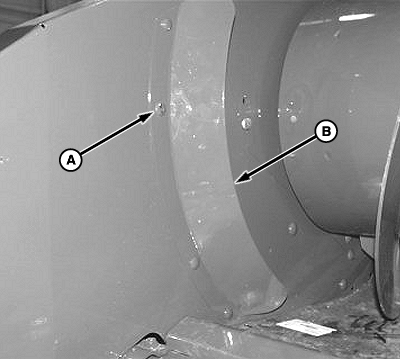
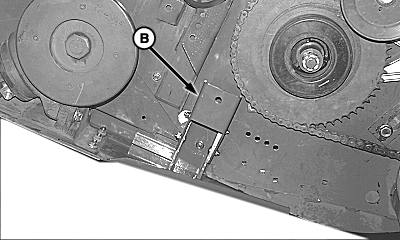
3.
Remove cap screw (A) and idler sheave (B).
|
|
OUO6035,000148F -19-06AUG01-2/11 |
|
4.
Remove carriage bolts (A) and auger deflector shield (B) if equipped.
|
|
OUO6035,000148F -19-06AUG01-3/11 |
|
5.
Remove cap screws (A) along rear edge of feed floor.
|
|
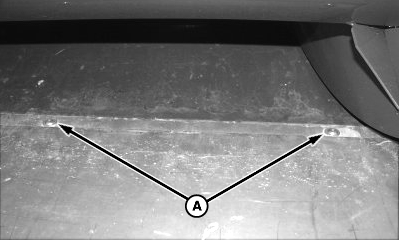
OUO6035,000148F -19-06AUG01-4/11 |
|
NOTE: Idler sheave mounting bracket (B) is removed for clarity. Idler sheave mounting bracket removal is not required for procedure. 6. Remove nuts (A) and carriage bolts between divider points and end sheets on both sides of platform.
|
|

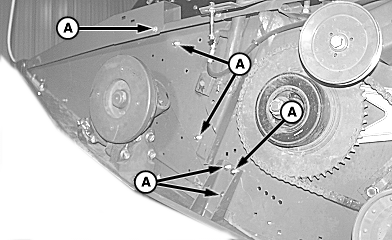
OUO6035,000148F -19-06AUG01-5/11 |
|
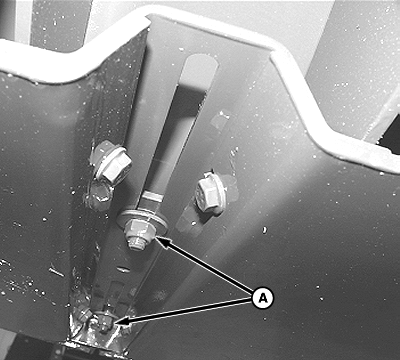
IMPORTANT: Loosen nuts (A) as much as possible without removing them to ensure free movement. 7. Loosen but do not remove nuts (A) under cutterbar support arms. IMPORTANT: Be careful not to damage skid plate sensor straps and wiring harness, if equipped. 8. Raise feeder house safety stops and lower platform to ground. Drive combine slowly forward or rearward to desired position:
IMPORTANT: Holes in feed plates and floor must line up. 9. Tighten nuts (A) under cutterbar support arms. |
|
OUO6035,000148F -19-06AUG01-6/11 |
|
10.
Install carriage bolts and nuts (A) on both sides of platform.
|
|
OUO6035,000148F -19-06AUG01-7/11 |
|
11.
Install bolts along rear edge of feed plate.
|
|
OUO6035,000148F -19-06AUG01-8/11 |
|
12.
Install auger deflector shield (B) and carriage bolts (A).
|
|
OUO6035,000148F -19-06AUG01-9/11 |
|
13.
Reinstall idler sheave (B) and retain with cap screw (A).
|
|
OUO6035,000148F -19-06AUG01-10/11 |
|
NOTE: See your John Deere dealer for a knife drive belt for mid and/or retracted cutterbar positions. 14. Pull up on tensioner arm sheave handle (A) and install cutterbar drive belt (B). 15. Check auger finger timing and reel height. Adjust as required to avoid damage to platform.
|
|
OUO6035,000148F -19-06AUG01-11/11 |