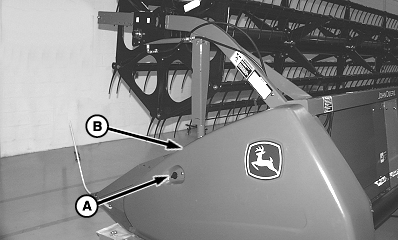
Replacing Cutterbar Knife1. Turn knob (A) and open left-hand end shield (B).
|
|
OUO6035,0001492 -19-07AUG01-1/8 |
|
2.
Pull up on tensioner arm sheave handle (A) and remove drive belt (B).
|
|

OUO6035,0001492 -19-07AUG01-2/8 |
|
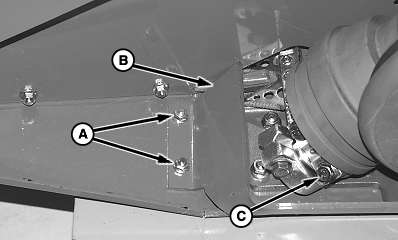
3.
RIGID PLATFORMS: Remove nuts (A) and shield (B).
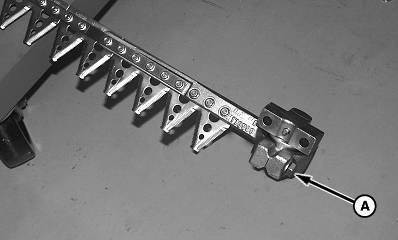
4. ALL PLATFORMS: Manually rotate knife head until cap screws (C) are accessible. 5. Remove cap screws (C) to disconnect knife from drive.
6. Pull knife through guards until bearing assembly is separated from knife drive. |
|
 CAUTION:
Avoid injury. Cutterbar and knives will move whenever the knife drive is rotated. Keep hands, feet and clothing away from cutterbar when servicing.
CAUTION:
Avoid injury. Cutterbar and knives will move whenever the knife drive is rotated. Keep hands, feet and clothing away from cutterbar when servicing.
OUO6035,0001492 -19-07AUG01-3/8 |
|
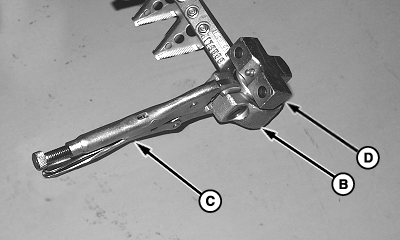
7.
Remove knife head bearing cap screw (A).
8. Spread knife head (B) slightly using self-locking pliers (C) and remove bearing assembly (D). IMPORTANT: Spanner ring (E) maintains a smooth drive operation and proper knife head alignment. Replace spanner ring any time a major component failure has occurred in knife head or knife drive gearbox area, or any time the system has been previously operated with improper knife head alignment. 9. Install bearing assembly into new knife head, remove self-locking pliers and finger tighten cap screw (A).
|
|

OUO6035,0001492 -19-07AUG01-4/8 |
|
IMPORTANT: Failure to fully tighten cap screws (A) will result in knife and drive damage. 10. Push knife back into guards until bearing contacts drive. Insure drive is positioned to accept bearing, lightly tap components together. Tighten cap screws (A and B) to specification. Specification
|
|

OUO6035,0001492 -19-07AUG01-5/8 |
|
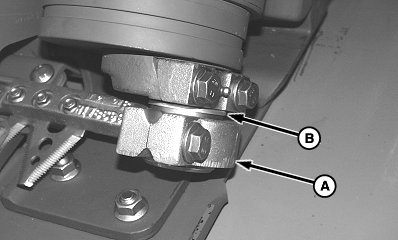
IMPORTANT: Setting of cutterbar head is critical. If cutterbar head is not set correctly, binding and gear box failure may occur. 11. Make sure knife head (A) does not contact bearing shield (B). see Aligning Knife Head and Knife Drive Alignment in this section for procedures.
|
|
OUO6035,0001492 -19-07AUG01-6/8 |
|
12.
RIGID PLATFORMS: Install shield (B) and tighten carriage bolts and flange nuts (A).
|
|
OUO6035,0001492 -19-07AUG01-7/8 |
|
13.
Lift up on tensioner arm sheave handle (A) and install drive belt (B).
14. Close left-hand end shield.
|
|
OUO6035,0001492 -19-07AUG01-8/8 |