Float Calibration
The lift cylinder pressure sensor must be calibrated for each header installed on the combine in order for Active Header Float to function Properly
Prepare Header for Calibration:
-
Turn the key switch to the run position.
-
Hook up header to the combine and ensure header harness is connected to the combine harness.
-
Move the machine onto a level surface.
-
Raise header completely.
|
|
|
|
OUO6043,000162E -19-12MAR03-1/8
|
|
Press the diagnostic switch. dIA will appear on the triple display tachometer.
|
|
|
|
OUO6043,000162E -19-12MAR03-2/8
|
|
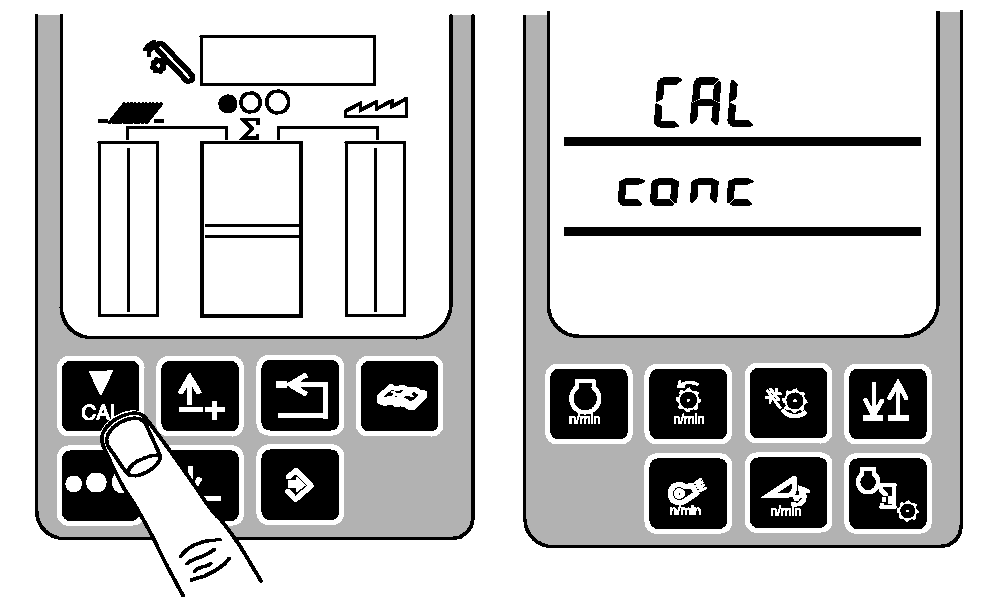
Press the calibration switch until CAL and conc appear on the triple display tachometer.
|
|
|
|
OUO6043,000162E -19-12MAR03-3/8
|
|
Press the up or down arrow switch to access the FLO calibration mode. CAL and FLO will appear on the triple display tachometer.
|
|
|
|
OUO6043,000162E -19-12MAR03-4/8
|
|
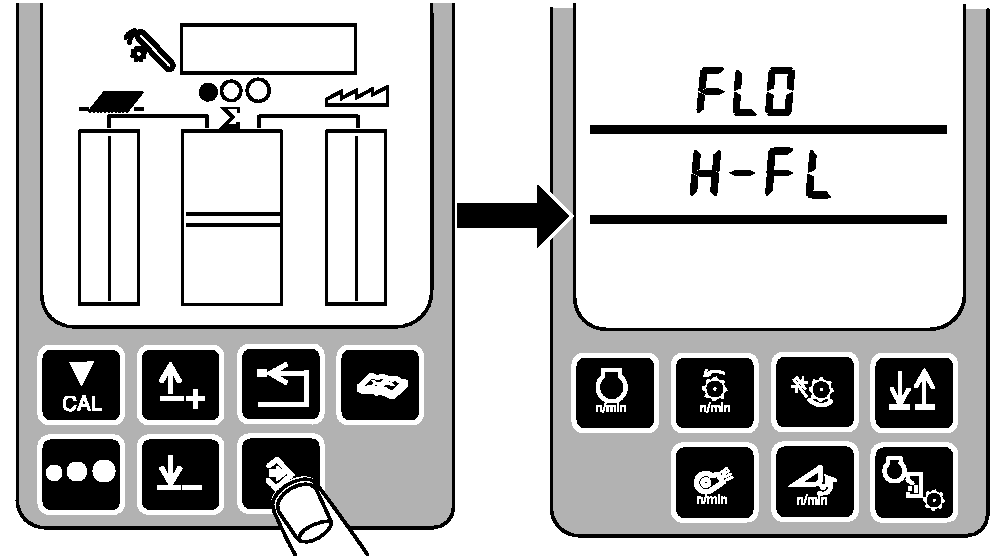
Press the enter switch to access the float calibration mode. FLO and H-FL will appear on the triple display tachometer.
|
|
|
|
OUO6043,000162E -19-12MAR03-5/8
|
|
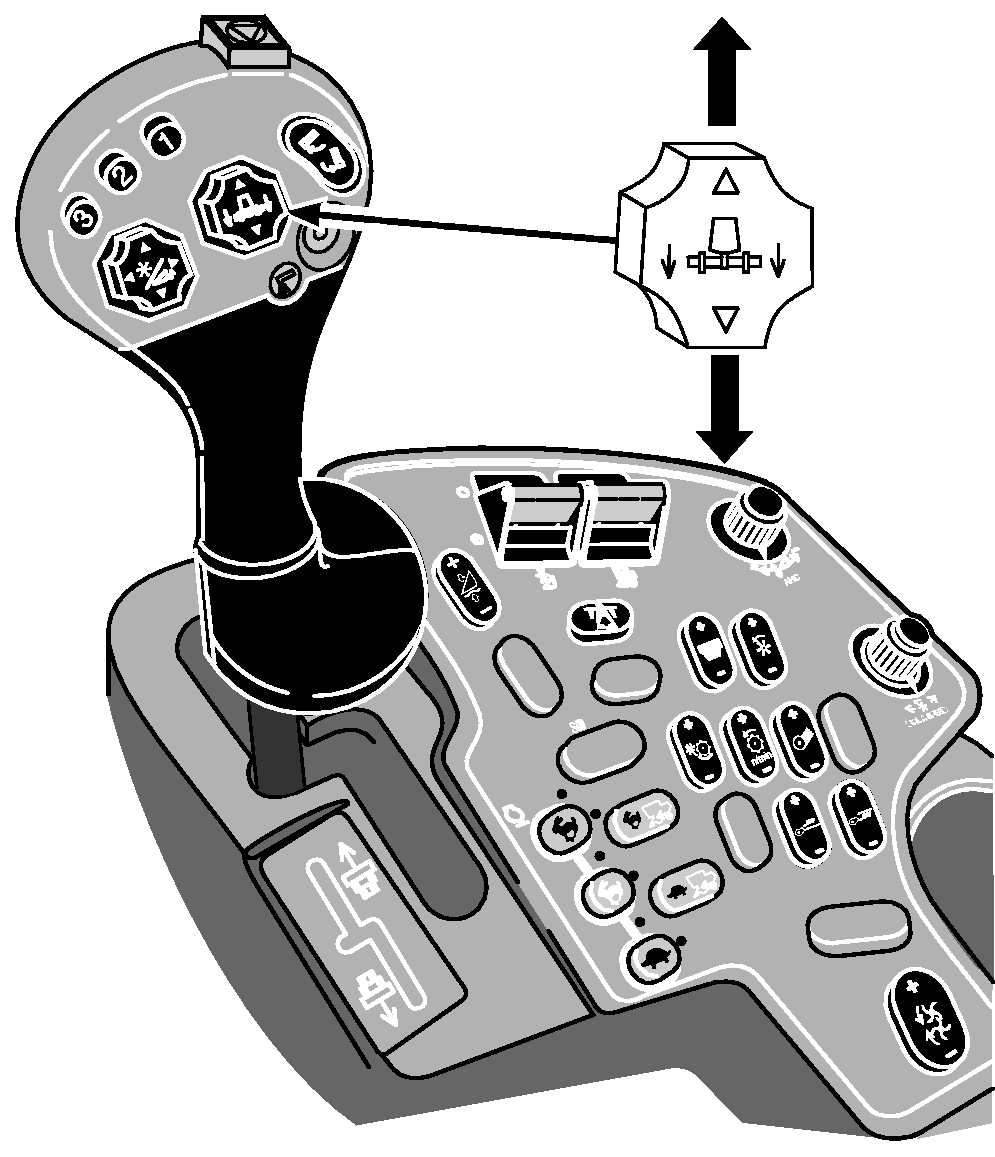
While in this mode, the feeder house may be moved in open loop control.
With the header lift switch on the multi-function handle, lower the header until the cutterbar is about 100 mm (3.94 in.) above ground level (the header must not touch the ground).
|
|
|
|
OUO6043,000162E -19-12MAR03-6/8
|
|
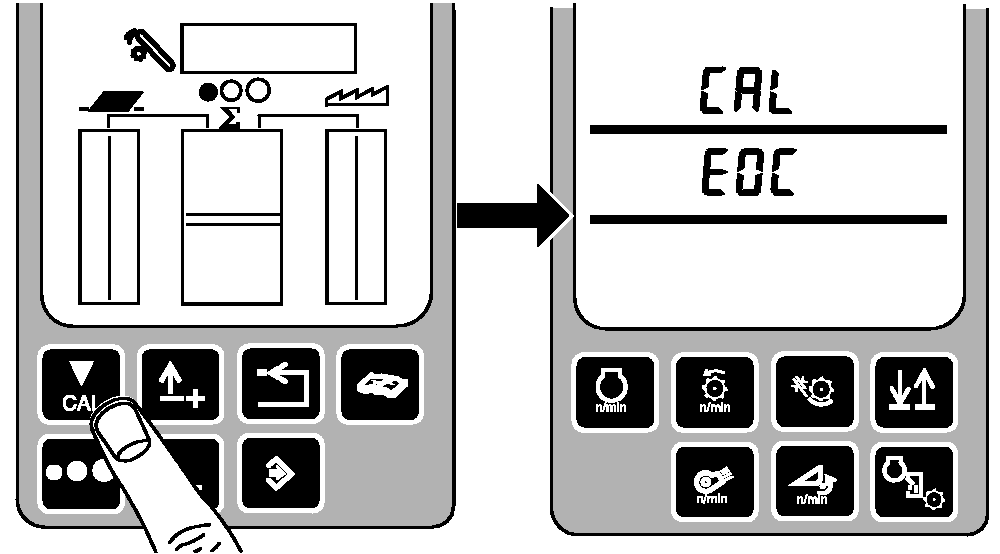
Press the calibration switch (the header must not touch the ground) to record the float calibration level. CAL and EOC will appear on the triple display tachometer.
If header does touch ground, press back arrow switch to abort calibration. Start calibration again.
|
|
|
|
OUO6043,000162E -19-12MAR03-7/8
|
|
Press the enter switch to store the float calibration pressure in the header controller. CAL and FLO will appear on the triple display tachometer.
Press the back arrow switch twice to return to normal operation.
|
|
|
|
OUO6043,000162E -19-12MAR03-8/8
|
|