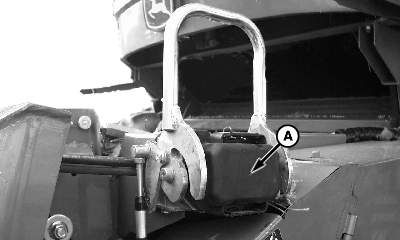
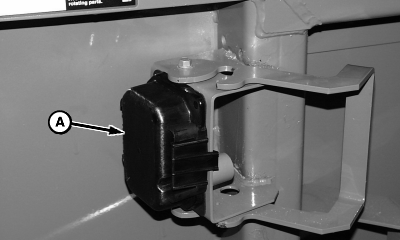
Attach Multi-Coupler and Single Point LatchingIMPORTANT: Latch pins are not to be actuated with header on the ground. If multi-coupler must be actuated with header on ground, unhook cable from handle. Remove cover (A) and clean multi-coupler face (B).
|
|
OUO6075,0002C87 -19-08MAY03-1/5 |
|
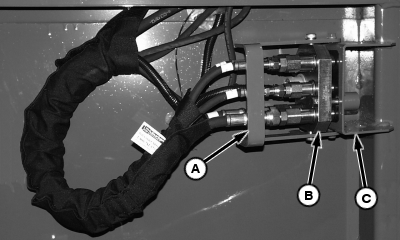
Open handle (A) and remove multi-coupler (B) from storage bracket (C).
|
|
OUO6075,0002C87 -19-08MAY03-2/5 |
|
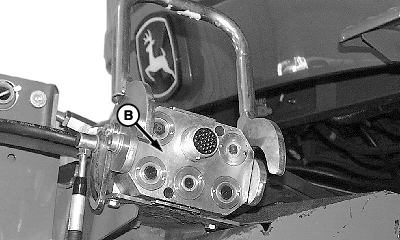
NOTE: To prevent damage to the latching cable, a shear screw is attached to the handle. Attempts to actuate the latching pins with the header on the ground will shear the screw on the handle. (See Extra Shear Screw Location later in this section.) Install multi-coupler (A) onto receptacle (B) on feeder house and close handle (C).
|
|
OUO6075,0002C87 -19-08MAY03-3/5 |
|
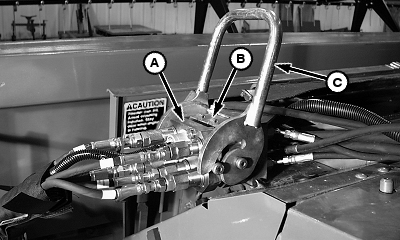
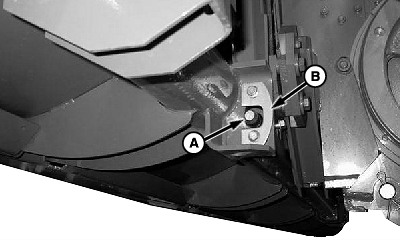
NOTE: With header attached, latch pins should move freely through receiving holes in header. If latch pins do not extend, make sure that the latching plates on the header are properly adjusted. Latch pins (A) will extend through latch plates (B) on feeder house when multi-coupler is latched.
|
|
OUO6075,0002C87 -19-08MAY03-4/5 |
|
Install multi-coupler cover (A) on platform storage position. Remove telescopic shaft from storage position and install onto feeder house backshaft, making sure quick attach collar locks fully.
|
|
OUO6075,0002C87 -19-08MAY03-5/5 |