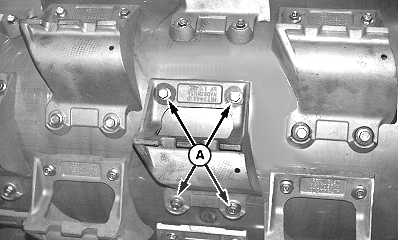
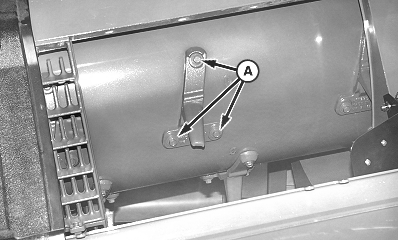
Threshing Elements And Tines-Remove And InstallIMPORTANT: STS Rotor is a balanced assembly. Elements and tines must be replaced in sets of three to maintain balance. Replacement kits are available through service parts and include new cap screws with pre-applied LOCTITE ™ 204. Always use new cap screws and do not re-tighten after initial installation. Tines or elements that become loose may result in machine damage. If tines or elements need to be removed for other than replacement, mark location on tine(s)/element(s) and rotor, prior to removal. Install in same location as removed to maintain balance. Always use new cap screws. Make sure to clean out tailings and front cross auger if tine replacement is due to broken or damage tines. Failure to do so before initial start-up may allow broken tines to recirculate and cause tine damage to reoccur. 1. Remove separator grates or concave sections as needed to access STS Rotor. (See Remove and Install Concave Sections.) 2. Inspect wear on threshing elements and separator tines using AH204933 STS Combine Clearance Gauge. 3. Remove cap screws (A) and threshing element or tine. |
|
|
LOCTITE is a trademark of Loctite Corp. | OUO6075,000296C -19-31MAR03-1/2 |
|
4.
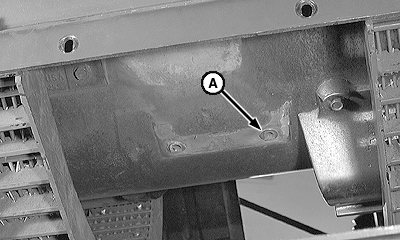
Inspect RIVNUT threaded inserts (A). Replace if damaged.
5. If one element or tine needs replaced, replace all in the group. Example: If element 2 needs to be replaced, replace elements 1 and 3 also. 6. Use Threshing Elements and Separator Tine Location diagram for identifying elements and tines. |
|
| Threshing Element Groups (Standard) | Threshing Element Groups (Rice Option) | ||
|---|---|---|---|
| Group 1 | Elements 1, 2, 3 | Group 1 | Elements 1, 2, 3 |
| Group 2 | Elements 4, 5, 6 | Group 2 | Elements 4, 6, 8 |
| Group 3 | Elements 7, 8, 9 | Group 3 | Elements 5, 7, 9 |
| Group 4 | Elements 10, 11, 12 | Group 4 | Elements 10, 12, 14 |
| Group 5 | Elements 13, 14, 15 | Group 5 | Elements 11, 13, 15 |
| Group 6 | Elements 16, 18, 20 | ||
| Group 7 | Elements 17, 19 ,21 | ||
| Group 8 | Elements 22, 24, 26 | ||
| Group 9 | Elements 23, 25, 27 | ||
| Separator Tine Groups (Standard) | Separator Tine Groups (Rice Option) | ||
|---|---|---|---|
| Group 1 | Tines 1, 2, 5 | Group 1 | Tines 1, 2, 5 |
| Group 2 | Tines 3, 4, 6 | Group 2 | Tines 3, 4, 6 |
| Group 3 | Tines 8, 9, 11 | Group 3 | Tines 8, 9, 11 |
| Group 4 | Tines 7, 10, 12 | Group 4 | Tines 7, 10, 12 |
| Group 5 | Tines 13, 16, 18 | Group 5 | Tines 13, 16, 18 |
| Group 6 | Tines 14, 15, 17 | Group 6 | Tines 14, 15, 17 |
| Group 7 | Tines 19, 22, 23 | Group 7 | Tines 19, 22, 23 |
| Group 8 | Tines 20, 21, 24 | Group 8 | Tines 20, 21, 24 |
|
7. Tighten cap screws to specification. Specification
|
OUO6075,000296C -19-31MAR03-2/2 |