Sieve-Remove And Install
2. Loosen gauge adjustment screw in sieve element. NOTE: Sieve opening gauge, set screw and retainer bolts are similar to chaffer. 3. Slide sieve opening gauge (A) inside sieve element. 4. Remove retaining bolts on both sides. 5. Slide sieve element out rear of machine. 6. Inspect grain seals on sieve element. 7. Repair or replace as necessary. 8. Install sieve element in rear of machine. |
|
 CAUTION:
Shut OFF engine, set parking brake and remove key to help prevent accidental starting and personal injury.
CAUTION:
Shut OFF engine, set parking brake and remove key to help prevent accidental starting and personal injury.
OUO6075,0003806 -19-01JUL04-1/5 |
|
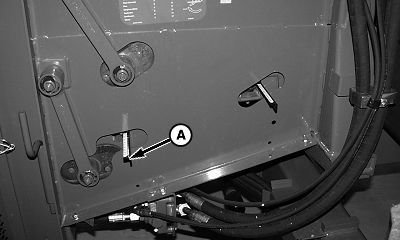
9.
Install sieve retaining bolts (A) with additional 10 mm block (B) between star washer and spring. Tighten to specification.
Specification
|
|
OUO6075,0003806 -19-01JUL04-2/5 |
|
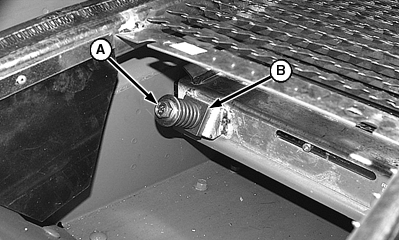
10.
Slide sieve opening gauge (A) through sidesheet.
|
|
OUO6075,0003806 -19-01JUL04-3/5 |
|
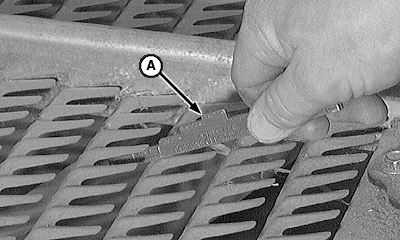
11.
Calibrate gauge to proper dimension.
a. Crank sieve to full open position. b. Close slowly until average opening measures approximately 8 mm (5-16 in.) with combine clearance gauge (A).
|
|
OUO6075,0003806 -19-01JUL04-4/5 |
|
c. Slide opening gauge (A) to read 8 mm (5-16 in.) mark at sidesheet (B). d. Tighten gauge adjustment screw in sieve element. 12. Install chaffer (see Remove and Install Chaffer in this section).
|
|

OUO6075,0003806 -19-01JUL04-5/5 |