Install Front Wheels-Dual Wheel Combine
|
|
NOTE: If installing dual wheels, both inner and outer wheels are positioned, so bottom end of tire |
cleats are facing towards the front and down. Tire MUST be installed as directed or machine will be un-drivable.
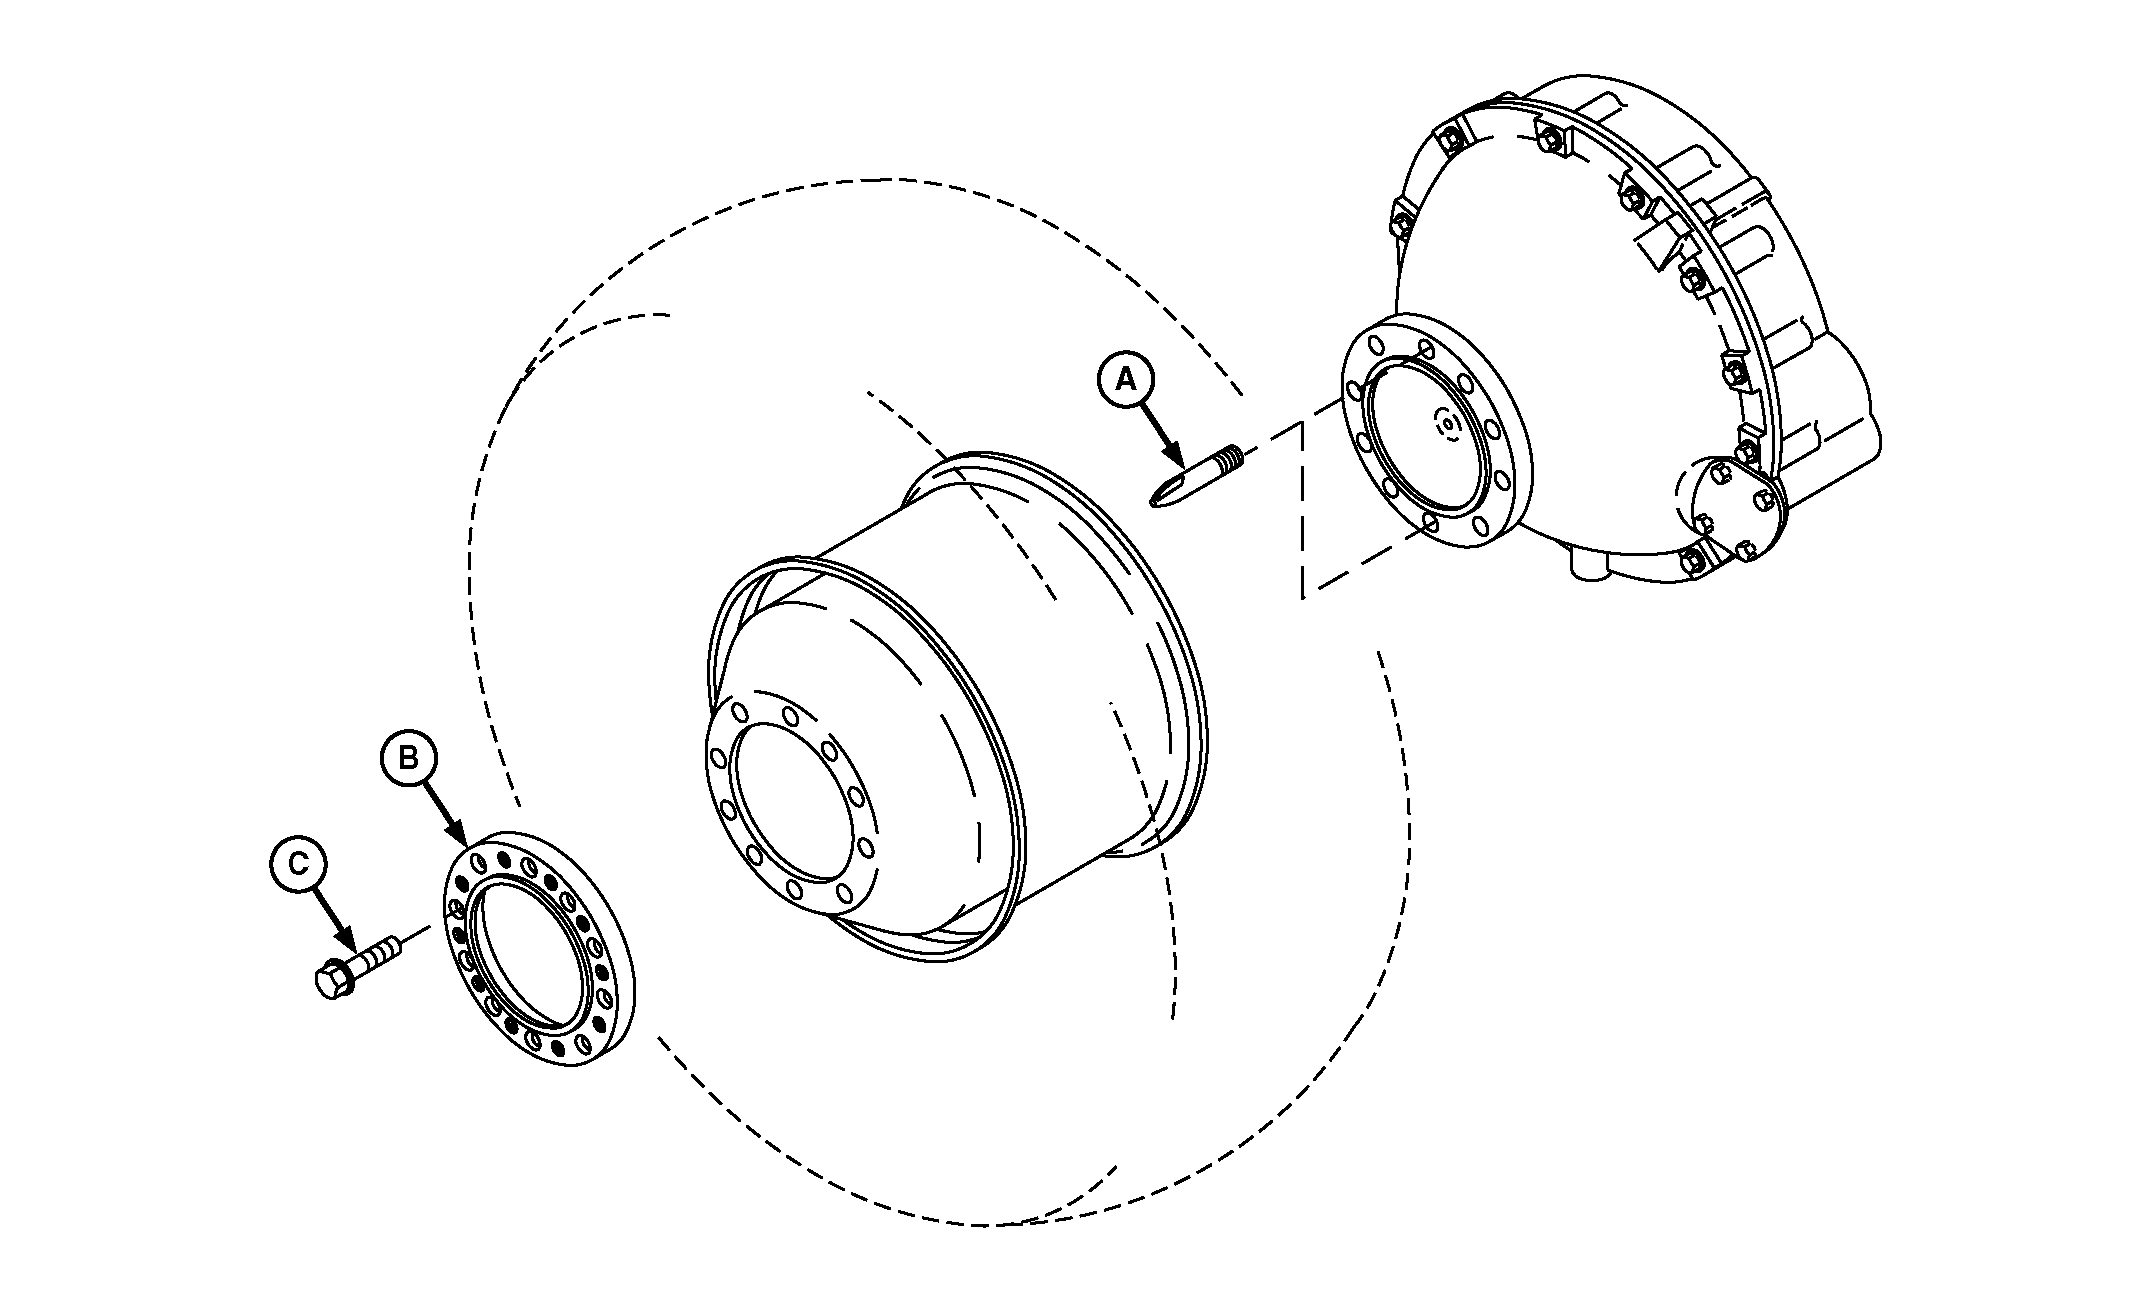
Use of pilot stud H138607 is strongly recommended to help guide wheels into mounting position. 1. Install pilot studs (A) in top and bottom holes of drive hub. Stud threads must bottom out in hole so inner end is flush with inside of hub. |
 CAUTION:
Dual wheels are heavy (approximately 340 kg (750 lb) without liquid ballast) and difficult to handle due to extreme offset of tire and rim. When handling wheels, off centered weight can suddenly shift making wheel handling awkward and the wheel difficult to control. To avoid personal injury, two service technicians are needed to control wheel handling.
CAUTION:
Dual wheels are heavy (approximately 340 kg (750 lb) without liquid ballast) and difficult to handle due to extreme offset of tire and rim. When handling wheels, off centered weight can suddenly shift making wheel handling awkward and the wheel difficult to control. To avoid personal injury, two service technicians are needed to control wheel handling.
OUO6075,000372D -19-11MAY04-1/7 |
|
IMPORTANT: Wheel bolts MUST be clean and oil-free when installing and torquing. Torque values specified in the following procedures are for clean, dry, wheel bolts. Lubricating oil reduces friction and thread bite to overload bolts. Due to countersunk design of spacer ring, inner wheel bolts can be checked and torqued when outer wheel is removed. |
Inner wheel is installed over drive hub (rim dished in) positioning tire close to machine. 2. Position inner wheel on studs with bottom end of tire cleats to front and down. 3. Attach wheel with spacer ring (B) and eight wheel bolts (C). Wheel bolt heads fit inside the larger unthreaded holes. 4. Remove pilot studs and replace with wheel bolts. |
OUO6075,000372D -19-11MAY04-2/7 |
|
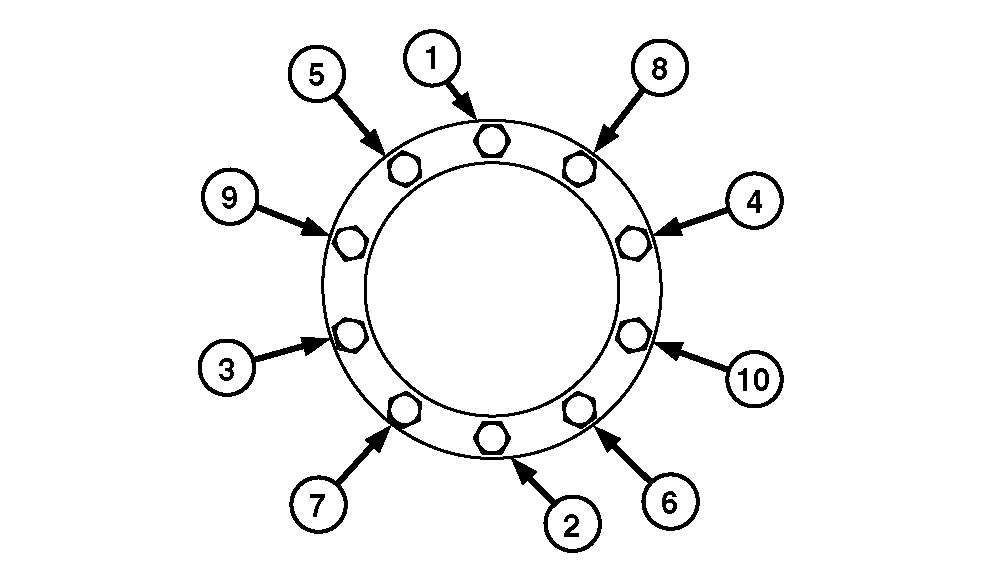
5.
Initial Wheel Bolt Torque: Torque wheel bolts to specification using criss/cross pattern (as shown) to evenly pull wheel tight against hub.
Specification
|
|
OUO6075,000372D -19-11MAY04-3/7 |
|
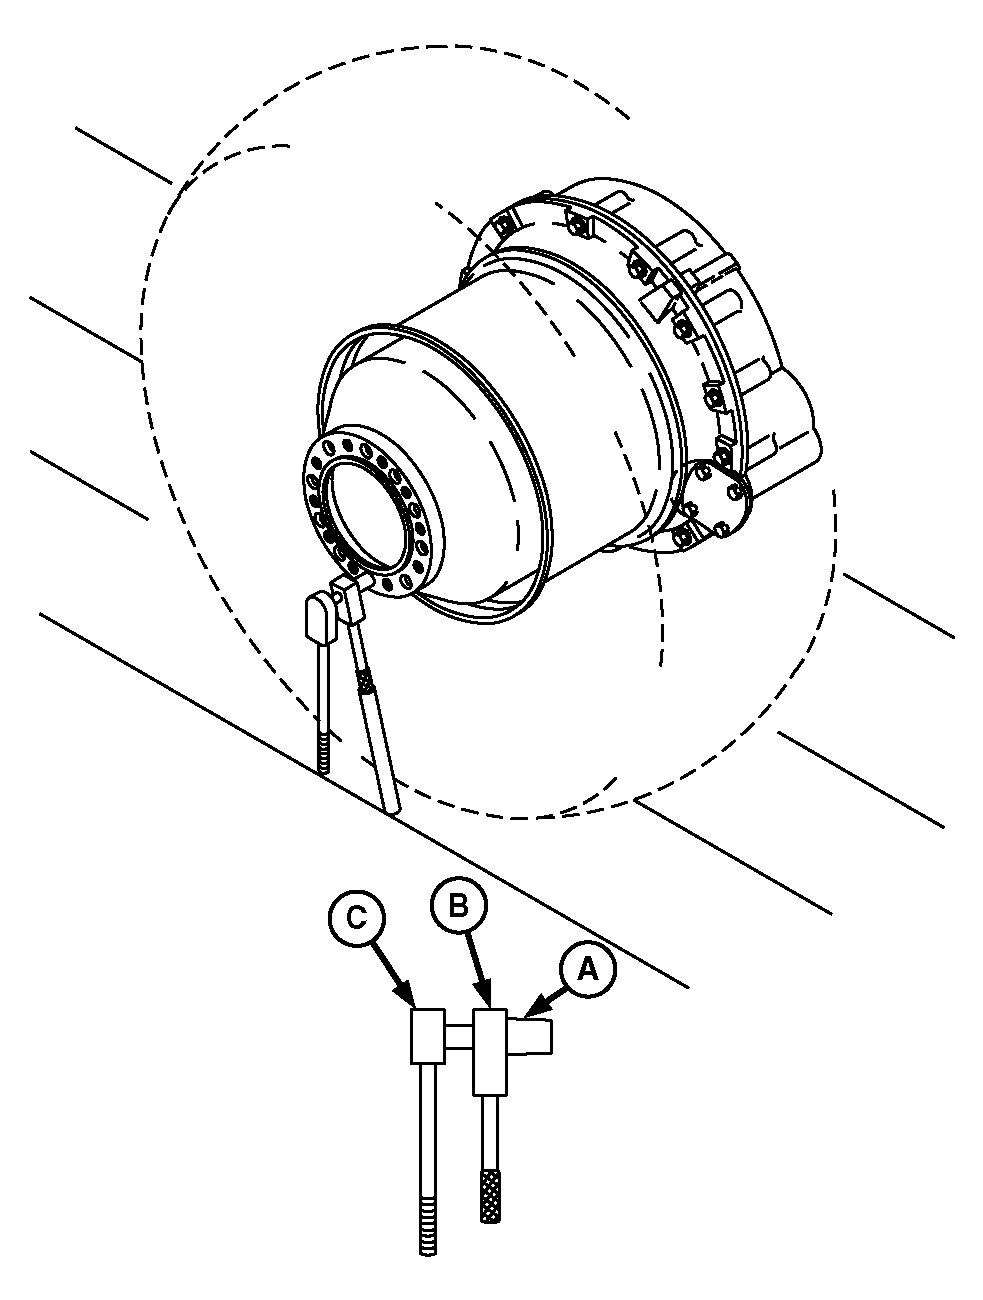
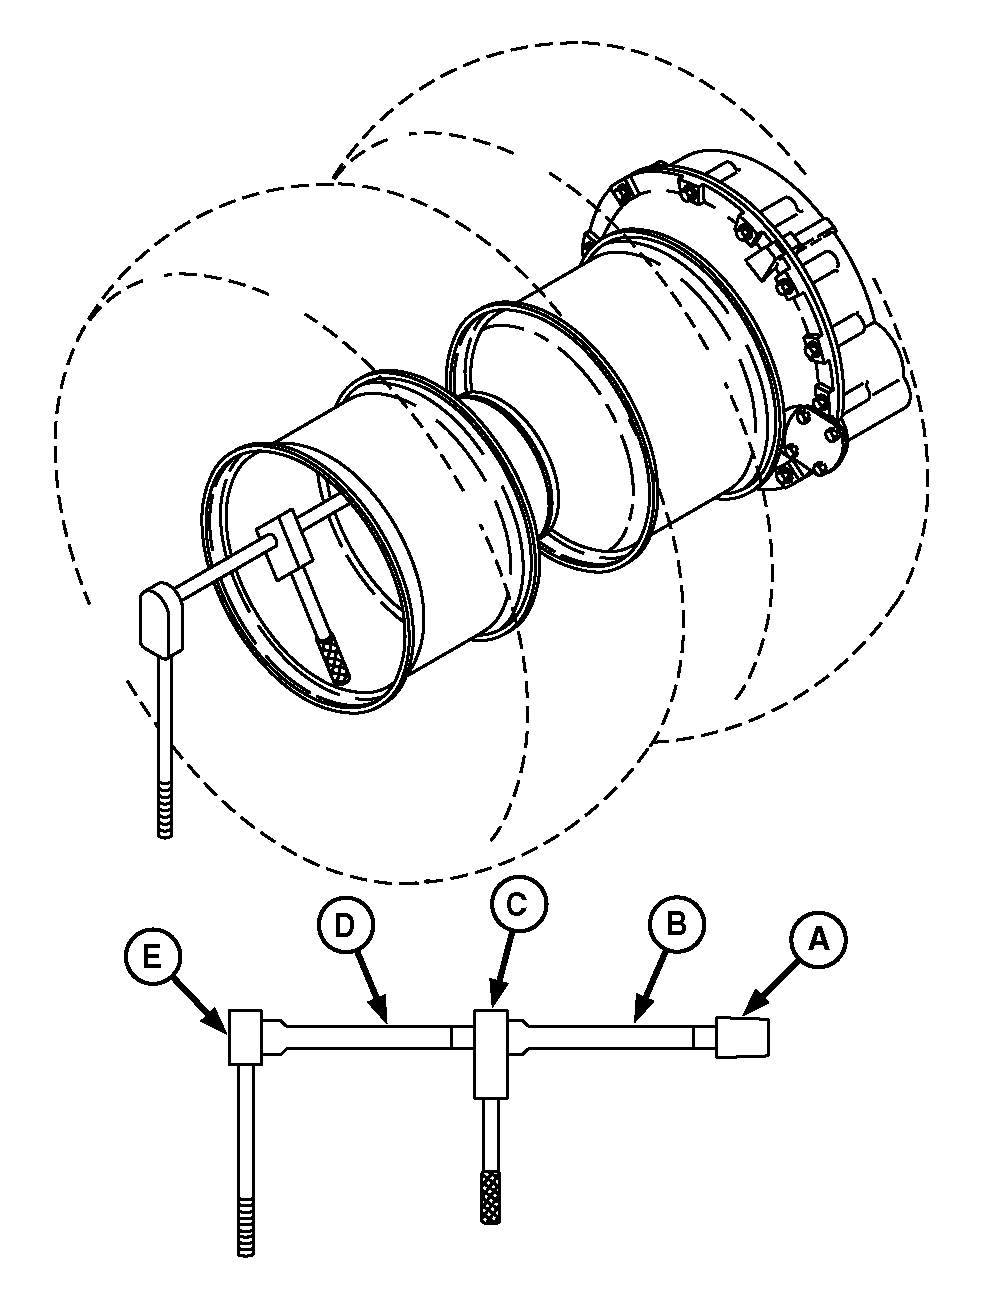
IMPORTANT: Final wheel bolt torque is extremely high and cannot be reached using common hand tools and torque wrench. A Four-to-One Torque Multiplier is required to meet final wheel bolt torque specifications. To achieve high torque results, final torquing must be done with tires on the ground and with multiplier handle against inside of rim. 6. Final Bolt Torque: Position tools (A-C) as shown, with Torque Multiplier handle against hard surface. 7. Turn all bolts an additional 1/4 turn, past initial torque. Due to 4-to-1 torque multiplier, torque wrench will make a full turn, while the bolt head makes a 1/4 turn. 8. Repeat steps on opposite of machine.
|
|
OUO6075,000372D -19-11MAY04-4/7 |
|
|
IMPORTANT: Wheel bolts MUST be clean and oil-free when installing and torquing. Torque values specified in the following procedures are for clean, dry, wheel bolts. Lubricating oil reduces friction and thread bite to overload bolts.
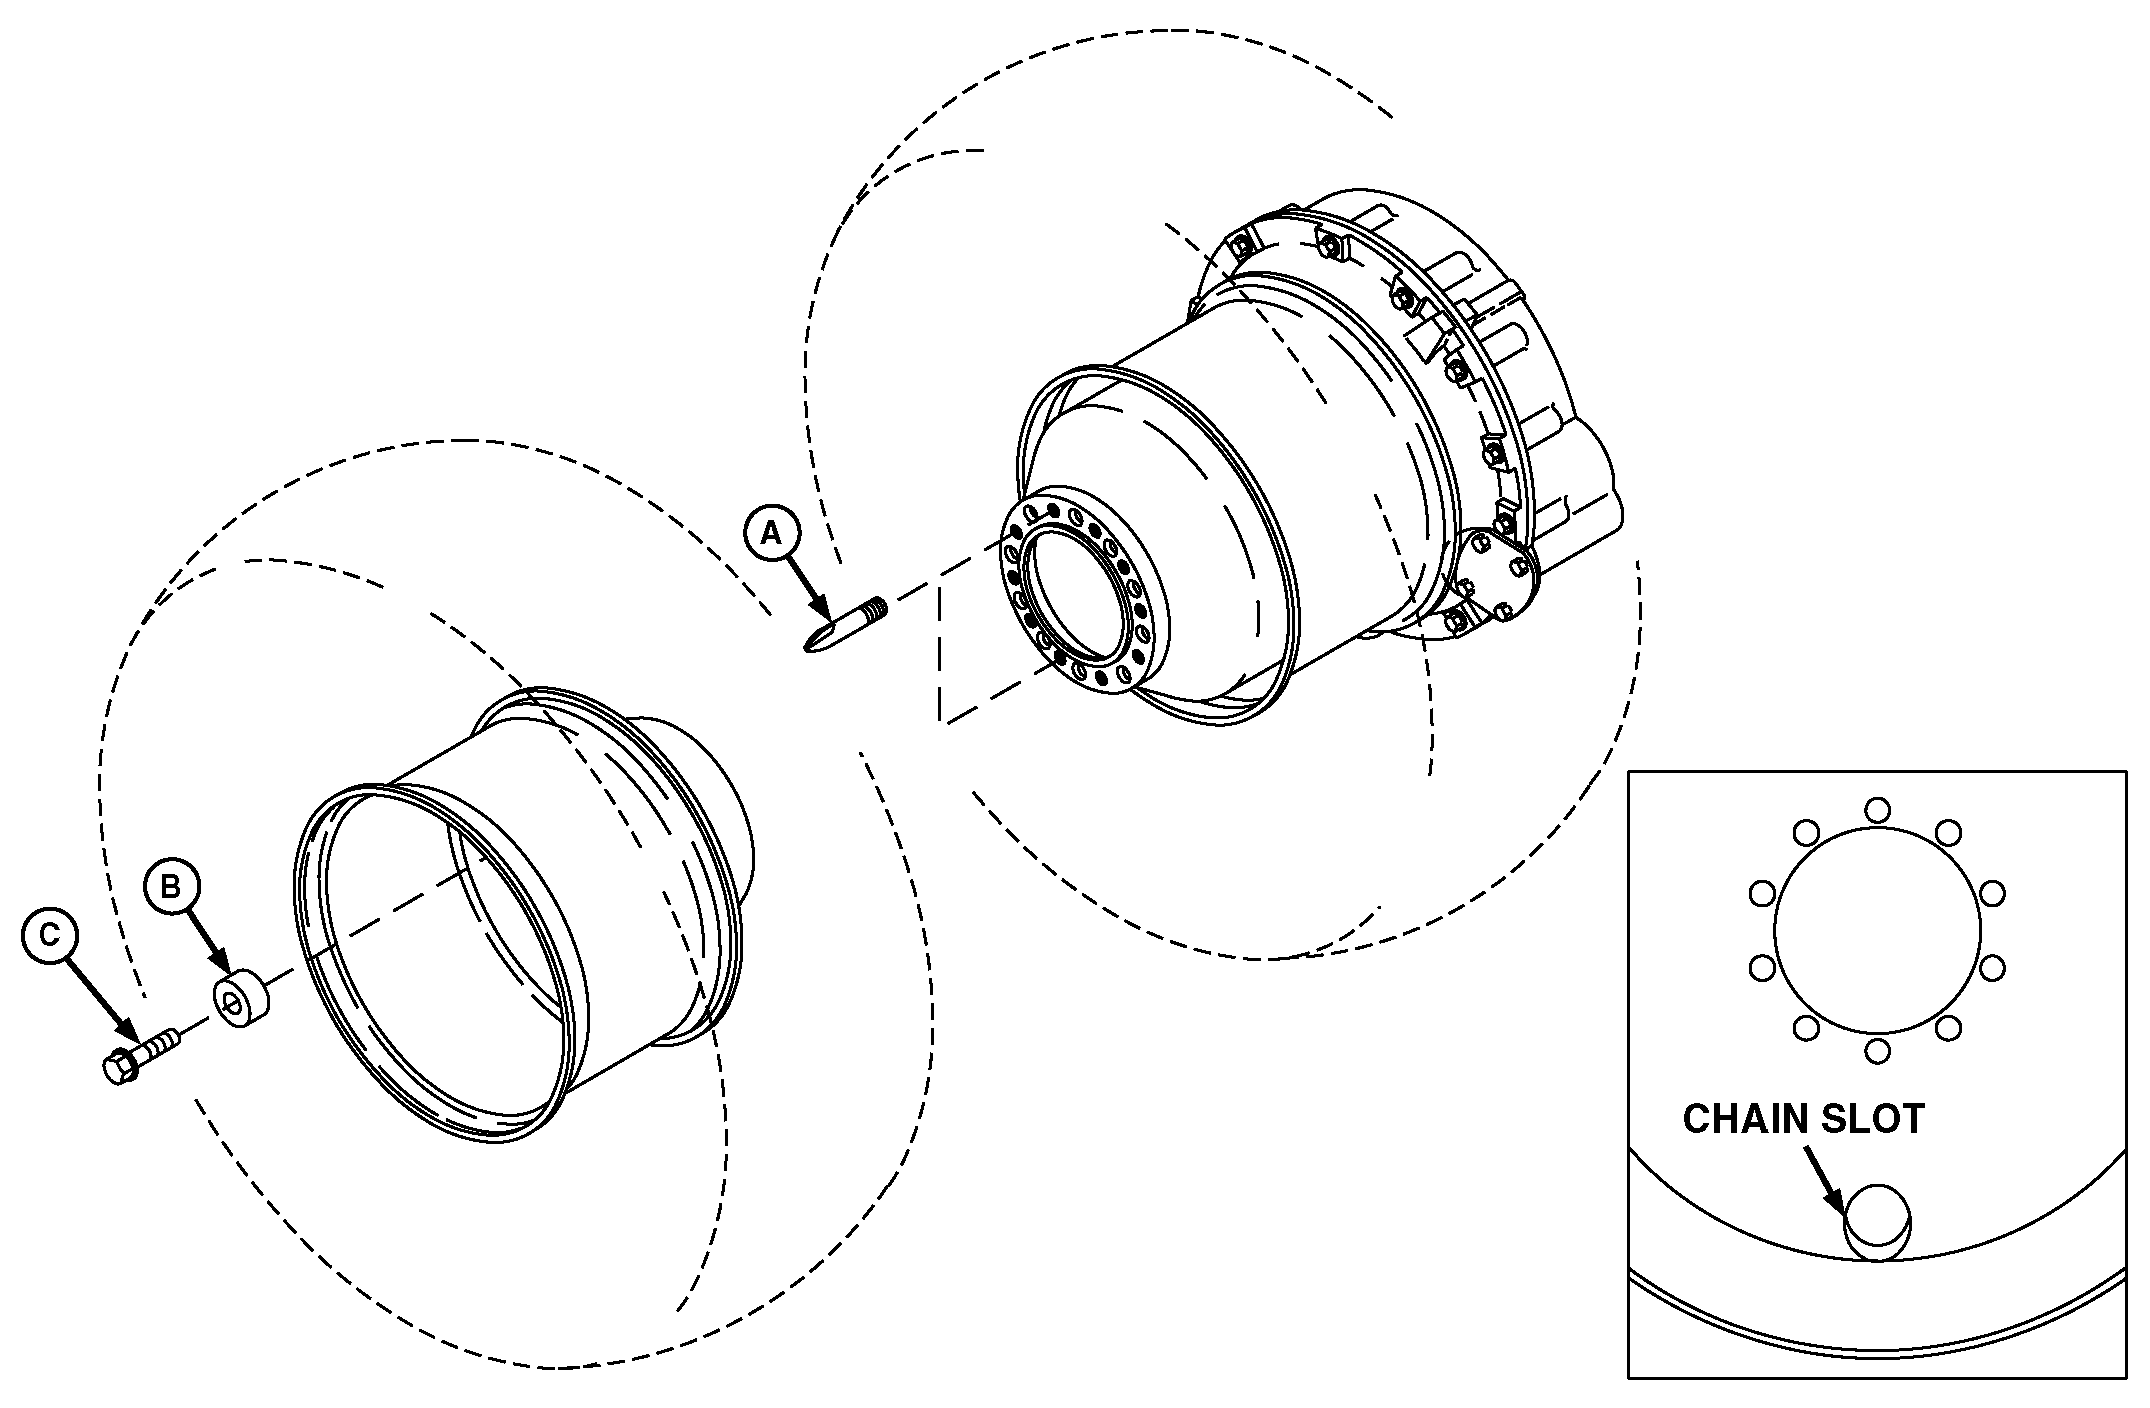
Due to countersunk design of spacer ring, inner wheel bolts can be checked and torqued when outer wheel is removed. NOTE: Outer wheels have chain slots in the rim. |
9. Outer Wheel Installation: Install pilot studs (A) in top and bottom tapped holes of spacer ring. Stud threads must bottom out in hole. 10. Position outer wheel on studs with bottom end of tire cleats to front and down. 11. Attach wheel with eight spacers (B) and wheel bolts (C). 12. Replace pilot studs with final two spacers and wheel bolts. |
OUO6075,000372D -19-11MAY04-5/7 |
|
13.
Initial Wheel Bolt Torque: Torque wheel bolts to specification using criss/cross pattern (as shown) to evenly pull wheel tight against hub.
Specification
14. Repeat steps on opposite side of machine. 15. Lower combine to ground. |
|
OUO6075,000372D -19-11MAY04-6/7 |
|
IMPORTANT: Final wheel bolt torque is extremely high and cannot be reached using common hand tools and torque wrench. A Four-to-One Torque Multiplier is required to meet final wheel bolt torque specifications. To achieve high torque results, final torquing must be done with tires on the ground and with multiplier handle against inside of rim. 16. Final Bolt Torque: Position tools (A-E) as shown, with Torque Multiplier handle against inside of rim. 17. Turn all bolts an additional 1/4 turn, past initial torque. Due to 4-to-1 torque multiplier, torque wrench will make a full turn, while the bolt head makes a 1/4 turn. 18. Check tire pressure and inflate as needed. (See Care and Service of Tires for tire inflation pressure).
|
|
OUO6075,000372D -19-11MAY04-7/7 |