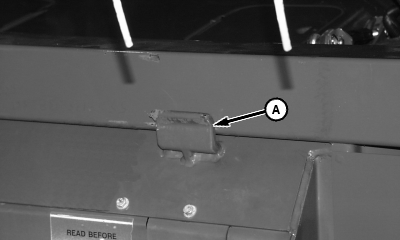
Attaching Platform to CombineIMPORTANT: Latch pins are not to be actuated with header on the ground. If multi-coupler must be actuated with header on ground, disconnect cable from handle. When attaching platform to a 9560 STS, flight and stripper extensions are required (see your John Deere Dealer). 1. Sound horn, start engine and lower feeder house. 2. Drive combine slowly forward until feeder house is centered in attachment frame opening. NOTE: If attaching platform to a machine without CONTOUR MASTER, platform will require manual leveling (see Leveling Header Without CONTOUR MASTER in this section). 3. Verify hooks (A) on both sides of feeder house catch front side of main frame beam of platform. 4. Raise platform completely, set parking brake, shut off engine, remove key and lower safety stop. |
|
JK22594,000005E -19-26JUL06-1/9 |
|
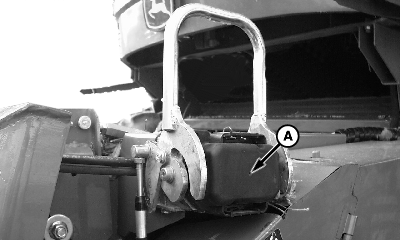
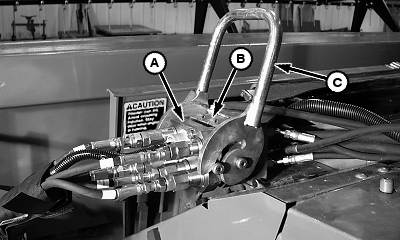
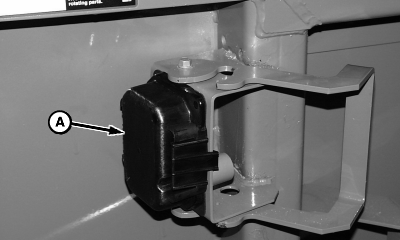
NOTE: If combine is not equipped with latching cable (C), latching pins will have to be manually latched (see, Manual Latch Feeder House Pins in Attaching Platform to Pre 60 Series Combines section). 5. Remove cover (A) and clean multi-coupler face (B).
|
|
JK22594,000005E -19-26JUL06-2/9 |
|
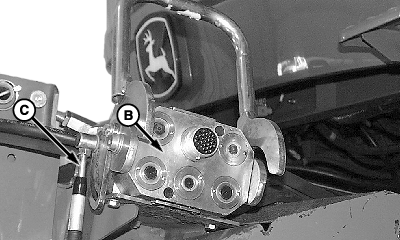
6.
Open handle (A) and remove multi-coupler (B) from storage bracket (C).
|
|
JK22594,000005E -19-26JUL06-3/9 |
|
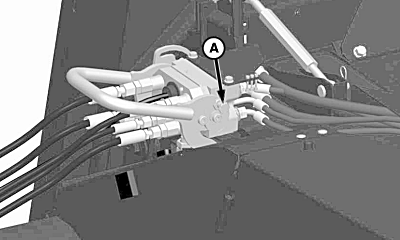
IMPORTANT: To prevent damage to the latching cable, a shear screw is attached to the handle. Attempts to actuate the latching pins with the header on the ground will shear the screw on the handle. (See Extra Shear Screw Location later in this section.) 7. Install multi-coupler (A) onto receptacle (B) and close handle (C).
|
|
JK22594,000005E -19-26JUL06-4/9 |
|
Machines Equipped with Slide Lock Multi-couplers
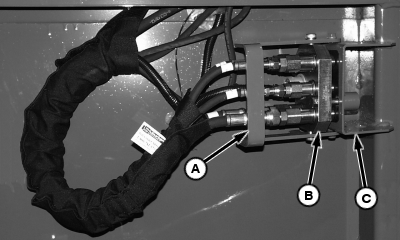
IMPORTANT: Failure to slide lock plate through multi-coupler assembly could result in the header falling off while harvesting or transporting. When multi-coupler handle is closed, slide lock plate (A) through multi-coupler latch assembly (B) and retain with quick-lock pin (C).
|
|
JK22594,000005E -19-26JUL06-5/9 |
|
Machines Equipped with Button Lock Multi-couplers
IMPORTANT: Failure to close multi-coupler fully so button lock can engage could result in the header falling off while harvesting or transporting. 1. When multi-coupler handle is fully closed, button lock (A) will automatically lock couplers together.
|
|
JK22594,000005E -19-26JUL06-6/9 |
|
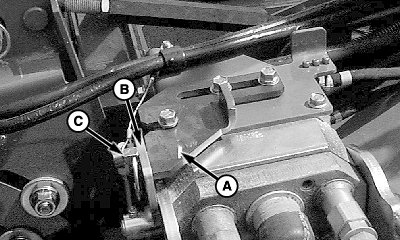
NOTE: Combines without cable latching option, go to Attaching Platform to Pre 60 Series Combines. With header attached, latch pins should move freely through latch plate holes. If latch pins do not extend through the latch plates, make sure that the latching plates on the header are properly adjusted. 2. Latch pins (A) should move freely through latch plate holes in header when multi-coupler is latched. Latch plate (B) must make contact with bracket (C). Less clearance (D) should be maintained between bottom of plate and pin rather than top of plate (E) and pin. This may require latch plate to be flipped. If adjustment is needed: Remove cap screws (F), flip plate (B) end for end and reinstall and tighten cap screws to specification. Specification
|
|
JK22594,000005E -19-26JUL06-7/9 |
|
3.
Install multi-coupler cover (A) on platform storage bracket.
|
|
JK22594,000005E -19-26JUL06-8/9 |
|
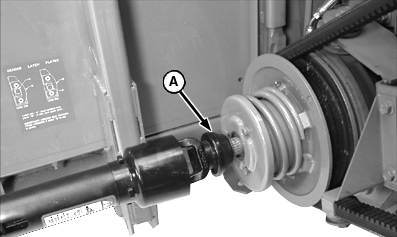
IMPORTANT: Before engaging platform, see Checking Platform Speeds in Operating section of this manual for proper front shaft (platform back shaft) speed. 4. Remove telescoping shaft (A) from storage position and install onto feeder house shaft, verify quick attach collar locks fully.
|
|
JK22594,000005E -19-26JUL06-9/9 |