Aligning KnifeTheory Of Knife AlignmentProper adjustment will help maintain good cutting performance while reducing system loads and extending the life of all knife drive components. Before aligning knife, verify proper knife hold-down clearances. Proper knife head and knife drive gear box alignment is critical in achieving effective cutting performance and knife drive durability. Improper alignment can cause knife binding at the first guard during knife strokes- causing heat build up, accelerated wear and high knife loads which all can shorten knife drive life. Knife fore/aft clearance must be performed first as it positions the knife back in the first guard, then knife section vertical clearance can be set. |
JK22594,0000086 -19-18AUG06-1/8 |
|
Two adjustments for proper knife alignment:
Avoid serious injury. Raise platform and reel completely, set safety stops. Avoid serious injury. Shut off engine and remove key. Avoid serious injury. Cutterbar and knives will move whenever the knife drive sheave is rotated. Keep hands, feet, clothing and electrical cords away from cutterbar when servicing, inspecting or rotating knife drive sheave. 1. Knife back fore/aft clearances in first guard slot (performed first).
2. Knife section vertical clearance is accomplished by repositioning knife drive gear box in mounting holes. This adjustment is not as commonly performed as the adjustment procedure above because knife drive gear box is prepositioned at factory and should not require repositioning unless removed for repair. If knife section vertical clearance needs adjusting, position knife drive in middle of mounting slots and snug cap screws.
1. Before starting the following procedures, check knife hold downs for proper adjustment (see Knife Hold-Down Clearance in this section for proper procedures). 2. Flex platforms only: Make sure all float arms are in the same position and cutterbar is flat. |
|
 CAUTION:
Avoid serious injury. Remove knife drive belt (see Remove and Replace Knife Drive Belt in this section).
CAUTION:
Avoid serious injury. Remove knife drive belt (see Remove and Replace Knife Drive Belt in this section).
JK22594,0000086 -19-18AUG06-2/8 |
| 3. Turn knob and open left-hand end shield. |
JK22594,0000086 -19-18AUG06-3/8 |
|
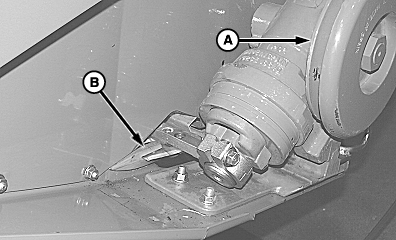
4.
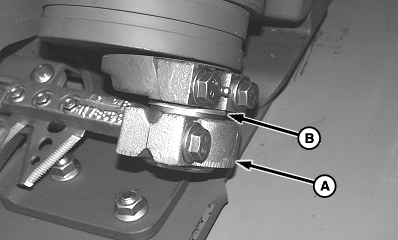
Turn knife drive sheave (A) by hand while visually inspecting knife at first guard slot (B) for excessive knife contact.
|
|
JK22594,0000086 -19-18AUG06-4/8 |
|
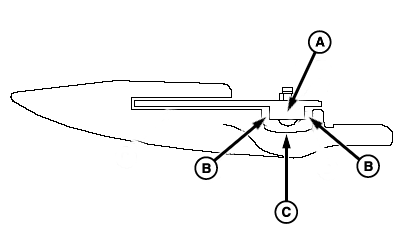
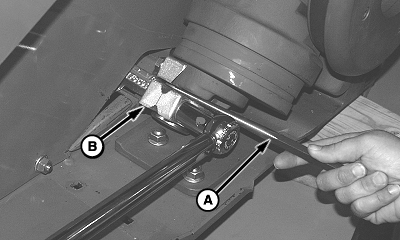
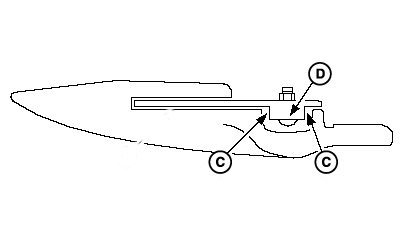
NOTE: Loosen but do not remove knife head cap screw. 5. Use pry bar (A) to move knife head (B) so that there is equal parallel gaps (C) on both sides of knife back (D). 6. Snug knife head cap screw but do not tighten.
|
|
JK22594,0000086 -19-18AUG06-5/8 |
|
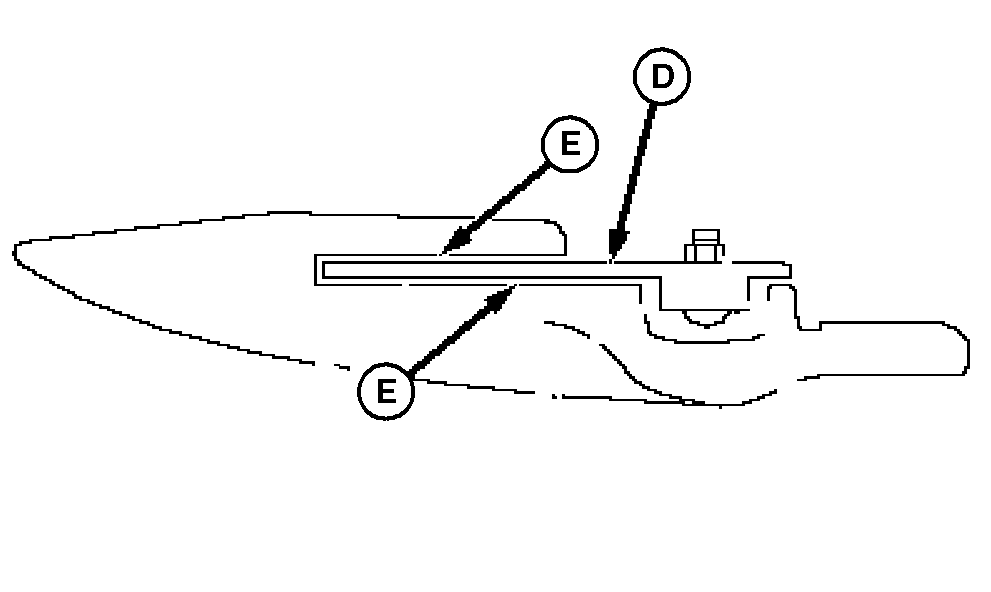
7.
Verify knife head (A) does not contact bearing shield (B), if contact exist see Adjust Knife Section Vertical Clearance in this section.
NOTE: When tightening bolt to specification use a pry bar to prevent twisting of knife head on bearing and loss of settings. 8. Tighten knife head cap screw to specification. Specification
9. Verify gaps by turning knife drive sheave and visually inspecting gaps at first guard slot, repeat adjustment steps if required. 10. Reinstall knife drive belt (see Remove and Replace Knife Drive Belt in this section). 11. Close left-hand end shield. |
|
JK22594,0000086 -19-18AUG06-6/8 |
|
Adjust Knife Section Vertical Clearance
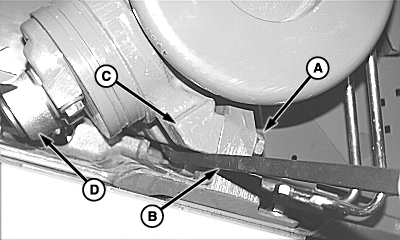
Avoid serious injury. Shut off engine and remove key. Avoid serious injury. Cutterbar and knives will move whenever the knife drive sheave is rotated. Keep hands, feet, clothing and electrical cords away from cutterbar when servicing, inspecting or rotating knife drive sheave. NOTE: If knife drive is installed and fore/aft clearance is set, skip to step five. 1. Reinstall knife drive and retain with cap screws (A) but do not tighten. 2. Using pry bar (B) preposition knife drive (C) in middle of mounting slots and snug cap screws. 3. Install knife head (D) on knife drive, (see Replacing Cutterbar Knife in this section for procedures). 4. Set Knife Fore/Aft Clearances (see Adjusting Knife Fore/Aft Clearances in this section). |
|
JK22594,0000086 -19-18AUG06-7/8 |
|
5.
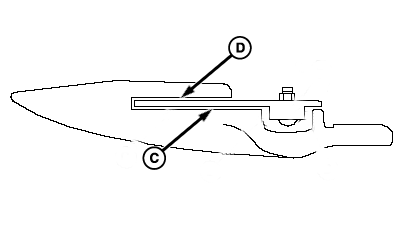
Rotate knife drive sheave (A) by hand while inspecting knife in first guard slot (B).
6. If vertical gaps do not exist in either the top (C) and bottom (D) of rock guard or if there is excessive contact in this area, continue to reposition until vertical gaps exist. NOTE: Before tightening cap screws to specification, snug cap screws and turn knife drive sheave by hand to visually verify knife vertical and fore/aft clearance (see Adjusting Knife Fore/Aft Clearance in this section). 7. Tighten knife drive cap screws to specification while holding knife drive with pry bar to avoid movement. Specification
|
|
JK22594,0000086 -19-18AUG06-8/8 |