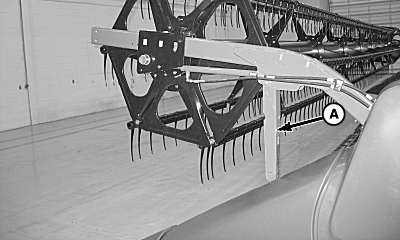
Remove and Install Side Draper Belts1. Lower platform onto blocks.2. Raise reel completely and engage safety stops (A) on reel lift cylinders. 3. Set parking brake, turn OFF engine, and remove key.
|
|
NS43404,00005FA -19-09JUN08-1/6 |
|
NOTE: Procedure demonstrates left-hand draper belt. Procedure for right-hand draper belt is similar. 4. Loosen tension nut (A) on lower rear of platform to reduce tension on side draper belts.
|
|
NS43404,00005FA -19-09JUN08-2/6 |
|
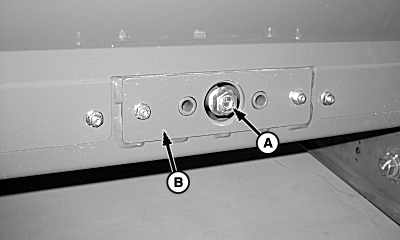
5.
Remove and retain all hardware (A) and connector bars (B).
6. Remove side draper belt. 7. Inspect belt for tears, cracks, and other signs of wear. Replace as necessary.
|
|

NS43404,00005FA -19-09JUN08-3/6 |
|
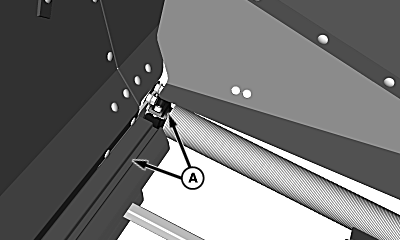
8.
Align rib with groove (A) in roller and guide located towards rear of platform.
9. Install side draper belt.
|
|
NS43404,00005FA -19-09JUN08-4/6 |
|
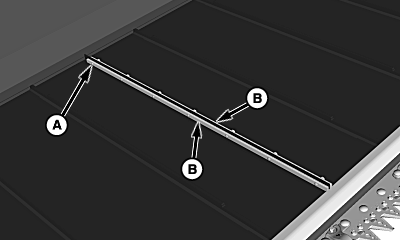
IMPORTANT: Connector bars (B) are positioned on belt with rounded edges down and cap screw heads facing direction of travel. Failure to do so can damage and reduce belt life. 10. Install connector bars (B) with retained hardware (A). Tighten cap screws to specification. Specification
|
|

NS43404,00005FA -19-09JUN08-5/6 |
|
11.
Tighten tension nut (A) so the surface of the nut is flush with the outside surface of the plate (B).
|
|
NS43404,00005FA -19-09JUN08-6/6 |