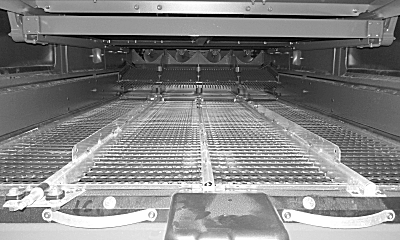
Cleaning Out Machine (Annual Cleanout and Specialty Crops)

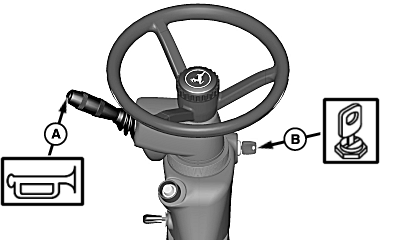
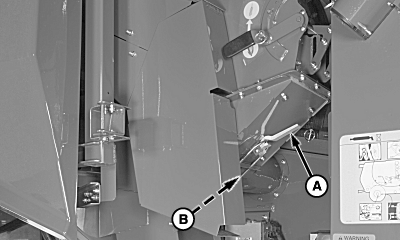
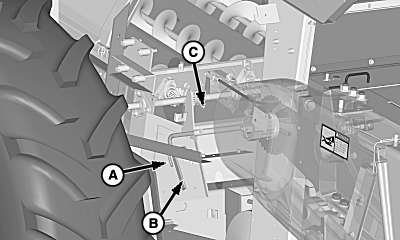
H97186-UN-02NOV10
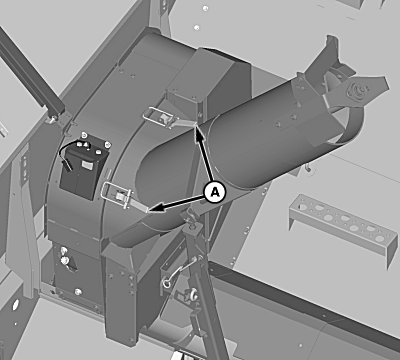
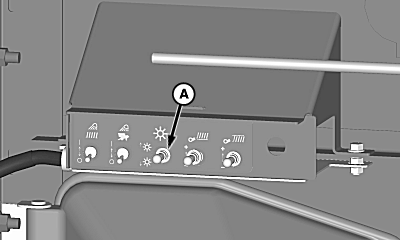
A - Horn
B - Key Switch
To prevent injury, never clean machine with engine running and separator engaged. Shut OFF engine, set park brake and remove key.The following instructions are recommended when cleaning out machine for certified seed crops or when transporting machine inter-state.
Block header safely so it does not move. Lower reel
safety stops.
Remove header from the machine.
Drive machine over end rows or bumps to jar and shake dirt loose. Shut OFF engine, set park brake and remove key.
Open or remove all doors and drain holes.
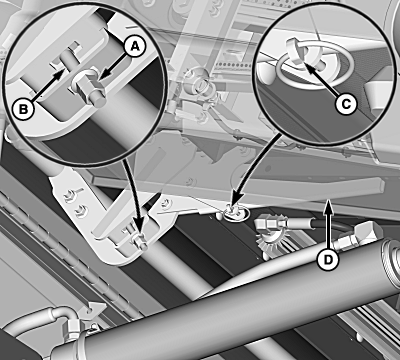
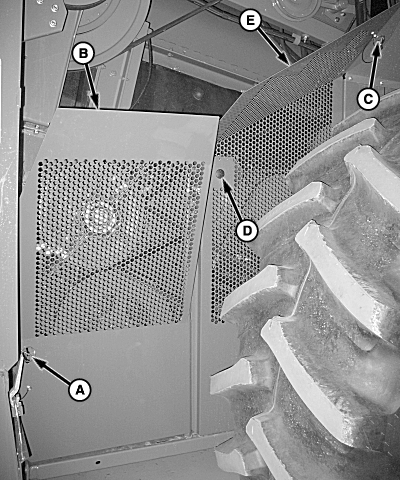
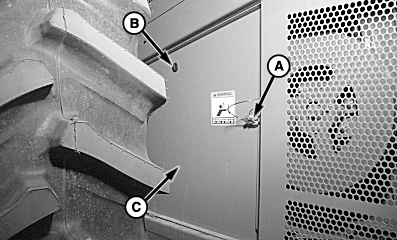
Sound horn (A) to clear everyone from area. Stay clear
of machine when discharging chaff.
Turn key switch (B) to start engine.
Engage separator until the chaff stops coming out rear of machine.
Lower engine rpm to low idle and engage separator several times. Running the separator at low idle removes dirt from inside the rotor.
Move throttle to high rpm and run for a few minutes. Repeat cycle until chaff no longer comes out of the rear of machine.
Keep bystanders clear of machine when discharging chaff.
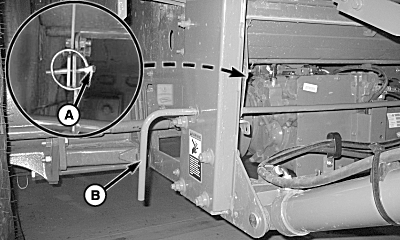
Drive machine onto blocking so right-hand side is about 150 mm (6 in) higher, or park on incline so dirt can run out.
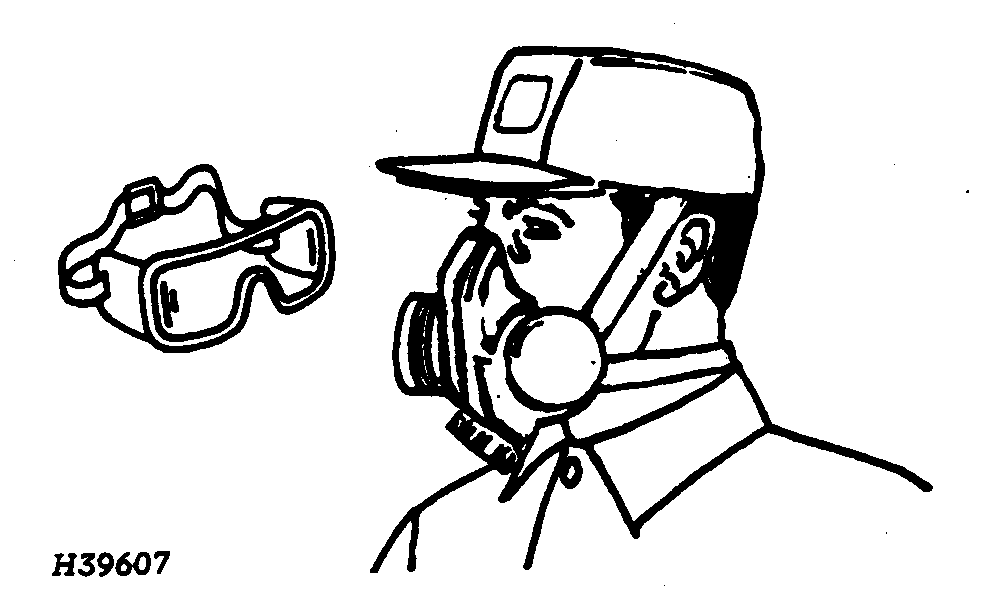
H39607-UN-11OCT88
When working with compressed air in dusty conditions, you must wear goggles and dust mask for personal protection.
Start at the top of the machine and work down.
H62230-UN-19JAN00
Style A
H98866-UN-27OCT10
Style B
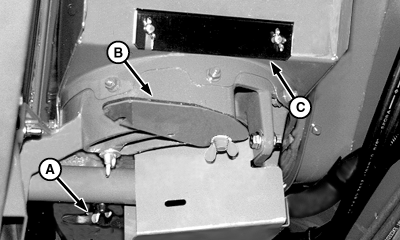
A - Cleanout Door
B - Cleanout Door
C - Cleanout Door
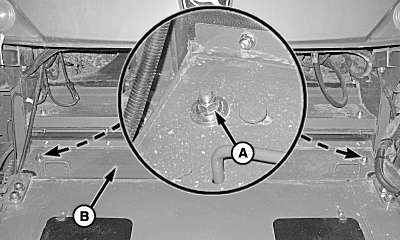
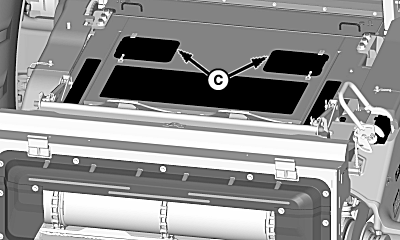
Open cleanout doors (A), (B) and (C).Clean grain from under the grain tank cross augers over to the sump.
Clean grain from edges of unloading auger sump to the bottom. Grain must be cleaned out from doors while standing on ground.
Grain Tank Loading Auger (Grain Tank Extensions)
H102235-UN-15JUN11
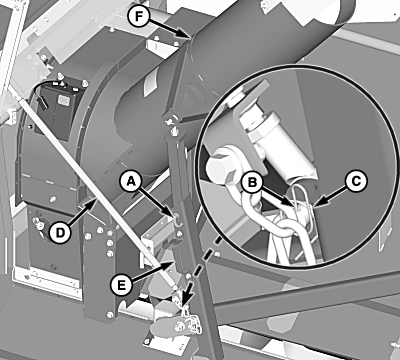
A - Clamps
Release clamps (A) and lower auger.Clean top area and down into the clean grain elevator to clean elevator chain. Clean all sides.
Grain Tank Loading Auger (Grain Tank Covers)
H102236-UN-15JUN11
A - Pin
B - Quick-Lock Pin
C - Pin
D - Turnbuckle
E - Handle
F - Auger
DO NOT pull or remove pin (A) to lower grain tank loading auger. Removing pin could result in personal injury or machine damage.Grain tank loading auger is heavy. Use extra care when raising or lowering auger.
Remove quick-lock pin (B) and pin (C) from turnbuckle (D).
Use handle (E) to assist in lowering the grain tank loading auger (F).
Clean top area and down into the clean grain elevator to clean elevator chain. Clean all sides.
H76204-UN-28APR03
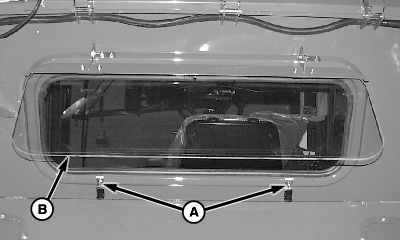
A - Clamps
B - Grain Tank Window
Loosen clamps (A) and swing grain tank window (B) up.Clean out area behind cab, around the primary countershaft and over separator.
H113138-UN-06MAR15
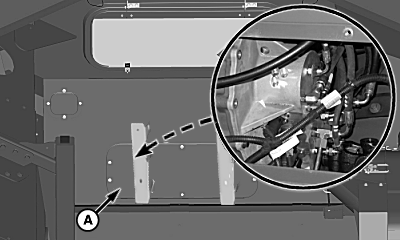
A - Access Door
Remove access door (A) (if equipped) on the front side of the grain tank.Clean out material around the multi-speed feeder house drive gear case.
H118329-UN-04MAY16
A - Lockout Pin
B - Handrail
C - Engine Access Covers
Pull lockout pin (A) and rotate handrail (B) up until handrail locks into place.Open engine access covers (C) and clean top side of engine compartment area and around separator on the front side of engine.
Clean entire engine compartment area, especially under engine.
Wipe up any oil or grease found on engine area.
H95353-UN-25AUG10
A - Lockout Pin
B - Ladder
C - Cover
Pull lockout pin (A) and rotate ladder (B) up until ladder locks into place.Pull filter access cover (C) open to release from magnet.
Clean rear side of engine compartment area.
Clean entire engine compartment area, especially under engine.
Wipe up any oil or grease found on engine area.
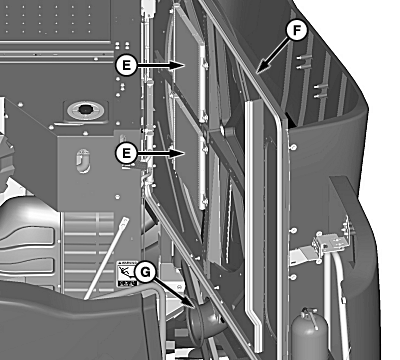
Tier 2/Stage II and Tier 3/Stage IIIA (Style A)
H106852-UN-08FEB13
A - Radiator
B - Vacuum Duct
C - Transfer Duct
Clean areas out with compressed air, blowing from inside out.Open rotary screen door.
Clean the following areas from inside out:
- Radiator (A)
- Condenser
- Oil Cooler
- Charge Air Cooler
Clean out dirt from the lower vacuum duct (B) and transfer duct (C).
Tier 2/Stage II (Style B) and Final Tier 4/Stage IV
H106853-UN-08FEB13
H106854-UN-08FEB13
A - Lockout Pin
B - Fuel Cooler
C - Radiator
D - Vacuum Duct
E - Condensers
F - Rotary Screen Door
G - Transfer Duct
Clean areas out with compressed air, blowing from inside out.Open rotary screen door.
Pull lockout pin (A) and rotate fuel cooler (B) to clean.
Clean the following areas from inside out:
- Radiator (C)
- Oil Cooler
- Charge Air Cooler
Clean out dirt from the lower vacuum duct (D).
Clean condensers (E) on rotary screen door (F).
Clean out dirt from the transfer duct (G).
Clean Grain Elevator and Tailings Elevator (Style A)
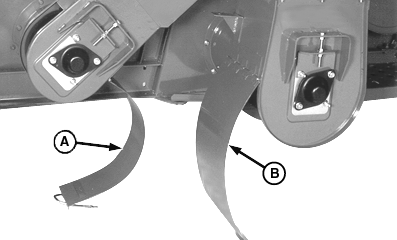
H62232-UN-19JAN00
H62233-UN-19JAN00
A - Tailings Elevator Door
B - Clean Grain Elevator Door
C - Wing Nuts
Open lower tailings elevator door (A) and clean grain elevator door (B).Remove wing nuts (C) and remove door at upper end of tailings elevator.
Remove material as needed and clean sides of elevator.
Clean Grain Elevator and Tailings Elevator (Style B)
H97193-UN-30JUN10
A - Handles
B - Clean Grain Elevator Door
C - Tailings System Elevator Door
Use handles (A) to open clean grain elevator door (B) and tailings system elevator door (C).Remove material as needed and clean sides of elevator.
H97194-UN-30JUN10
A - Handle
B - Tailings System Auger Door
Use handle (A) to open the tailings system auger door (B).Remove material as needed and clean sides of elevator.
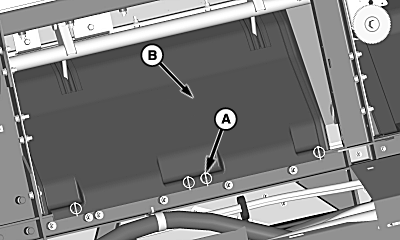
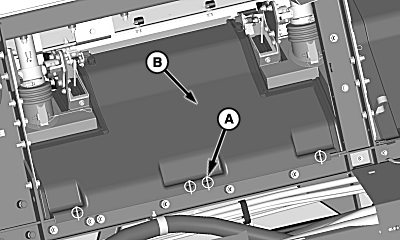
H100541-UN-02MAR11
H100486-UN-28FEB11
H90905-UN-27FEB08
A - Nuts
B - Feeder House Door
C - Feeder House Door
Loosen nuts (A) on each side of the feeder house door and push nuts towards center of the feeder house.Pull door forward to remove.
Clean feeder house through top doors (B) and (C).
Lift conveyor chain and let chain snap back several times while cleaning.
Feed Plate (Style A)
H52761-UN-17MAY99
A - Lever
Remove quick-lock pin and move lever (A) down and rearward to open feed plate.Clean out feed plate area.
Push lever forward and up to close feed plate. Retain with the previously removed quick-lock pin.
Feed Plate (Style B)
H120113-UN-29NOV16
A - Nuts
B - Round Head Bolt
C - Quick-Lock Pin
D - Lever
Remove nuts (A) and round head bolt (B) on both sides of the machine.Remove quick-lock pin (C) and move lever (D) down and rearward to open feed plate.
Clean out feed plate area.
Push lever forward and up to close feed plate. Retain with previously removed quick-lock pin.
Install previously removed round head bolt (B) and nuts (A) on both sides of the machine.
H99239-UN-01DEC10
A - Quick-Lock Pin
B - Lever
Remove quick-lock pin (A) and move lever (B) up to open stone trap.Clean out stone trap area.
Move lever down to close stone trap. Retain with the quick-lock pin.
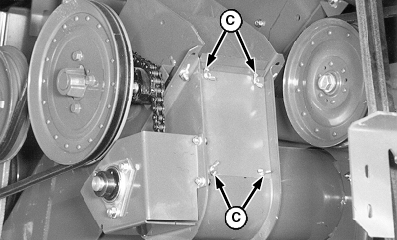
H102538-UN-29JUN11
A - Cleanout Doors
If Equipped: Remove cap screws from cleanout doors (A) to clean area.Install cleanout doors and cap screws when cleaning is complete.
H91139-UN-15APR08
A - Lockout Pin
B - Handle
C - Cleanout Door
If Equipped: Pull lockout pin (A) and move handle (B) up to dump cleanout door (C) and move handle down to close and lock cleanout door.
H111240-UN-13MAY14
Inspection Cover (Standard Concave Adjust)
H111241-UN-13MAY14
Inspection Cover (Active Concave Isolation)

H52708-UN-23MAR99
A - Quick-Lock Pins
B - Inspection Cover
Remove quick-lock pins (A) and inspection cover (B). Use scraper to loosen material, and clean out through sides of machine.
H99165-UN-22NOV10
Push-Button Shift Machine Shown
Clean off top of axle and transmission.
H115550-UN-20AUG15

H115551-UN-20AUG15
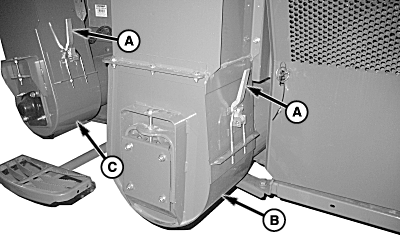
H96806-UN-09JUN10
A - Quick-Lock Pin
B - Shield
C - Quick-Lock Pin
D - Latch
E - Shield
Remove quick-lock pin (A) and open shield (B).Remove quick-lock pin (C) and turn latch (D) to unlock.
Lift and remove rear shield (B) and middle fan shield (E).
Clean out fan area.
H96803-UN-09JUN10
A - Quick-Lock Pin
B - Latch
C - Shield
Remove quick-lock pin (A) and turn the latch (B) to remove shield (C).Clean out area.
H100557-UN-02MAR11
H97565-UN-14SEP10
A - Switch
Raise chopper (if equipped) with switch (A).
H98137-UN-20SEP10
A - Wing Nut
B - Handle
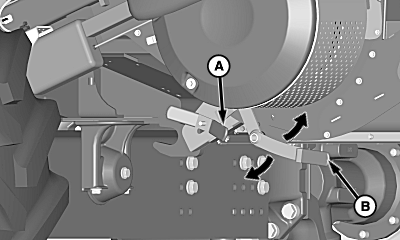
Loosen wing nut (A) and use handle (B) to disengage the knifebank and clean chopper.
H98906-UN-27OCT10
|
OUO6075,0004353-19-20170328 |