Chaffer/Sieve Elements (Without Self-Leveling Shoe)-Remove and Install
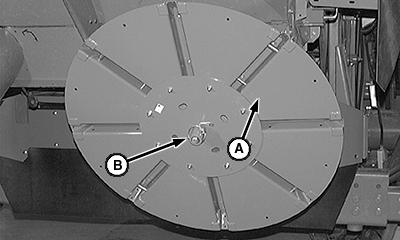
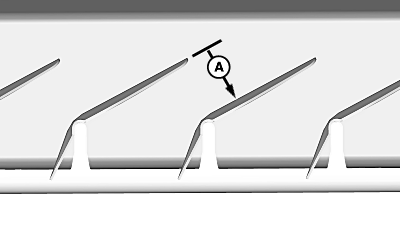
NOTE: It is not necessary to remove straw chopper (if equipped) to remove chaffer/sieve elements. Chopper must be in fully raised position. Sieve removal is similar to chaffer removal. 1. Raise spreader (if equipped) and remove pins (B). 2. Remove spreader disks (A). |
|
 CAUTION:
Shut OFF engine, set parking brake and remove key to help prevent accidental starting and personal injury.
CAUTION:
Shut OFF engine, set parking brake and remove key to help prevent accidental starting and personal injury.
OUO6075,00001F2 -19-01JUN09-1/13 |
|
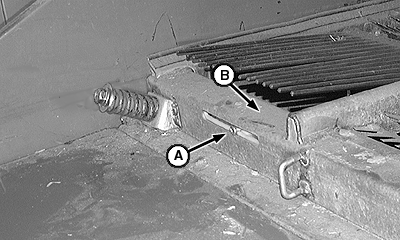
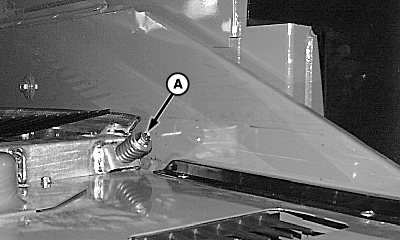
3.
Without Optional Automatic Combine Adjust:
Loosen gauge adjustment screw (A) in chaffer/sieve element (B).
|
|
OUO6075,00001F2 -19-01JUN09-2/13 |
|
4.
Without Optional Automatic Combine Adjust:
Slide chaffer/sieve opening gauge (A) inside chaffer/sieve element.
|
|
OUO6075,00001F2 -19-01JUN09-3/13 |
|
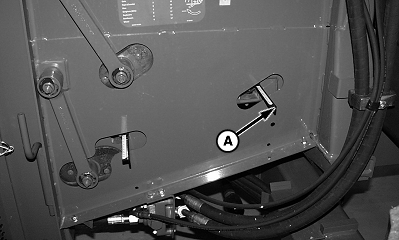
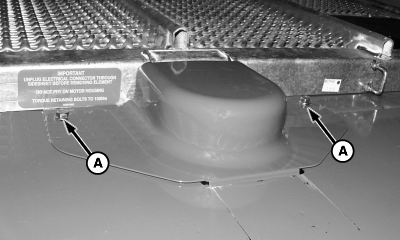
5.
With Optional Automatic Combine Adjust:
Disconnect electrical harness (A).
|
|
OUO6075,00001F2 -19-01JUN09-4/13 |
|
NOTE: Chaffer motor does not have to be removed. 6. With Optional Automatic Combine Adjust: Remove cap screws (A) and cover to access chaffer motor.
|
|
OUO6075,00001F2 -19-01JUN09-5/13 |
|
7.
With Optional Automatic Combine Adjust:
Remove cap screws (A) and shield.
|
|
OUO6075,00001F2 -19-01JUN09-6/13 |
|
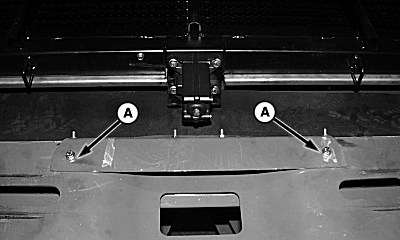
8.
Remove chaffer/sieve retaining bolts (A) and springs from both sides.
|
|
OUO6075,00001F2 -19-01JUN09-7/13 |
|
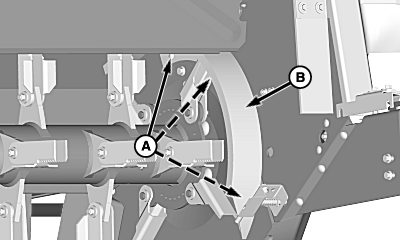
9.
Remove round head bolts (A) and chopper shroud (B) from both sides of chopper.
10. Slide chaffer/sieve element through rear of machine. 11. Inspect grain seals on chaffer/sieve element and repair or replace as needed. 12. Install chaffer/sieve element through rear of machine and tighten retaining bolts on both sides to specification. Specification
13. Install chopper shroud (B) and round head bolts (A) on both sides of chopper. |
|
OUO6075,00001F2 -19-01JUN09-8/13 |
|
14.
With Optional Automatic Combine Adjust:
Install shield and retain with cap screws (A).
|
|
OUO6075,00001F2 -19-01JUN09-9/13 |
|
15.
With Optional Automatic Combine Adjust:
Install chaffer motor cover and retain with cap screws (A).
|
|
OUO6075,00001F2 -19-01JUN09-10/13 |
|
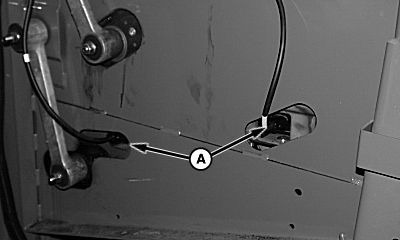
16.
With Optional Automatic Combine Adjust:
Connect electrical harness (A) and calibrate chaffer/sieve (see Calibration Procedures section.
|
|
OUO6075,00001F2 -19-01JUN09-11/13 |
|
17.
Without Optional Automatic Combine Adjust:
Slide chaffer/sieve opening gauge (A) through sidesheet.
|
|
OUO6075,00001F2 -19-01JUN09-12/13 |
|
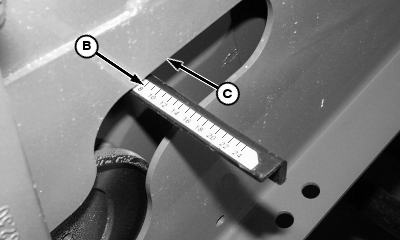
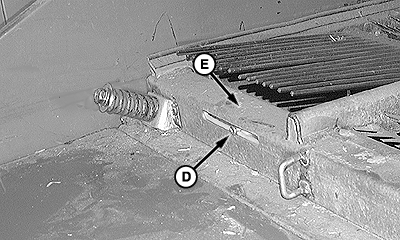
18.
Without Optional Automatic Combine Adjust:
Calibrate opening gauge to proper dimension.
a. Crank chaffer/sieve to full open position. b. Close slowly until average opening measurement (A) is approximately 8 mm (5/16 in.). c. Slide chaffer/sieve opening gauge (B) to read 8 mm at sidesheet (C). d. Tighten gauge adjustment screw (D) in chaffer/sieve element (E). 19. Install spreader disks and lower straw spreader or chopper.
|
|
OUO6075,00001F2 -19-01JUN09-13/13 |