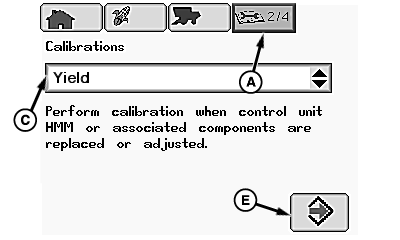
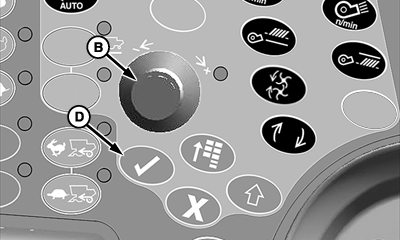
Yield CalibrationIMPORTANT: Mass flow sensor must be calibrated every year to achieve accurate grain weight measurements. Standard calibration must be performed in every crop that is harvested. Low Flow calibration must be performed to obtain improved levels of accuracy in situations where large variations in grain flow rates occur. From diagnostics and calibration icon (A), rotate selection dial (B) until calibrations menu (C) is highlighted. Press confirm switch (D) and rotate selection dial until Yield is highlighted. Press confirm switch and rotate selection dial until enter icon (E) is highlighted. Press confirm switch to advance to next page. |
|
OUO6075,00002B9 -19-06MAR09-1/7 |
|
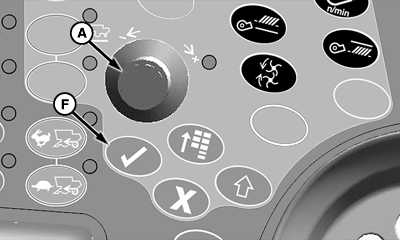
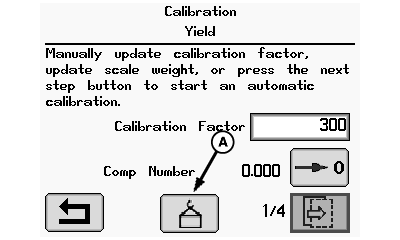
NOTE: Operator must perform the standard calibration before the low flow calibration. For the initial calibration, weight icon and comp number rest box are not enabled. Rotate selection dial (A) until one of the following icons is highlighted:
Press confirm switch (F) once desired selection is highlighted. |
|
OUO6075,00002B9 -19-06MAR09-2/7 |
|
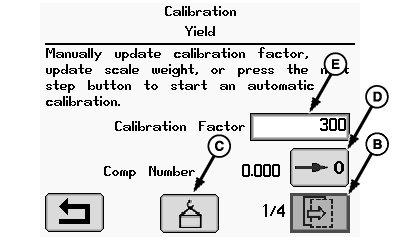
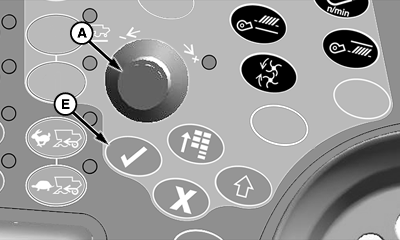
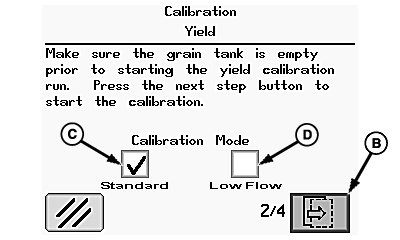
Rotate selection dial (A) until one of the following icons is highlighted: NOTE: For the initial calibration, standard box and low flow box are not enabled.
Press confirm switch (E) once desired selection is highlighted.
|
|
OUO6075,00002B9 -19-06MAR09-3/7 |
|
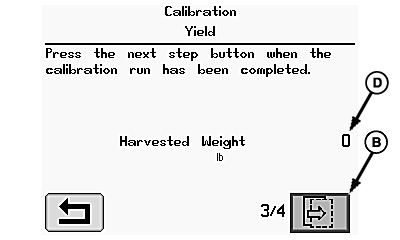
Standard Calibration Mode
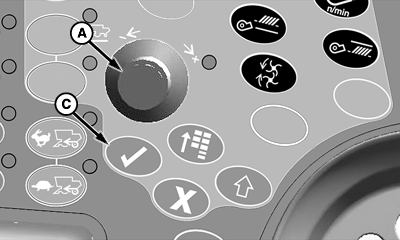
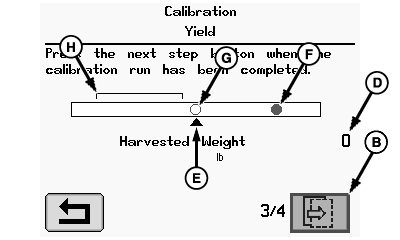
NOTE: Harvested weight (D) is the approximate weight of grain that was calibrated during the calibration process. Rotate selection dial (A) until next page icon (B) is highlighted and press confirm switch (C).
|
|
OUO6075,00002B9 -19-06MAR09-4/7 |
|
Low Flow Calibration Mode
NOTE: Harvested weight (D) is the approximate weight of grain that was calibrated during the calibration process.
Rotate selection dial (A) until next page icon (B) is highlighted and press confirm switch (C).
|
|
OUO6075,00002B9 -19-06MAR09-5/7 |
|
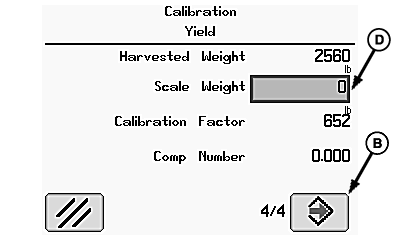
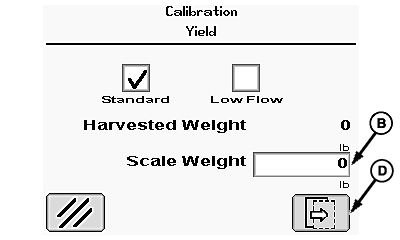
Scale Weight Not Known: Rotate selection dial (A) until enter icon (B) is highlighted and press confirm switch (C). NOTE: Scale weight can be entered after a calibration is complete (during calibration this indicates approximate weight of grain that has been harvested).
Scale Weight Known:
|
|
OUO6075,00002B9 -19-06MAR09-6/7 |
|
Scale Weight Returns From Elevator
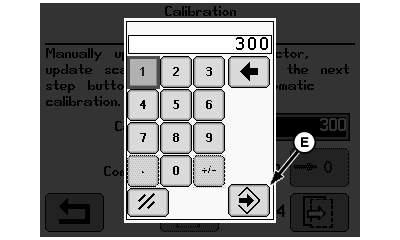
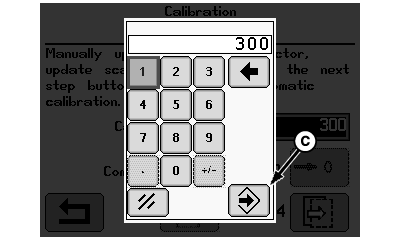
Rotate selection dial until weight icon (A) is highlighted and press confirm switch. Rotate selection dial until scale weight box (B) is highlighted and press confirm switch. Using numeric display, rotate selection dial until desired digits are highlighted and press confirm switch. NOTE: Repeat procedure until scale weight value is shown. Rotate selection dial until enter icon (C) is highlighted and press confirm switch to return to calibration menu. Rotate selection dial until next page icon (D) is highlighted and press confirm switch to follow instructions shown on remaining screens.
|
|
OUO6075,00002B9 -19-06MAR09-7/7 |
