Chaffer/Sieve Elements—Remove and Install
 CAUTION:
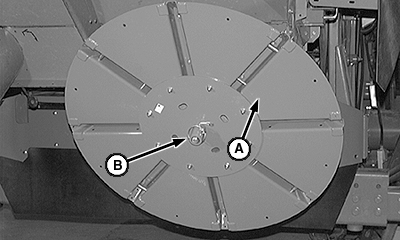
H54063-UN-19FEB99A - Disk
B - Quick-Lock Pin
Shut OFF engine, set parking brake and remove key to help prevent accidental starting and personal injury.NOTE: Chopper or spreader must be fully raised to remove chaffer/sieve elements.
Sieve removal is similar to chaffer removal.
Raise spreader (if equipped) and remove pins (B).
Remove spreader disks (A).
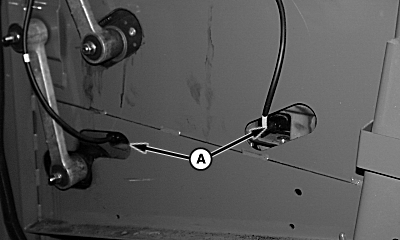
H69954-UN-12SEP01A - Chaffer/Sieve Harness
Disconnect electrical harness (A).NOTE:
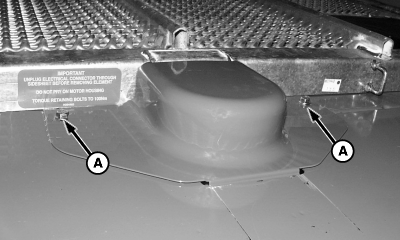
H75897-UN-09APR03A - Cap Screws
Chaffer motor does not have to be removed.Remove cap screws (A) and cover to access chaffer motor.
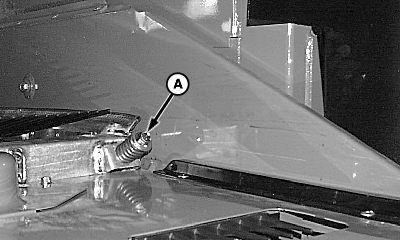
H76684-UN-01MAY03A - Retaining Bolts
Remove chaffer/sieve retaining bolts (A) and springs from both sides.Slide chaffer/sieve element through rear of machine.
Inspect grain seals on chaffer/sieve element and repair or replace as needed.
Install chaffer/sieve element through rear of machine and tighten retaining bolts on both sides to specification.
Item Measurement Specification Chaffer/Sieve Retaining Bolts Torque 100 N·m (74 lb-ft)
H75897-UN-09APR03A - Cap Screws
Install chaffer motor cover and retain with cap screws (A).
H69954-UN-12SEP01A - Chaffer/Sieve Harness
Connect electrical harness (A) and calibrate chaffer/sieve (see Calibration Procedures section.Install spreader disks and lower straw spreader or chopper.
OUO6075,00007E0-19-20101206 |