Active Header Float
NOTE:
H96245-UN-03MAY10
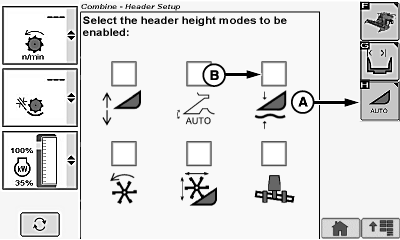
Header Setup Icons
H95941-UN-23JUN11
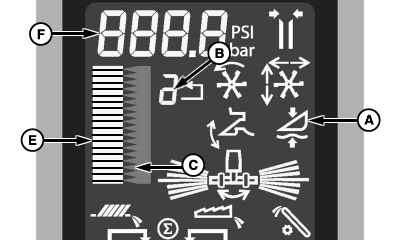
Draper/Platform/Belt Pickup Display
A - Automatic Header Height Modes Icon
B - Active Header Float Icon
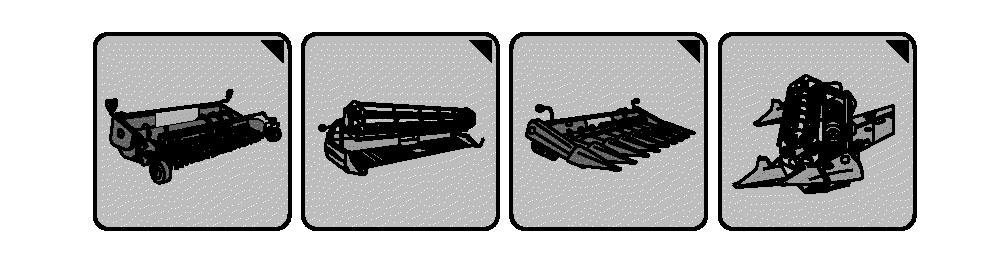
System only works with rigid platforms, flex platforms, and draper platforms.Header setup icon changes based on type of header connected to machine.
Allows a rigid header to be operated in contact with the ground and maintain a set contact pressure. Operator selects how firmly the header contacts ground and returns to that pressure automatically. A sensor measures the oil pressure within the feeder house lift cylinders and maintains that pressure as the header moves across the ground. Accuracy is greatly affected by accumulator precharge settings.
NOTE: While moving through the field, a sensor measures pressure in the lift cylinders. The system actuates the header raise/lower solenoid valve based on oil pressure within the lift cylinders. This maintains a constant ground contact pressure for the header as the terrain changes.
System must be calibrated with each header that is used (see Calibration Procedures section).
Activation buttons 1, 2 or 3 located on the multi-function lever are used to select one of the three different programmable header pressures.
Enable/Disable System:
Touch or press confirm switch when header setup icon is highlighted.
Touch or press confirm switch when automatic header height modes icon (A) is highlighted.
Touch or press confirm switch when Active Header Float icon (B) is highlighted.
NOTE: Checkmark appears indicating system is enabled or disappears indicating system is disabled.
Operation:
H99254-UN-01DEC10
H95079-UN-27JAN10
H95077-UN-18DEC09
A - Active Header Float Icon
B - Activation Button Number
C - Pressure Setpoint
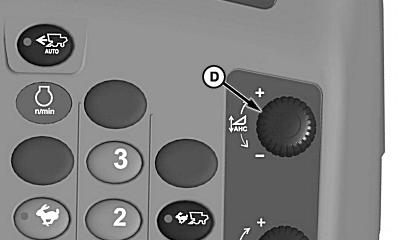
D - Header Height Control Dial
E - Bar Graph
F - Numeric Display
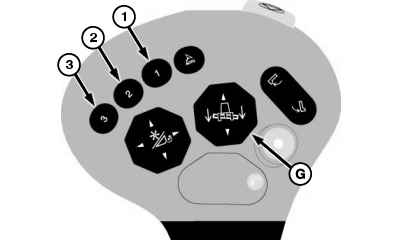
G - Header Raise/Lower Switch
System is active when:- Properly equipped header is connected to machine.
- Engine is running.
- Road transport disconnect switch is in field position.
- Active Header Float mode enabled.
- Header is engaged.
Activate Header Float by pressing activation buttons 1, 2 or 3 on multi-function lever.
Activation button number (B) on display indicates which activation button was selected.
Active Header Float icon (A) appears on display indicating system is active.
To change pressure setpoint (C) of activation buttons, press desired activation button and adjust pressure using active header height control dial (D).
Turn dial towards plus (+) symbol to increase cylinder lift pressure setpoint (raise header) or towards minus (-) symbol to decrease cylinder lift pressure setpoint (lower header).
Bar graph (E) and numeric display (F) show the actual header float pressure. Units: bar for metric system and psi for English system.
Manually raising Active Header Float using header raise/lower switch (G) deactivates system.
NOTE: Pressing header raise/lower switch disables system within five seconds.
Press activation buttons 1, 2 or 3 to reactivate system. Header automatically moves to preselected pressure.
|
OUO6075,00004CB-19-20101208 |