Variable Speed Fan Drive Belt—Replacing (Interim Tier 4/Stage III B) (S660 and S670)
 CAUTION:
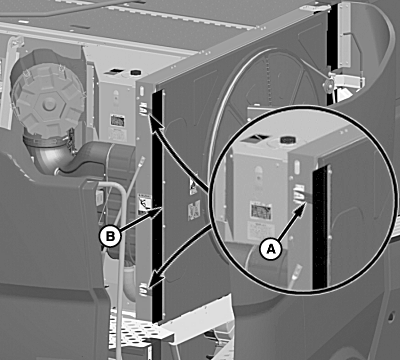
H95348-UN-15FEB10
A - Latches
B - Rotary Screen Door
Shut OFF engine, set parking brake and remove key.Pull latches (A) and open rotary screen door (B).
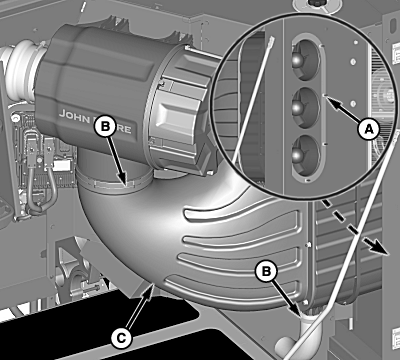
H95647-UN-10MAR10
A - Nuts (7 Used)
B - Clamps
C - Air Duct
Remove nuts (A) and loosen hose clamps (B).Lay air duct (C) out of the way.
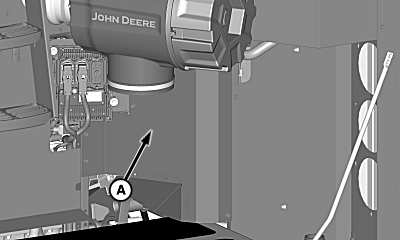
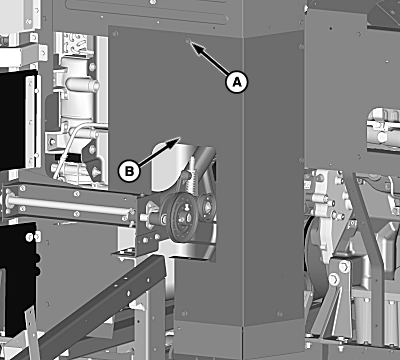
H95648-UN-10MAR10
A - Shield
Remove shield (A).
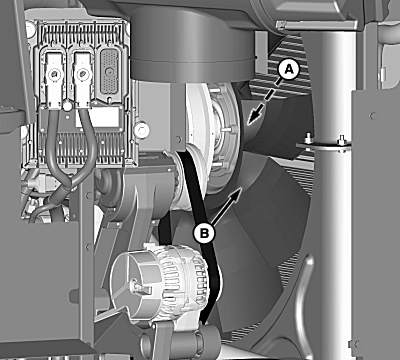
H95649-UN-10MAR10
A - Cap Screws (6 Used)
B - Fan Assembly
Remove cap screws (A) from fan assembly (B).Lay fan assembly out of the way.
H95650-UN-10MAR10
A - Cap Screws
B - Spacers
Remove cap screws (A) and spacers (B).Install previously removed cap screws until spring is compressed completely.
H102385-UN-22JUN11
A - Lock-Out Pin
B - Handrail
C - Separator Access Cover
Pull lock-out pin (A) and rotate handrail (B) up until handrail locks into place to open separator access cover (C).
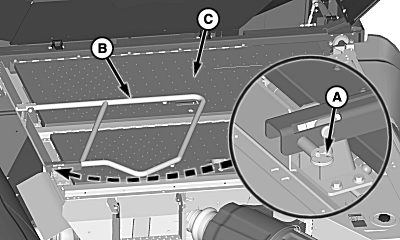
H95651-UN-10MAR10
A - Cap Screws (7 Used)
B - Shield
Remove cap screws (A) and shield (B).
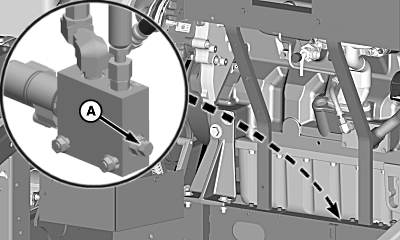
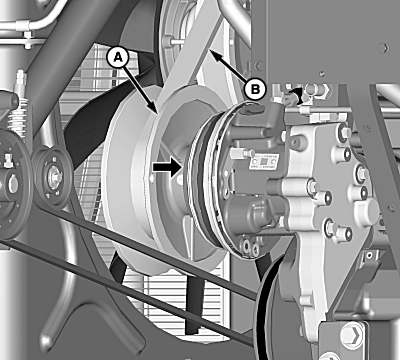
H95652-UN-10MAR10
A - Bleed Screw
Locate valve on front side of support rail and loosen bleed screw (A) to relieve pressure from sheaves.
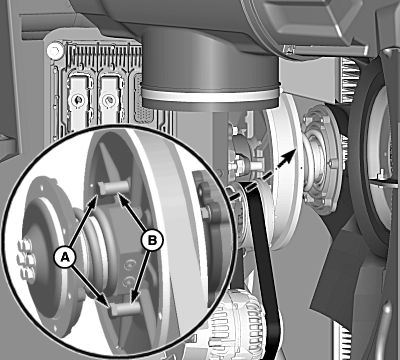
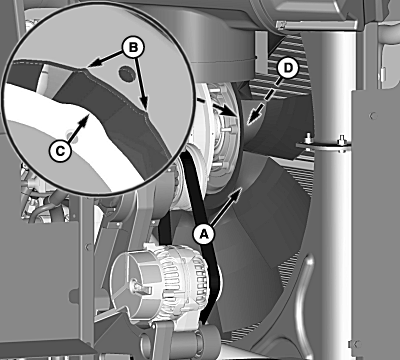
H95653-UN-31MAR10
A - Sheave
B - Variable Speed Belt
With bleed screw loose, pull sheave (A) towards engine until completely open.Remove variable speed belt (B).
NOTE: Belt MUST be installed over driver sheave first and then over driven sheave.
Install replacement variable speed belt.
IMPORTANT:
H95650-UN-10MAR10
A - Cap Screws
B - Spacers
Spring MUST be un-compressed to allow variable speed fan to adjust speed.With variable speed belt installed, remove cap screws (A) to un-compress spring and install previously removed spacers (B) as shown.
H95654-UN-10MAR10
A - Fan Assembly
B - Index Marks
C - Boss
D - Cap Screws (6 Used)
Install fan assembly (A) so index marks (B) are positioned on either side of boss (C).Install previously removed cap screws (D). Tighten cap screws to specification.
| Item | Measurement | Specification |
| Cap Screws | Torque | 40 N·m (30 lb.-ft.) |
H95652-UN-10MAR10
A - Bleed Screw and Nut
Locate valve on front side of support rail and tighten bleed screw and nut (A) to specification.
| Item | Measurement | Specification |
| Bleed Screw and Nut | Torque | 23 N·m (17 lb.-ft.) |
Install previously removed shield (front side).
Close separator access cover and lower handrail.
Install previously removed shield (rear side) and air duct.
Close and latch rotary screen door.
|
OUO6075,0000FFD-19-20120213 |