Transporting Machine on a Trailer
-
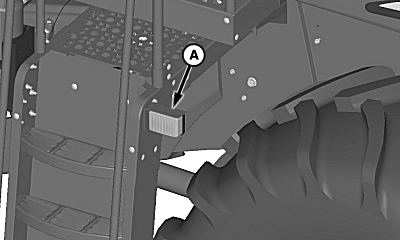
H102533-UN-28JUN11A - Light Bracket
Refer to Driving Machine on Roads earlier in this section for additional information that MUST be done before transporting machine on a trailer. -
Remove header and outside dual wheels (if equipped).
-
Drive machine on trailer and move multi-function lever to neutral position.
-
Dual Ladder Landing Configuration: Lower feeder house onto trailer to allow ladder landing to be swung to transport position.
-
Shut OFF engine, set parking brake and remove key.
-
Fold radio antenna down and retain with hook (if equipped). If hook is not available, retain antenna to cab roof with tape.
-
Single Tire Configuration: Disconnect wiring harness and remove light bracket (A).
-
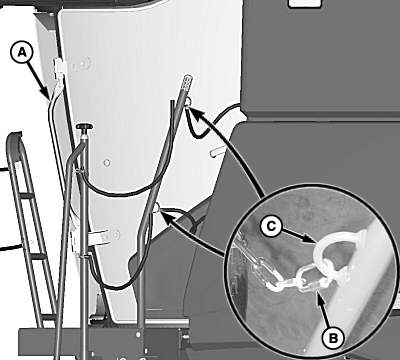
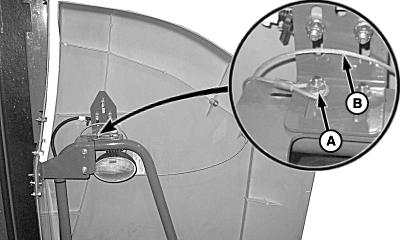
H102527-UN-28JUN11A - Handrail
B - Chain Link
C - Handrail Loops
Single Tire Configuration: Remove and retain cab handrail (A). -
IMPORTANT: Possible injury to you or others can occur from falling. Be careful when disconnecting safety chains and dismounting ladder landing.
NOTE: Assemble chain back onto existing loops on ladder handrail and loops on grain tank. This shortens the chain and prevents it from damaging the composite panels.
Single Tire Configuration: Disconnect and retain closure chain link (B) from handrail loops (C).
-
NOTE:

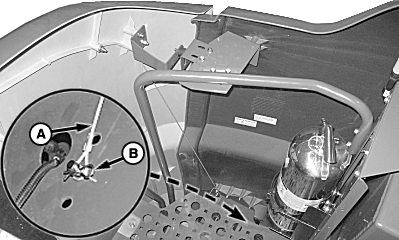
H102532-UN-28JUN11A - Ladder Landing
B - Shipping Bracket
C - Cap Screw
Cab ladder must be swung past inner most dentent position to allow ladder landing to contact shipping bracket.Single Tire Configuration: Swing ladder landing (A) to transport position until it contact shipping bracket (B) and install cap screw (C).
-
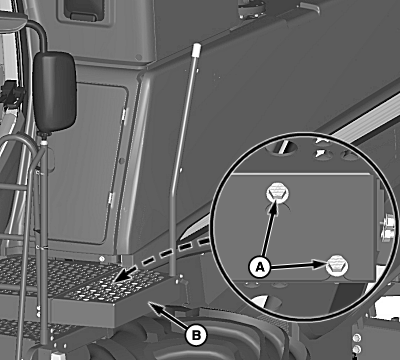
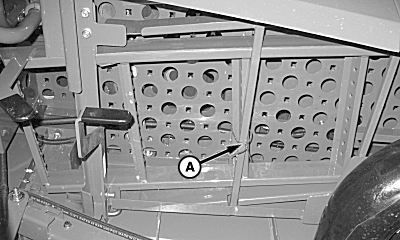
H102531-UN-28JUN11A - Cap Screws (5 Used)
B - Ladder Landing
Single Tire Configuration: Loosen cap screws (A) and remove ladder landing (B). -
IMPORTANT:
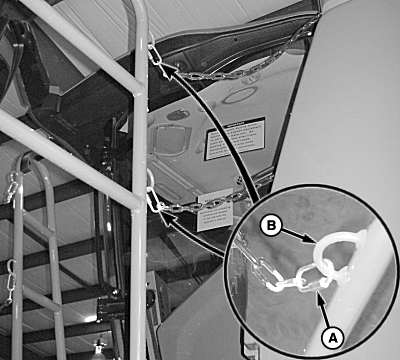
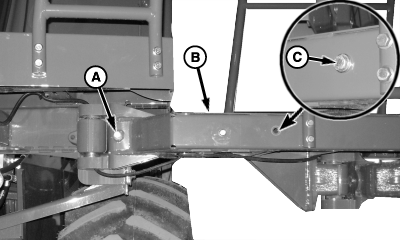
H102501-UN-27JUN11A - Chain Link
B - Handrail Loop
Possible injury to you or others can occur from falling. Be careful when disconnecting safety chains and dismounting ladder landing.NOTE: Assemble chain back onto existing loops on grain tank. This shortens the chain and prevents it from damaging the composite panels.
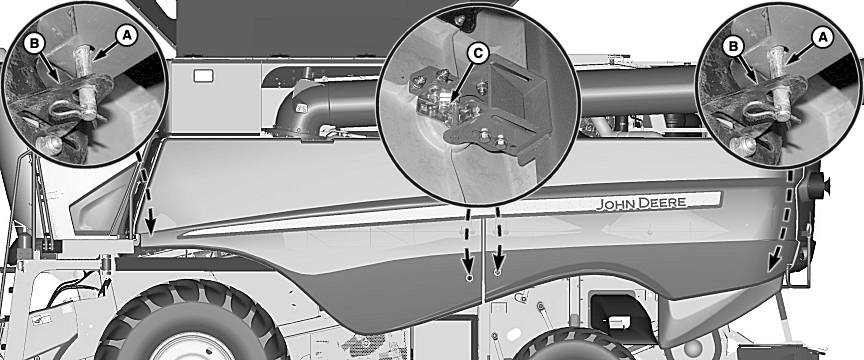
Dual Tire Configuration: Disconnect and retain closure chain link (A) from handrail loop (B) on both sides of handrail.
-
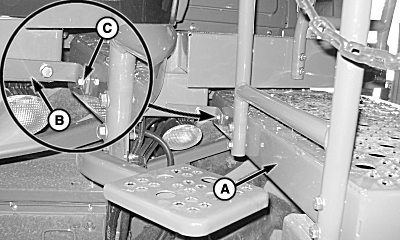
H102502-UN-27JUN11A - Cap Screw
B - Ladder Landing
C - Cap Screw
Dual Tire Configuration: Remove cap screw (A) and swing ladder landing (B) to transport position. -
Dual Tire Configuration: Install previously removed cap screw (C) in storage position as shown.
-
IMPORTANT:
H102503-UN-28JUN11A - Ladder Landing
B - Shipping Bracket
C - Cap Screw
Feeder house MUST be lowered onto trailer to avoid contact between ladder landing and feeder house drive shaft when ladder is swung forward.NOTE: Cab ladder must be swung past inner most dentent position to allow ladder landing to contact shipping bracket.
Dual Tire Configuration: Swing ladder landing (A) to transport position until it contact shipping bracket (B) and install cap screw (C).
-

H102388-UN-22JUN11A - Engine Access Covers
B - Handrail
Lower engine access covers (A) and handrail (B) to lock covers into place. -
Tier 2/Stage II Engines: Tape muffler cap closed to prevent damage to turbocharger.
-
 CAUTION:
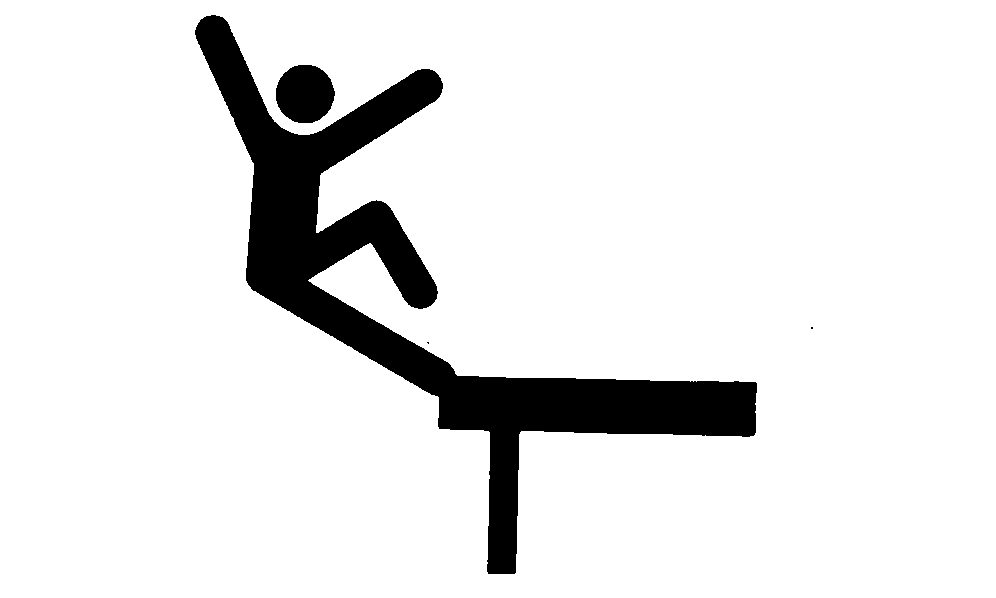
TS249-UN-23AUG88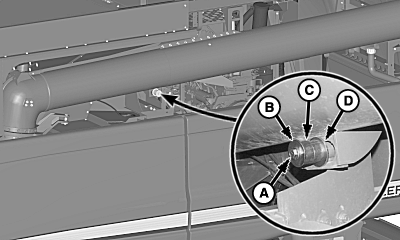
H98764-UN-21OCT10A - Cap Screw
B - Washer
C - Spacer
D - Washer
Possible injury or death to you or others can occur from falling. Use a ladder or equivalent with an appropriate load rating to access location when installing unloading auger retaining cap screw. Do not attempt to access location from engine platform.Pinned Unloading Auger (If Equipped):
-
Retrieve cap screw (A), washer (B), spacer (C), and washer (D) from tool box.
-
Install hardware as shown to retain unloading auger.
-
-
CAUTION:
TS249-UN-23AUG88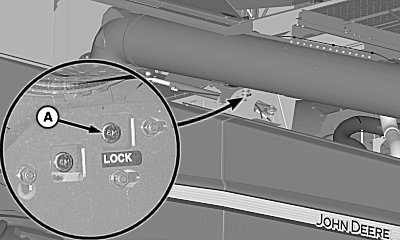
H97168-UN-21OCT10A - Pin
Possible injury or death to you or others can occur from falling. Use a ladder or equivalent with an appropriate load rating to access location when installing unloading auger retaining pin. Do not attempt to access location from engine platform.Cradled Unloading Auger (If Equipped):
-
Retrieve pin (A) and spring pin from tool box.
-
Install hardware as shown to retain unloading auger.
-
-
H97169-UN-29JUN10A - Hardware
B - Cable
Remove hardware (A) and remove cable (B) from storage position. -
NOTE:
H97170-UN-29JUN10A - Cable
B - Spring Pin
Verify that cable is installed on inside portion of handrail.Adjust pin to different positions if cable does not reach.
Install cable (A) over pin and retain with spring pin (B).
-
H97171-UN-29JUN10A - Ladder Extension and Platform
Wire down ladder extension and platform (A). -
H97149-UN-08OCT10A - Pins
B - Locking Plates
C - Latches
Install pins (A) through locking plates (B) and retain with spring pins at front and rear corners of left-hand gull wing doors. Repeat on opposite side of machine. -
Wire down gull wing doors at latches (C). Repeat on opposite side of machine.
-
H97172-UN-29JUN10A - Hazard Lights
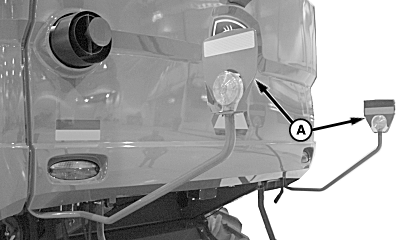
Swing left-hand and right-hand hazard lights (A) rearward as shown. -
H96787-UN-09JUN10A - Slow Moving Vehicle Emblem
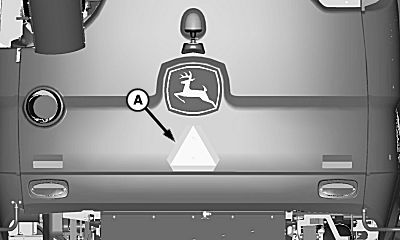
Cover up slow moving vehicle emblem (A). -
IMPORTANT: Fasten machine to trailer with chains.
Fasten machine to trailer with chains (see Machine Tie Down Location Decal located on cab ladder for tie down information).
|
OUO6075,0001065-19-20120316 |