Adjust Header Height Sensors
Header Height Sensor Adjustments
NOTE: Two people are required to calibrate and adjust sensors. One person in the cab of machine to monitor sensor voltage and one person to adjust sensor.
-
 CAUTION:
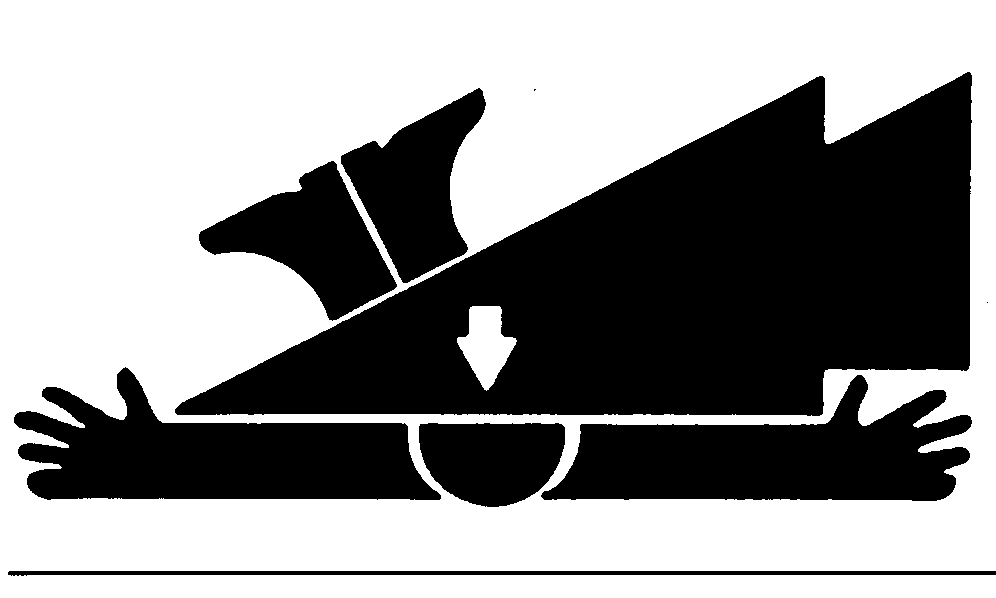
TS696-UN-21SEP89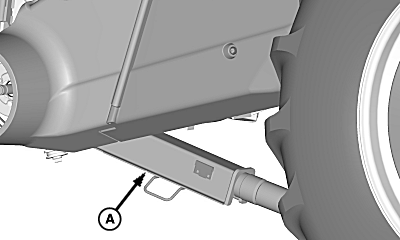
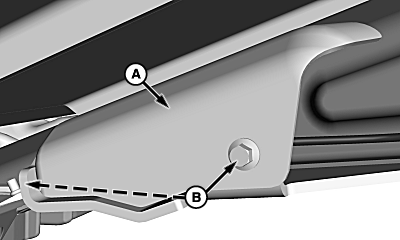
H90891-UN-26FEB08A - Feeder House Safety Stop
Death to you or others can result from feeder house inadvertently lowering. Completely raise feeder house and verify that safety stop is engaged when performing this procedure with header attached.Completely raise feeder house and engage safety stop (A).
-
Shut OFF engine and set park brake.
-
H111501-UN-30JUN14A - Cap Screws and Nuts (2 used per sensor)
B - Bracket
Refer to Header Height Sensor Locations in this manual for sensor locations. -
NOTE: Left-hand and right-hand end shields need removed to access outer sensors.
Loosen cap screws and nuts (A) on sensor mounting bracket.
-
Rotate sensor (B) until desired voltage is reached.
-
Tighten cap screws and nuts on mounting bracket.
TS696-UN-21SEP89
H90891-UN-26FEB08
A - Feeder House Safety Stop
Auxiliary Header Height Sensor (If Equipped) AdjustmentsNOTE: Two people are required to calibrate and adjust sensors. One person in the cab of machine to monitor sensor voltage and one person to adjust sensor.
-
CAUTION: Death to you or others can result from feeder house
inadvertently lowering. Completely raise feeder house and verify that
safety stop is engaged when performing this procedure with header
attached.
Completely raise feeder house and engage safety stop (A).
-
Shut OFF engine and set parking brake.
-
H108382-UN-24JUN13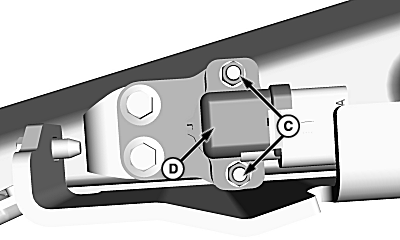
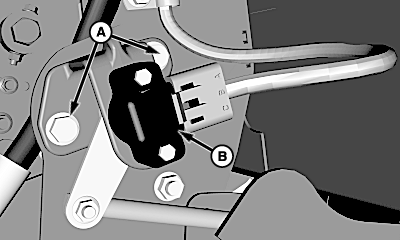
H108383-UN-24JUN13A - Self-Tapping Cap Screws
B - Cover
C - Cap Screws and Nuts (2 used per sensor)
D - Sensor
Refer to Header Height Sensor Locations in this manual for sensor locations. -
Remove self-tapping cap screws (A) and cover (B) to access each sensor.
-
Loosen cap screws and nuts (C).
-
Rotate sensor (D) until desired voltage is reached.
-
Tighten cap screws and nuts.
-
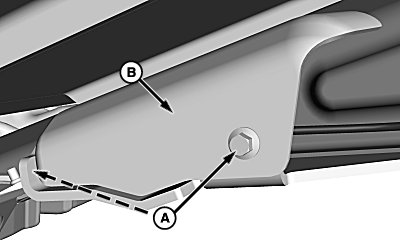
H107503-UN-17APR13A - Cover
B - Self-Tapping Cap Screws
Install cover (A) and retain with self-tapping cap screws (B).
|
SS43267,0000411-19-20150429 |