Height Adjustment of Perma-Glide™ Divider Point
-
IMPORTANT:
H112326-UN-04DEC14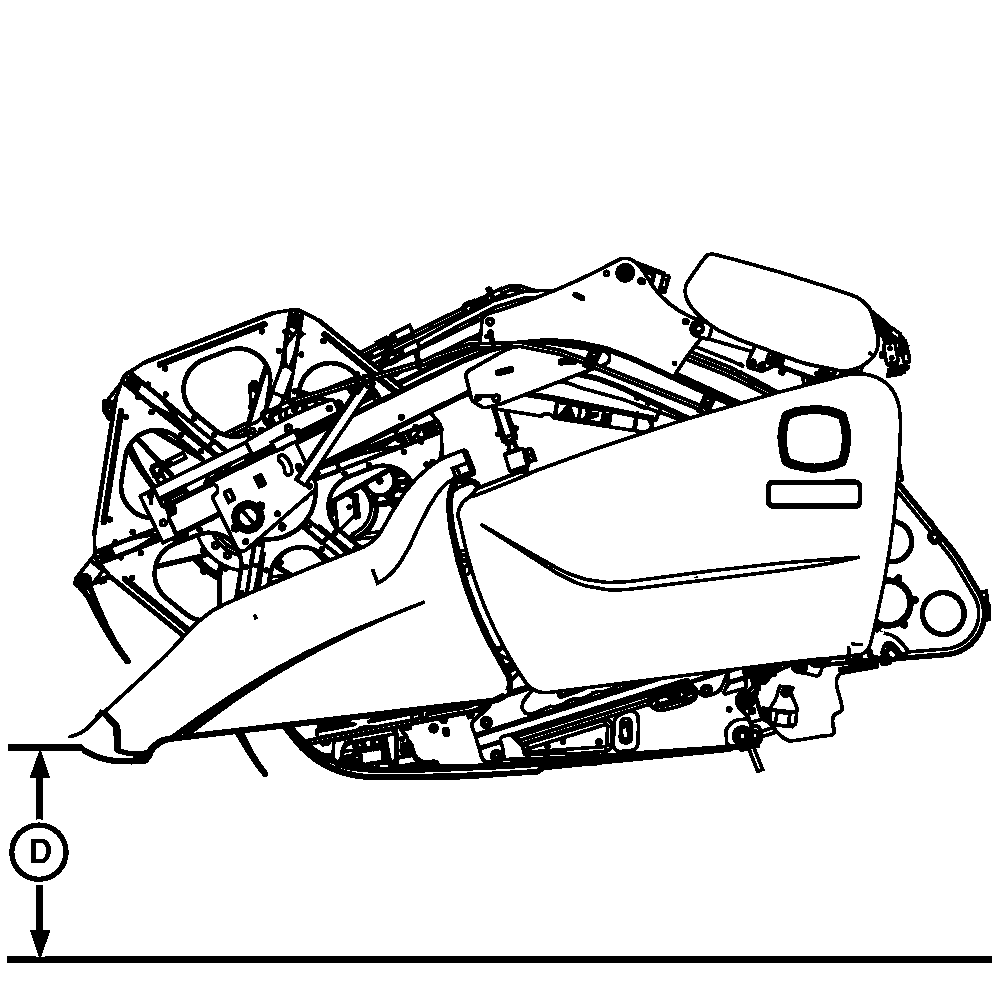
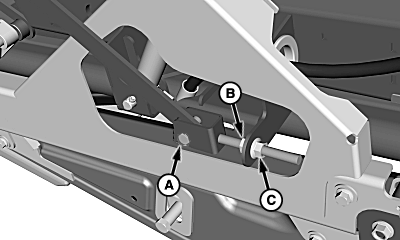
H112207-UN-11NOV14A - Cap Screw, Washer, and Nut
B - Jam Nut
C - Nut
D - Height Setting, 101 mm (4 in.)
Every time a change is made between off the ground and on the ground cutting, divider points need set. Setting divider points each time a switch is made between cutting modes helps maximize divider performance and limits damage in aggressive terrain.If multiple cutting mode changes are made daily, set divider for off the ground mode with cutter bar locked out. Divider gets closest to the ground cut in this mode.
If machine is equipped with hydraulic fore/aft tilt feeder house, place feeder house in fore/aft position mostly used before setting divider set point.
Set hydraulic fore/aft tilt feeder house setting to 0.
-
If cutting off the ground in rigid mode, lower header completely to ground.
-
If cutting in HydraFlex™ mode, turn on header engage switch and lower header to ground using Automatic Header Height Control activation buttons 2 or 3.
-
-
Turn OFF header engage switch, shut OFF engine, set park brake, and remove key.
-
Loosen cap screw, washer, and nut (A), jam nut (B), and nut (C).
-
NOTE: Divider point support has three hole settings. It may be necessary to switch hole setting used depending on height adjustment needed.
Adjust Perma-Glide™ divider point height so tip is positioned 101 mm (4 in.) above soil when platform is in operating position.
In softer ground, divider point may need raised to avoid plowing.
Adjust Perma-Glide™ divider point until nominal height setting (D) is obtained off the ground.
-
Once nominal divider point height is obtained, tighten nut (C) and jam nut (B) against bracket.
-
Tighten previously loosened nut (A).
-
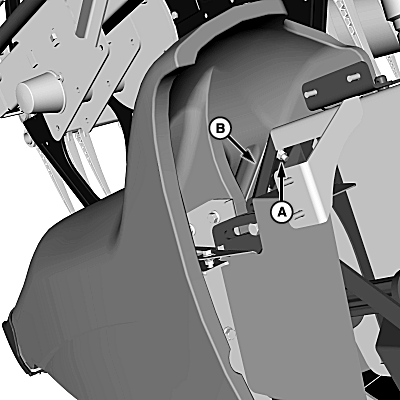
H112208-UN-07NOV14A - Cap Screws and Nuts (2 used)
B - End Sheet Extension
If necessary, loosen cap screws and nuts (A) and adjust end sheet extension (B) so divider moves freely. -
Tighten previously loosened cap screws and nuts.
-
Repeat on opposite side divider point.
|
HydraFlex is a trademark of Deere & Company Perma-Glide is a trademark of Deere & Company |
SS43267,0000457-19-20150708 |