Remove Liquid System
-
NOTE: This procedure contains steps pertaining to the removal of optional equipment (such as Load Command system) for this machine. Ignore steps that involve equipment not installed on your machine.
Clean vehicle, empty solution tank, and rinse solution system. (See Service Spray Equipment Safely in this manual.)
-
Shut off engine and remove key.
-
N92303-UN-11APR11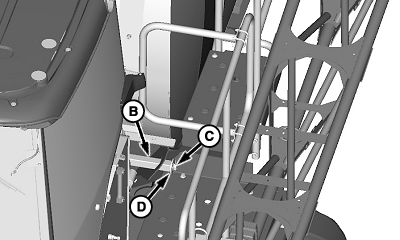
N92320-UN-14APR11A - Tank Saddle Openings
B - Solid Square Bar
C - Cap Screw (2 used)
D - Washer (2 used)
Install front solid square bar (B) through openings (A) in the front tank saddle. -
Install washers (D) and cap screw (C) on each end of bar.
-
N92314-UN-13APR11A - Cap Screw and Nut (2 used)
B - Washer (2 used)
C - Tank Loop (2 used)
D - Spreader Bar
Position spreader bar (D) on top of tank. -
Connect spreader bar to tank loop (C) using washer (B), and cap screw and nut (A). Repeat on right-hand side of tank.
-
NOTE: Caps and plugs for hydraulic components are supplied with dry box bundle.
N67376-UN-01SEP04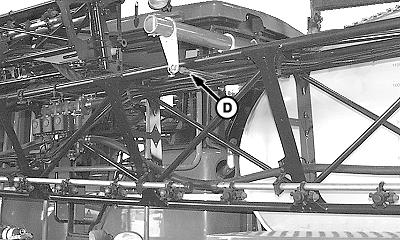
N67548-UN-08SEP04A - Top Boom Rails
B - Holes
C - Bracket
D - Bar
Align hook of boom spreader bar (C) with tank strap on right-hand side of machine. Unfold left inner wing until boom rail is between brackets (B). -
Raise boom, using center lift frame switch, until top two boom rails (A) of inner wings are above holes in brackets (B).
-
Insert bar (D) under top two rails of inner wing and pin in place.
-
Lower boom until it is supported by bars.
-
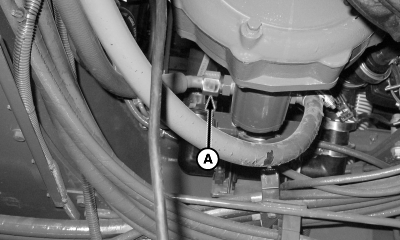
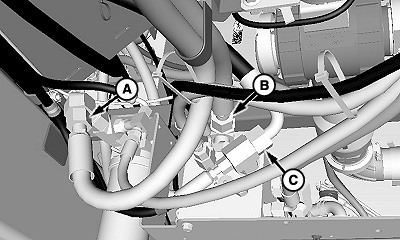
N90972-UN-01FEB11Solution Pump Motor
A - Solution Pump Motor Supply Hose
Disconnect solution pump motor supply hose (A). Cap and plug all openings. -
Retain hose (A) away from dry spreader conveyor belt using tie bands.
-
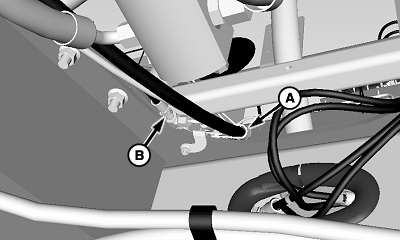
N91901-UN-16MAR11A - Clamp
B - Boom Load Sense Hose
Disconnect boom load sense hose (B) from T-fitting. Cap and plug openings. -
Retain boom load sense hose using existing clamp (A).
-
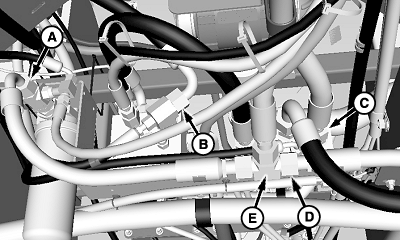
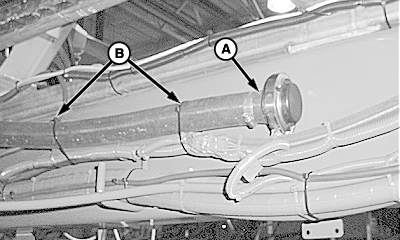
N91871-UN-16MAR11A - Return Hose
B - Boom Valve Supply Hose
C - Pump Supply Hose
D - Load Command Pump Supply Hose
E - T-Fitting
For machines equipped with Load Command:-
Disconnect hydraulic hoses (A—D).
-
Cap Load Command pump supply hose (D) using SAE12 ORFS plug.
-
Connect return hose (A) to end of T-fitting (E) that Load Command pump supply hose was previously connected to.
-
Retain T-fitting (E), and hydraulic hoses (A—C) to pump motor.
-
-
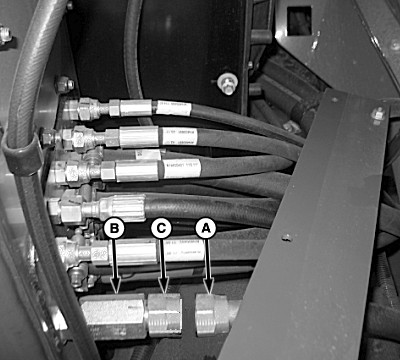
N91870-UN-16MAR11A - Pump Return Hose
B - Pump Supply Hose
C - Boom Valve Supply Hose
For machines not equipped with Load Command:-
Disconnect hydraulic hoses (A—C).
-
Cap and plug all openings.
-
Retain hydraulic hoses to pump motor.
-
-
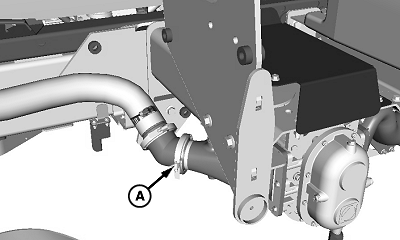
N90976-UN-01FEB11A - Boom Valve Return Hose
B - Check Valve
C - Cap
Disconnect boom valve return hose (A) from hydraulic reservoir. Install cap (C). -
NOTE: Plugs for electrical connectors are supplied in Dry Box Bundle.
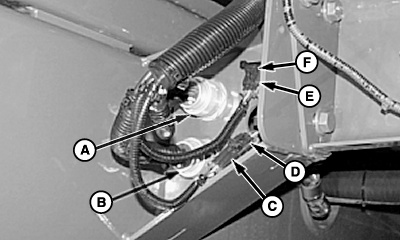
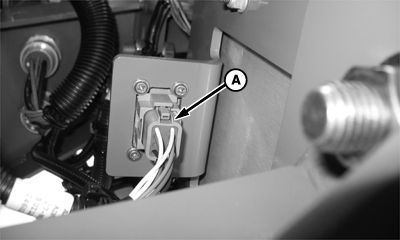
N73812-UN-12SEP06A - Connector
B - Connector
C - Solution System Harness Connector
D - Chassis Harness Connector
E - Solution System Harness Connector
F - Terminator
Disconnect solution system harness connectors (A and B) from bulkhead. Plug or cover connectors with plugs supplied in Dry Spreader Bundle to protect from environment. -
Unplug 6-pin connector (C) on solution system harness from connector (D) on chassis harness.
-
Unplug 6-pin connector (E) on solution system harness from terminator (F).
-
Connect chassis harness connector (D) to terminator.
-
Connect 6-pin connectors (C) and (E) on solution system harness into each other to protect from environment.
-
N80494-UN-23APR08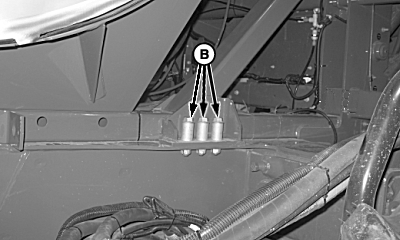
N90977-UN-01FEB11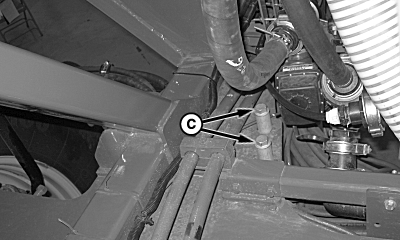
N91107-UN-25FEB11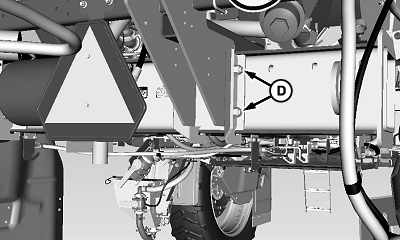
N91902-UN-16MAR11A - Front Mounting Cap Screw (2 used)
B - Rear Outside Mounting Cap Screw (6 used)
C - Rear Inside Mounting Cap Screw (4 used)
D - Rear Mounting Cap Screw (4 used)
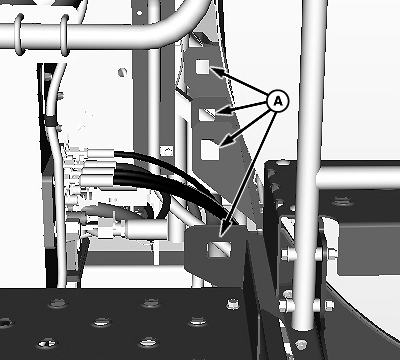
Remove front mounting cap screw (A) from left- and right-hand side. -
Remove rear inside and outside mounting bolts (B and C) from left- and right-hand side of frame.
-
Remove rear mounting cap screws (D) from left- and right-hand side. Retain shims.
-
N91903-UN-16MAR11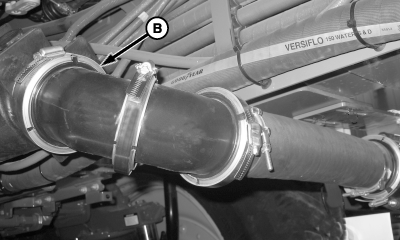
N91108-UN-25FEB11A - Cap Screws and Nuts
B - Clamp
Remove two cap screws and nuts (A) retaining Quick Fill™ valve to frame. -
Loosen clamp (B).
-
Remove and retain Quik-Fill valve assembly.
-
Cap solution skid end with clamp, gasket, and cap.
-
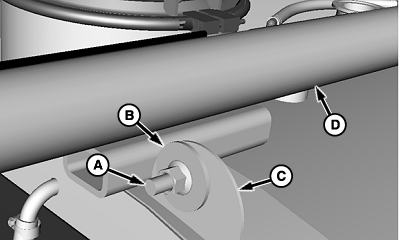
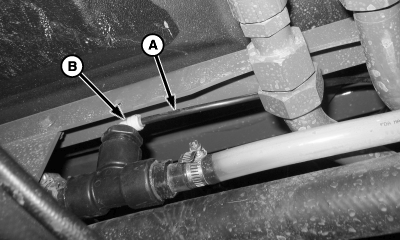
N67965-UN-08OCT04A - Hose
B - Tie Bands
Disconnect hose (A) from 2 in. Quik-Fill rinse tank valve. Install gasket, cap, and clamp on solution skid end where hose was removed. -
Install gasket, cap, and clamp on 2 in. rinse tank hose. Retain hose to frame using tie bands (B) as shown.
-
N91904-UN-16MAR11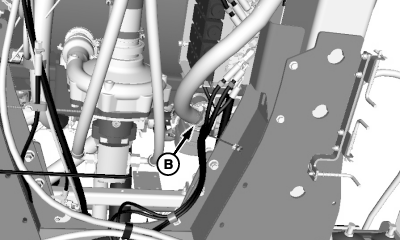
N91906-UN-16MAR11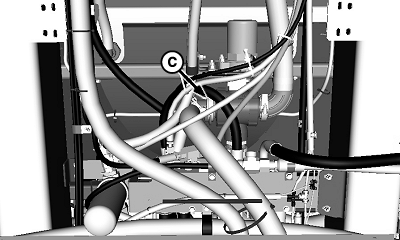
N91907-UN-16MAR11A - Clamp
B - Clamp
C - Clamp
For machines equipped with Load Command:-
Loosen clamp (A), disconnect and cap solution hose.
-
Loosen clamp (B), disconnect and cap evacuation hose.
-
Loosen clamp (C), disconnect and cap rinse hose.
-
-
N91908-UN-16MAR11A - Clamp
Loosen clamp (A), disconnect and cap rinse hose. -
N88460-UN-21MAY10A - Line
B - Fitting
Disconnect foam marker water intake line (A). Coil line where it cannot be damaged. -
Install a plug from the plugs supplied in Dry Spreader Bundle into quick connect fitting (B).
-
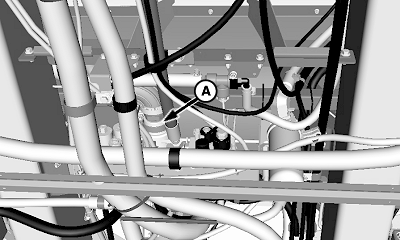
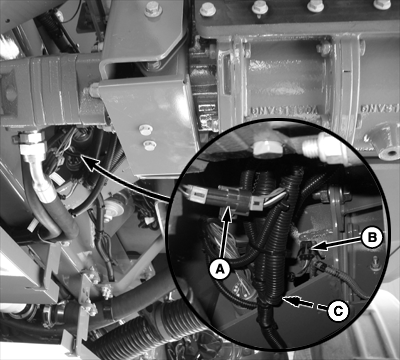
N83169-UN-09FEB09A - Electrical Connection
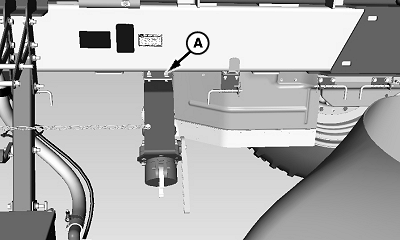
Disconnect electrical connection (A) from plate behind Load Command pump. -
Plug connection with one DT, 8 plug connector (57M7632), one plug locking wedge (57M7679), and sealing plug (R78069).
-
N83580-UN-06MAR09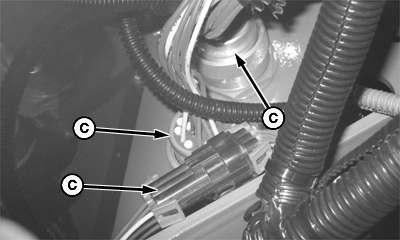
N83474-UN-03MAR09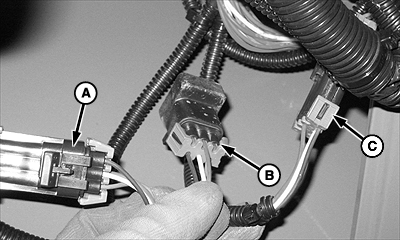
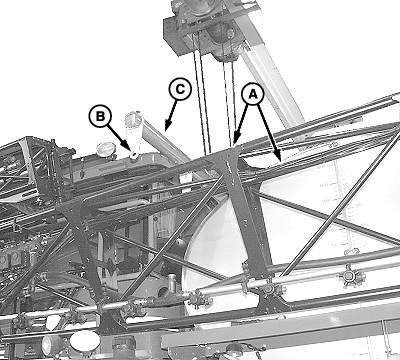
N83598-UN-24MAR09A - Load Command Connection
B - Terminator
C - Chassis Connector (3 Used)
Disconnect Load Command connection (A), solution system connection (B), and chassis connectors (C). -
Connect Load Command (A) and chassis connection (C).
-
Plug terminator (B).
-
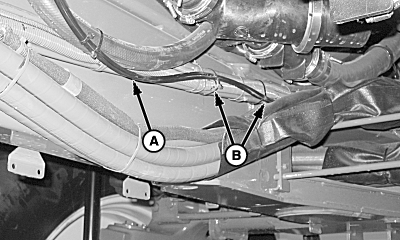
N72720-UN-15MAY06A - Air Hose
B - Tie Bands
Locate air hose (A) attached to air cylinder on the main shut off valve of the solution tank. Follow hose along left-hand inner frame rail and cut tie bands (B). -
 CAUTION: On board air system is charged at 689—896 kPa
(8.9 bar) (100—130 psi). To avoid injury to yourself or others,
wear safety goggles and gloves and be sure that others are clear of
area before relieving on board air system pressure.
CAUTION: On board air system is charged at 689—896 kPa
(8.9 bar) (100—130 psi). To avoid injury to yourself or others,
wear safety goggles and gloves and be sure that others are clear of
area before relieving on board air system pressure.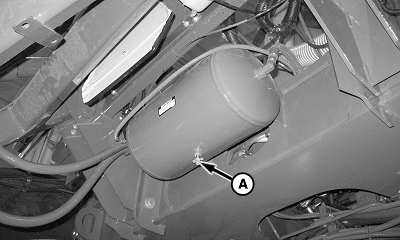
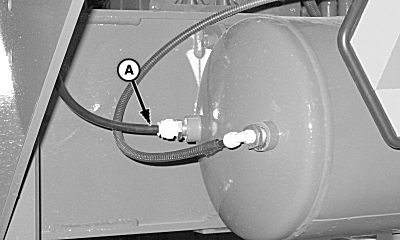
N91644-UN-25FEB11A - Drain Valve
Relieve air system pressure by opening drain valve (A). -
N72718-UN-15MAY06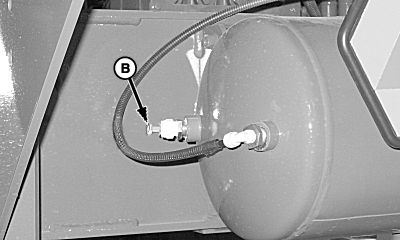
N72760-UN-15MAY06A - Foamer Air Supply Hose
B - Plug
Disconnect foamer air supply hose (A) from air tank and install supplied plug (B). -
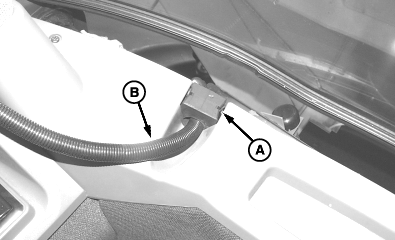
N67267-UN-19AUG04A - Opening
B - Harnesses
If any additional equipment has been installed on the solution skid that required harnesses (B) be routed through opening (A) in the rear of the cab or to any other part of the machine, disconnect or remove them as necessary. -
CAUTION: Crane or hoist must have a rated lifting capacity of
at least 4536 kg (10,000 lbs) to remove liquid system from machine.
Verify any additional lifting or connecting devices, such as anchor
shackles or clevises, are properly rated for the job.
Faulty tank strap lift points or lift straps may allow liquid system to fall during removal and cause severe injury or death to you or others. Inspect tank strap lifting points and lift straps for wear before attaching and lifting.
NOTE: In order to remove liquid system from machine, the crane, or hoist must be able to lift liquid system at least 61 cm (2 ft.). Verify that there is sufficient clearance above liquid system.
Lifting straps approximately 304.8 cm (10 ft.) long work best for this application.
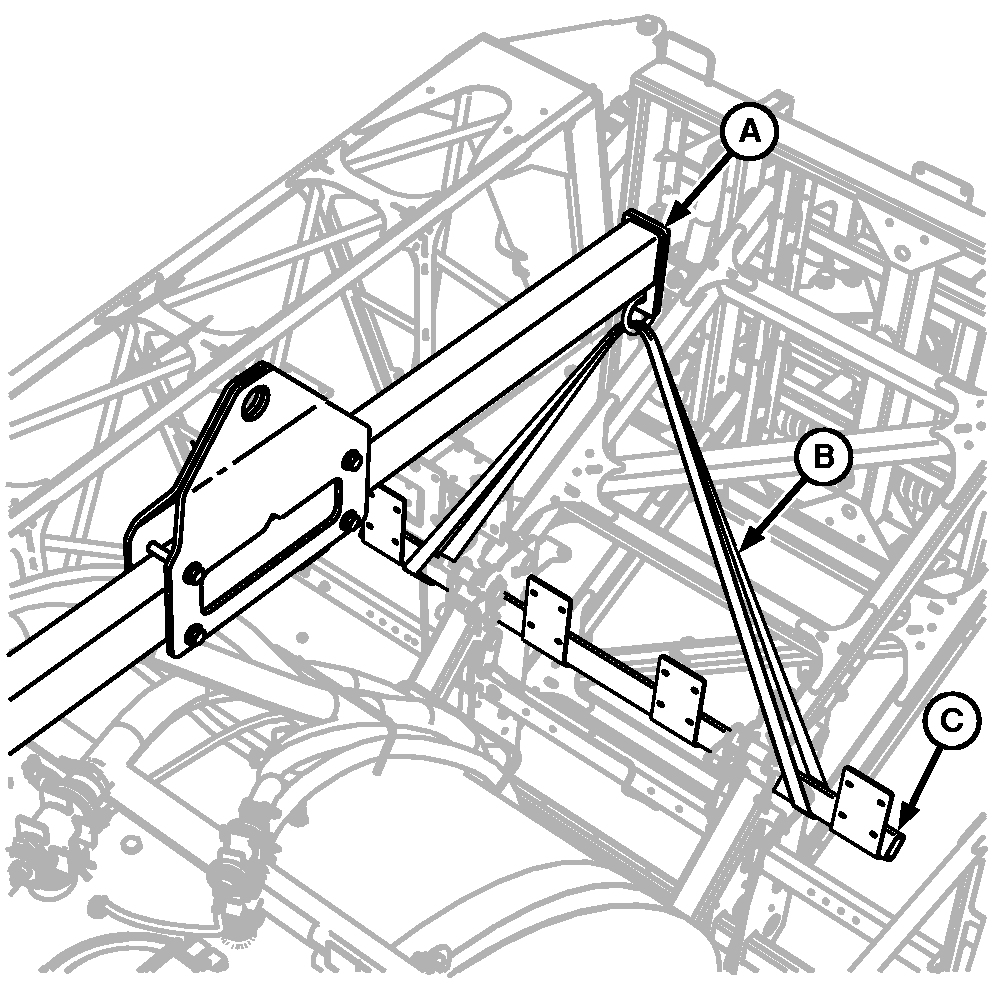
N92306-UN-13APR11A - Lift Bar
B - Strap
C - Support Bar
Attach lift bar (A) (John Deere or equivalent) to rear support bar (C) with properly rated lifting straps (B). -
CAUTION: Liquid system may become imbalanced during removal
and cause severe injury or death to you or others. Adjust lift bar
to correct dimension (B) to balance load.
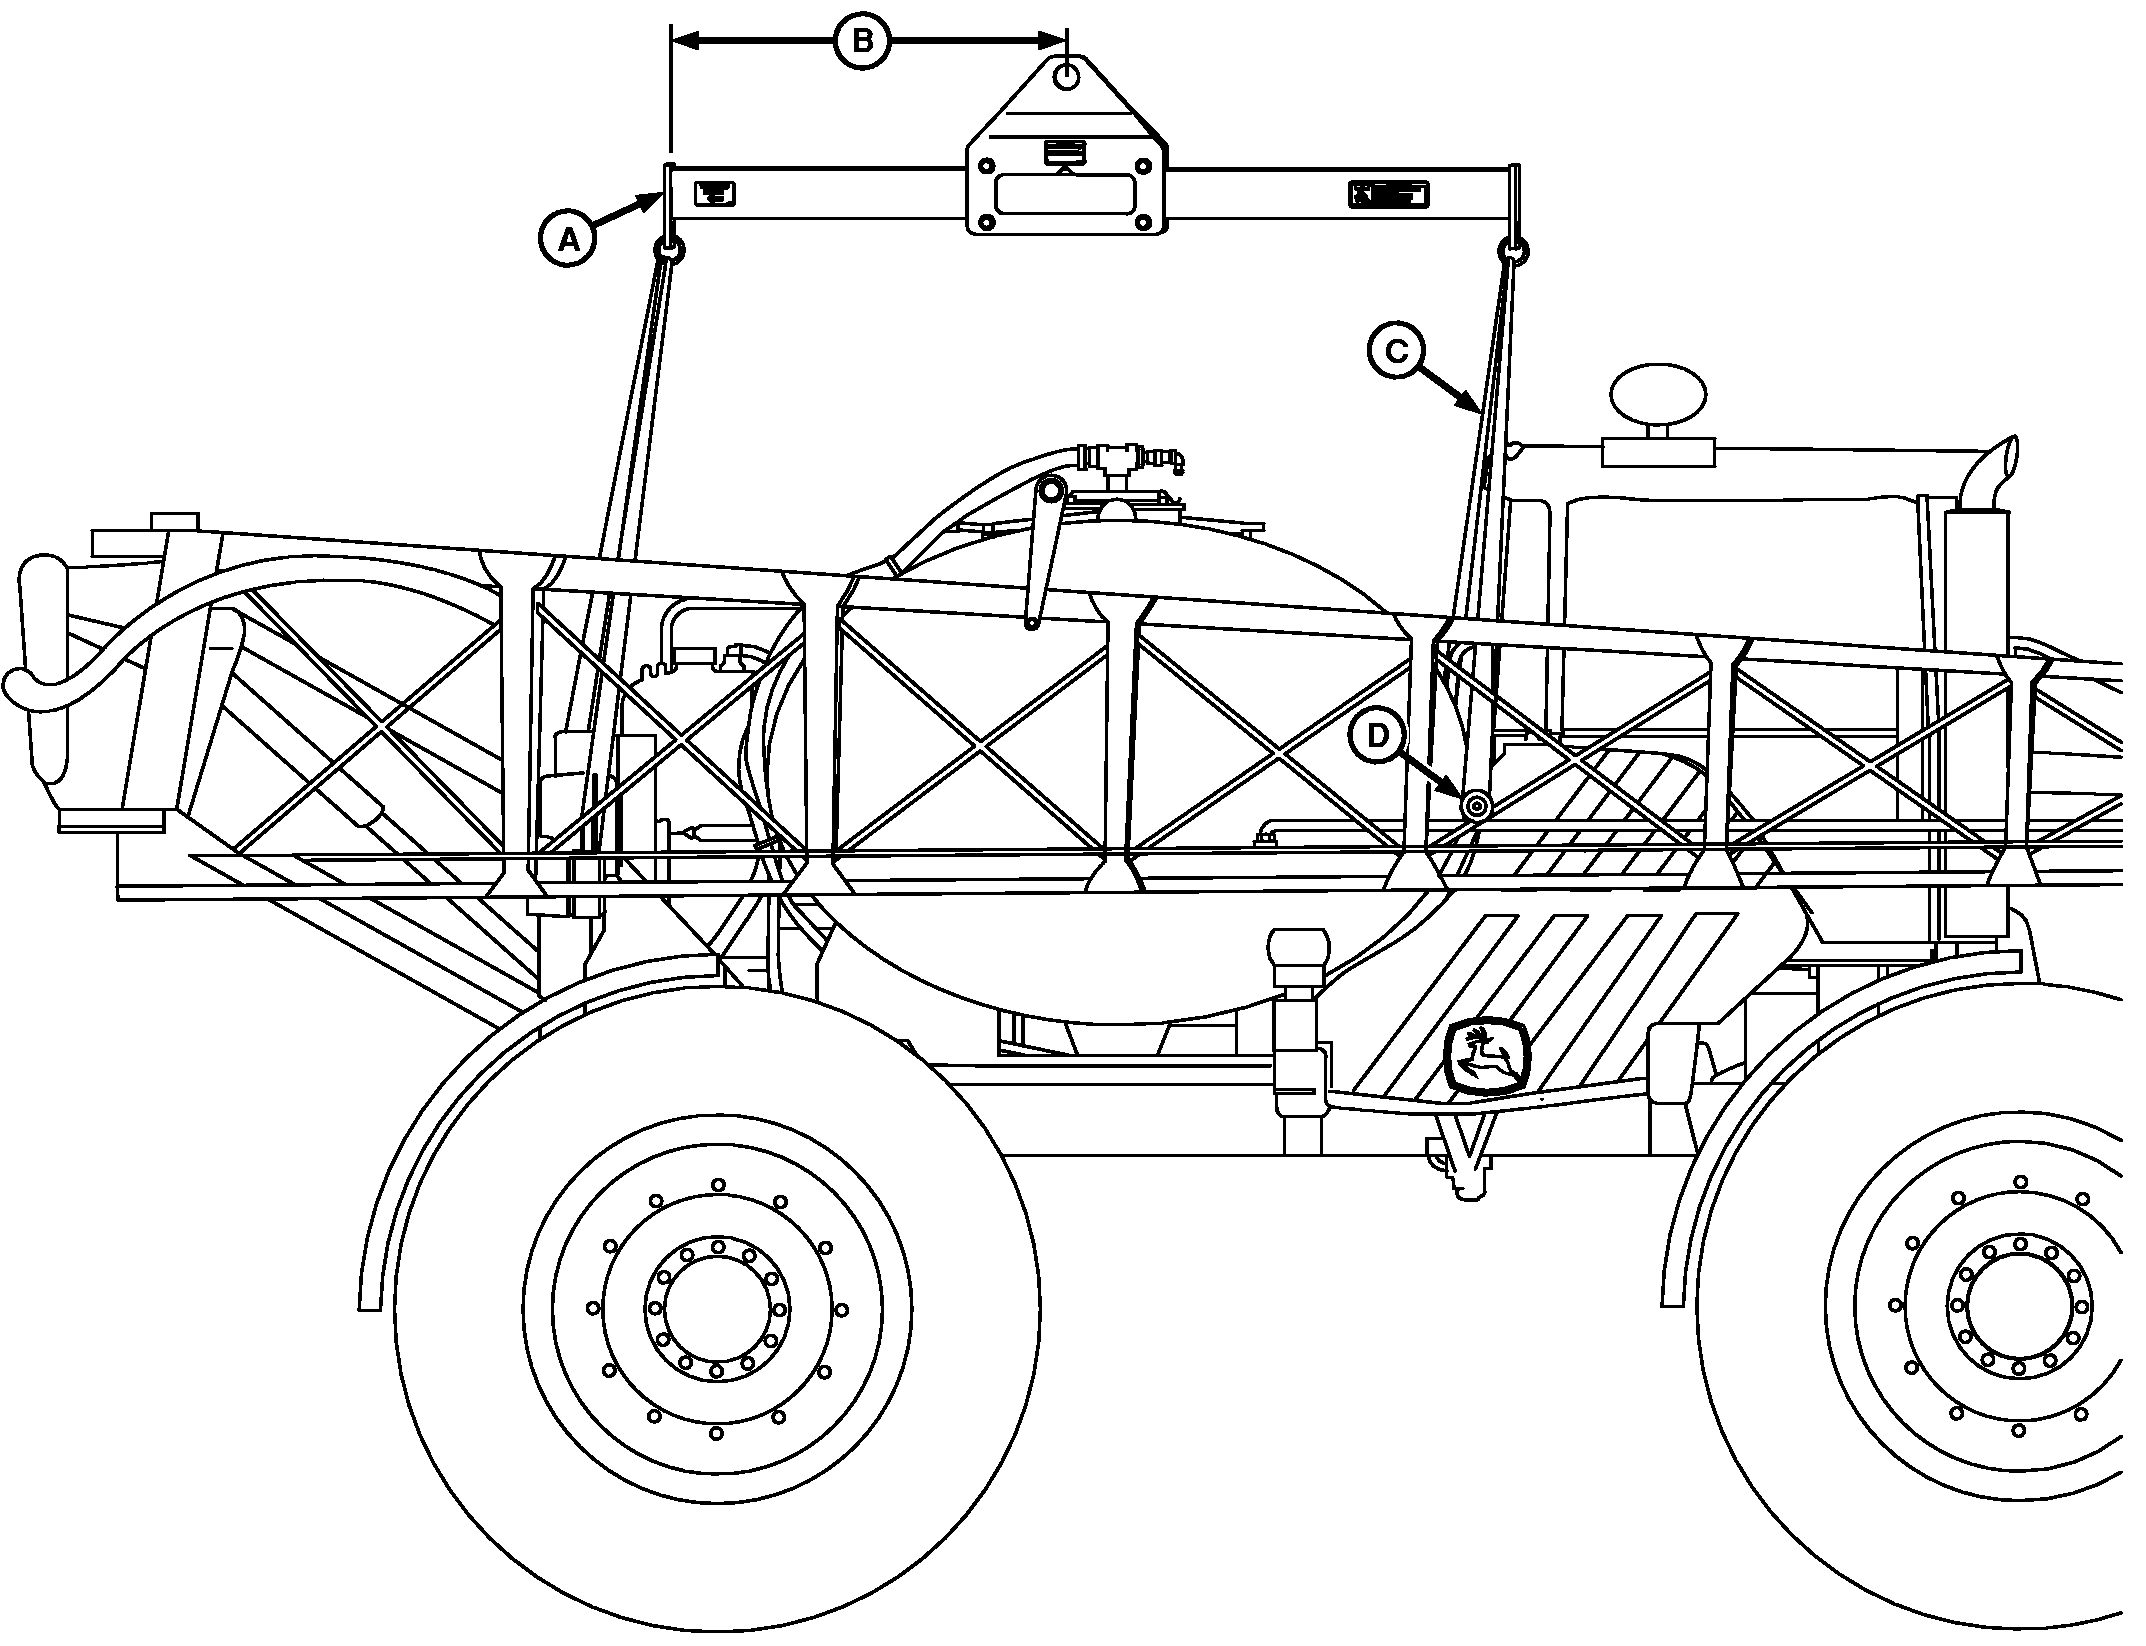
N92305-UN-13APR11A - Lift Bar
B - Dimension, Lift Bar Adjustment
C - Lifting Straps
D - Solid Square Bar
Attach lift bar (A) (John Deere or equivalent) to solid square bar (D) with properly rated lifting straps (C).Lift Bar Adjustment
Boom Size
Dimension (E)
27.4 m (90 ft.)
635 mm (25 in.)
30.5 m (100 ft.)
813 mm (32 in.)
36.6 m (120 ft.)
1143 mm (45 in.)
Dry Spreader
(See New Leader installation instructions.)
-
IMPORTANT: Verify that liquid system will lift freely from chassis before removal to prevent machine damage.
Raise liquid system from chassis.
NOTE: Once removed, liquid system can be set on rear of platform with front blocked up to provide room for solution pump.
|
Quick Fill is a trademark of Deere & Company |
OUO6046,000C673-19-20110414 |