Drain, Flush and Refill Cooling System—Every 6000 Hours or Six Years
IMPORTANT:
TS281-UN-23AUG88
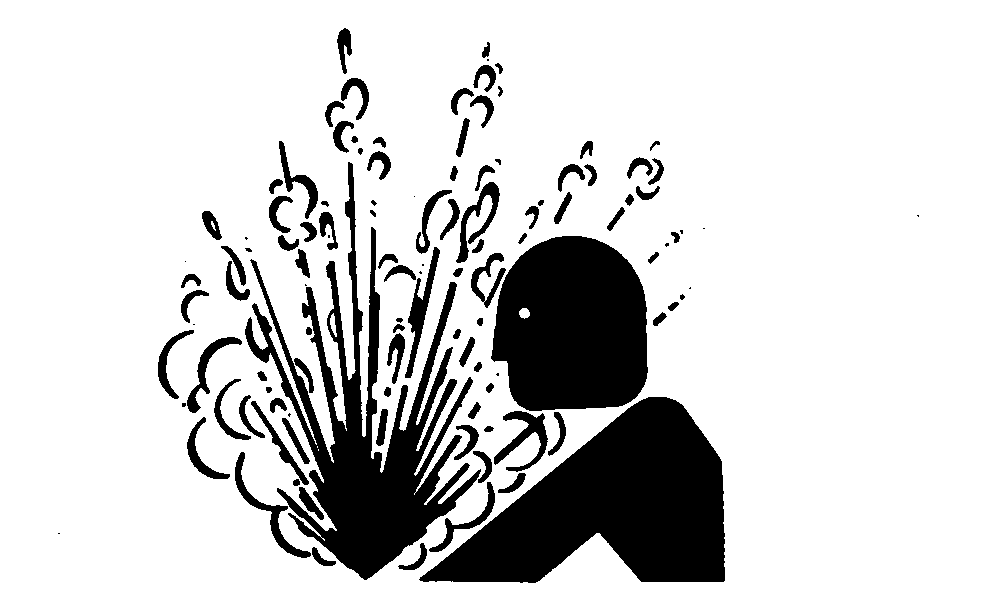
Safety—Explosive Release of Fluids
N90879-UN-07JAN11
Turn Key To Run
RXA0110622-UN-02SEP10
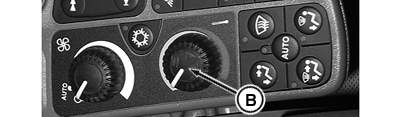
Turn Temperature Knob To Highest Setting—ClimaTrak™

N90878-UN-07JAN11
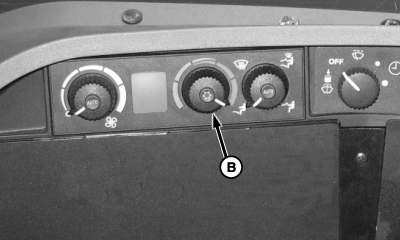
Turn Temperature Knob To Highest Setting—Standard HVAC
N90880-UN-07JAN11
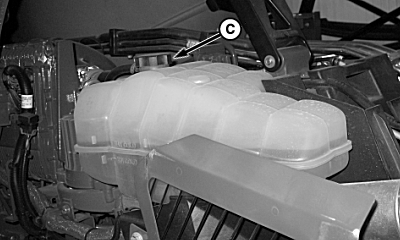
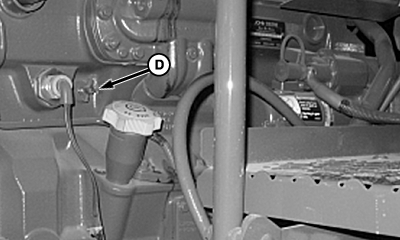
Remove De-aeration Cap
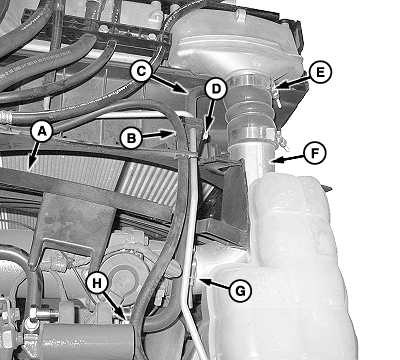
A - Run
B - Temperature knob
C - De-aeration Cap
Thermostat, thermostat gasket, and de-aeration tank cap should be replaced whenever system is flushed.INITIAL change interval is 6 years or 6000 hours, provided cooling system is topped off using only John Deere Cool-GARD II and premix and coolant is tested at recommended intervals. After initial service, the SCHEDULED interval (2 years or 2000 hours) can be extended up to 6 years or 6000 hours depending on coolant used and if coolant is tested at recommended intervals. Follow recommendations in ”Drain Intervals for Diesel Engine Coolant” in Fuels, Lubricants and Coolant section of this manual.
NOTE: When service is performed on cooling system, make sure to check coolant daily for the next three days of operation. The most effective way to check coolant level is when the tractor is cool. If coolant is low, fill de-aeration tank to mark on tank.
 CAUTION: Explosive release of fluids from pressurized cooling
system can cause serious burns.
CAUTION: Explosive release of fluids from pressurized cooling
system can cause serious burns.
Shut off engine. Only remove cap when cool enough to touch with bare hands. Slowly loosen cap to first stop to relieve pressure before removing completely.
-
Park tractor, turn ignition key to off and allow radiator to cool.
NOTE: Throughout the draining, flushing and filling procedure, turn temperature knob to highest setting and leave set to the highest setting to ensure that fluids are drained from heating/air conditioning unit. If either temperature knob is not set to highest setting or ignition key is not turned to Run, system will not completely drain.
See your John Deere™ dealer for recommendations on cleaning solutions.
-
Turn key to Run (A), then turn temperature knob (B) to highest setting.
-
Open hood.
-
Remove de-aeration tank cap (C).
-
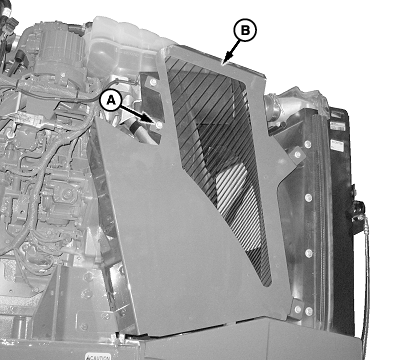
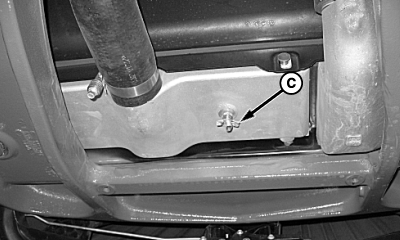
N90550-UN-24NOV10A - Cap Screw (5 used)
B - Right-Hand Shield
Remove cap screws (A) and right-hand shield (B). -
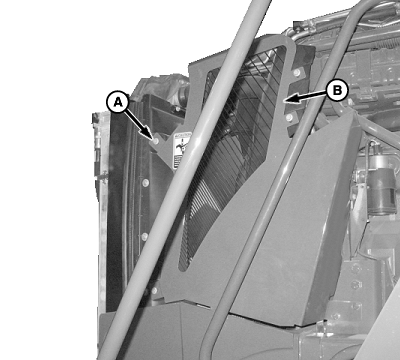
N90554-UN-24NOV10A - Cap Screw (5 used)
B - Left-Hand Shield
Remove cap screws (A) and left-hand shield (B). -
N90525-UN-06DEC10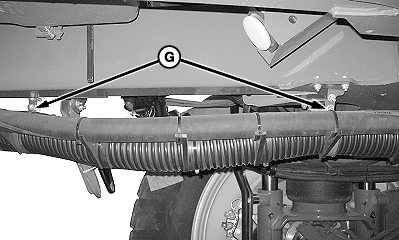
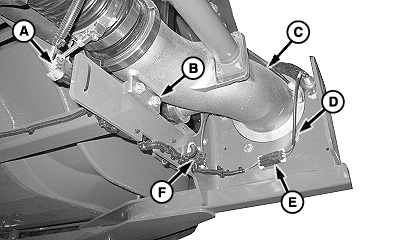
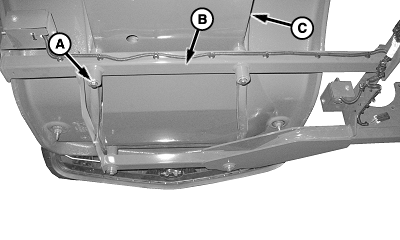
N90578-UN-29NOV10A - Harness Connector
B - Cap Screw (2 used)
C - Fill Pipe
D - Cap Screw (4 used)
E - Harness Connector
F - Harness Connector
G - Clamp (2 used)
If equipped with Load Command perform the following:-
Disconnect harness connectors (A, E, and F).
-
Remove clamps (G).
-
Remove cap screws (B and D).
-
Remove fill pipe (C) from bracket and place hoses and pipe on floor.
-
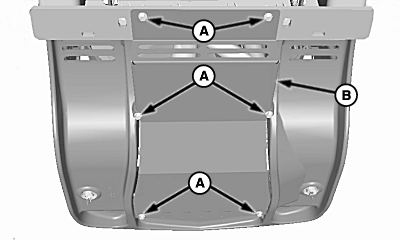
N90533-UN-24NOV10A - Cap Screw (6 used)
B - Frame
C - Shield
Remove cap screws (A) and frame (B).
-
-
Remove shield (C).
-
N91131-UN-04MAR11Remove Cap Screws and Deflector
N90881-UN-07JAN11Open Cooler Valve And Drain
N90882-UN-07JAN11Open Engine Valve And Drain
A - Cap Screws
B - Shield
C - Radiator Drain Valve
D - Engine Drain Valve
Remove cap screws (A), then remove shield (B) beneath radiator drain valve. -
Place catch pan under radiator drain valve.
-
Open radiator drain valve (C) and drain coolant into catch pan.
-
Place catch pan under engine drain valve.
-
Open engine drain valve (D) and drain coolant into catch pan.
-
Allow radiator and engine to drain.
-
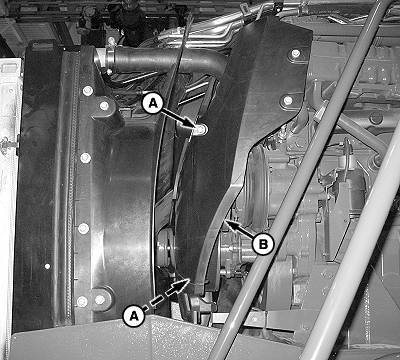
N90520-UN-23NOV10A - Cap Screw (3 used)
B - Left-Hand Diverter
Remove cap screws (A) and left-hand diverter (B). -
N90548-UN-24NOV10A - Right-Hand Diverter
B - Cap Screw (2 used)
Remove cap screws (B). Do not try to remove right-hand diverter (A) at this time. -
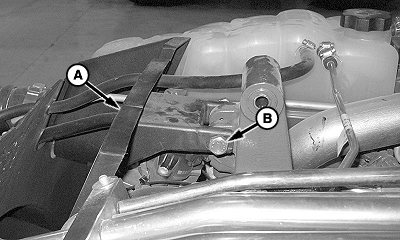
N90583-UN-29NOV10
N90582-UN-29NOV10A - Cap Screw (2 used)
B - Pipe
C - Cap Screw (2 used)
Remove cap screws (A and C) and pipe (B). -
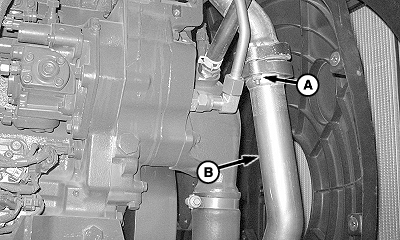
N90581-UN-29NOV10A - Right-Hand Diverter
B - Overflow Hose
C - Radiator Support
D - Cap Screw
E - Clamp (2 used)
F - Pipe
G - Clamp
H - Cap Screw
Loosen clamps (E and G). Remove pipe (F). -
Loosen cap screw (D) and disconnect fuel line from clamp.
-
Remove cap screw (H), nut, and radiator support (C).
-
Disconnect overflow hose (B) from right-hand diverter (A).
-
Remove right-hand diverter.
-
RXA0107496-UN-22APR10
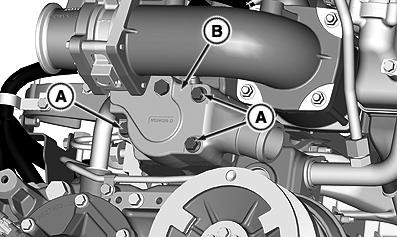
N90690-UN-07DEC10A - Cap Screw (3 used)
B - Thermostat Cover
C - Thermostat
Remove cap screws (A) and thermostat cover (B). -
Remove old thermostat (C) and clean sealing area.
-
Apply RTV silicone sealant to new gasket.
-
Install new thermostat, new gasket, and cover. Tighten cap screws to specifications.
Item Measurement Specification Thermostat Cover Cap Screws Torque 48 N·m (35 lb.-ft.) -
Close engine drain valve, and radiator drain valve.
-
Replace previously removed radiator hoses, clamps, tube, and diverter.
-
IMPORTANT: Never pour cold water or coolant into hot engine.
Fill radiator with cooling system cleaning solution.
-
Install deaeration cap, install front side panels, and close hood.
CAUTION: Make sure that side panel is installed and hood is
closed before starting engine. -
Start engine and run at a minimum of 1500 rpm for 15 minutes.
CAUTION: Explosive release of fluids from pressurized cooling
system can cause serious burns.
TS281-UN-23AUG88Shut off engine. Only remove cap when cool enough to touch with bare hands. Slowly loosen cap to first stop to relieve pressure before removing completely.
-
Shut off engine and allow cleaning solution to cool.
-
Open hood, remove deaeration cap. Open radiator and engine drain valves. Drain solution into an approved container.
-
Close engine drain valve, and radiator drain valve.
-
IMPORTANT: Never pour cold water or coolant into hot engine.
Fill radiator with clean water.
CAUTION: Make sure that hood is closed before starting engine. -
Install deaeration cap and close hood. Start engine and run for a minimum of 1500 rpm for 15 minutes.
-
CAUTION: Explosive release of fluids from pressurized cooling
system can cause serious burns.
Shut off engine. Only remove cap when cool enough to touch with bare hands. Slowly loosen cap to first stop to relieve pressure before removing completely.
Turn off engine, allow clean water to cool.
-
Open hood, remove deaeration cap. Open radiator and engine drain valves. Drain water into an approved container.
-
Close engine drain valve and radiator drain valve.
-
Fill radiator with coolant.
CAUTION: Make sure that hood is closed before starting engine.NOTE: Coolant leaking on ground indicates air in high-pressure circuit is being discharged.
-
Install deaeration cap and close hood, start engine and run for a minimum of 1500 rpm for 15 minutes.
-
NOTE: Level may change when engine is running or during next few cycles.
Monitor coolant level for next several hours/overnight. Refill deaeration tank as required.
|
ClimaTrak is a trademark of Deere & Company John Deere is a trademark of Deere & Company |
OUO6092,000055E-19-20110330 |