Install Liquid System
-
IMPORTANT: Mid-body light bracket assembly must be removed to avoid interference when installing liquid system.
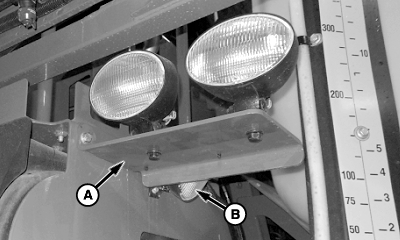
N101158-UN-09NOV12A - Mid-Body Light Bracket Assembly
B - Fill Station Light
If installed, remove and retain mid-body light bracket assembly (A) and fill station light (B). -
NOTE:
N100978-UN-01NOV12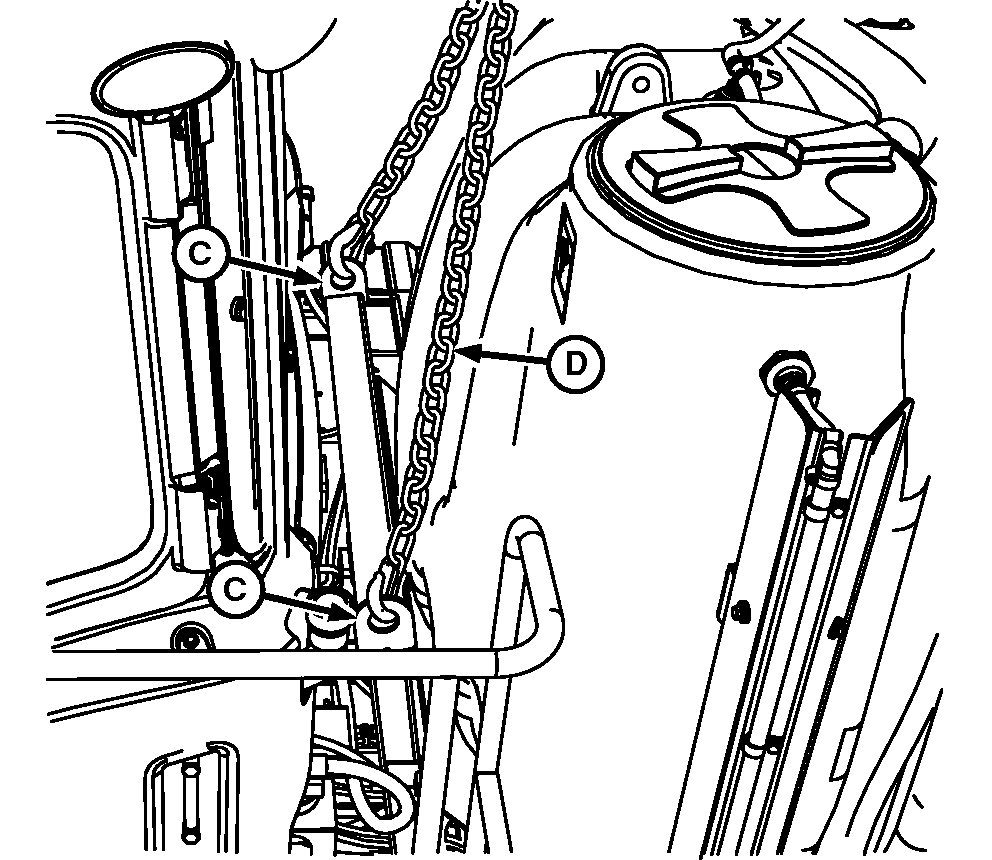
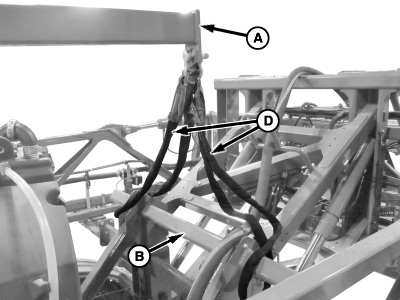
N100979-UN-19JUL13Lifting Points at Front of Liquid System (Poly)
N102740-UN-19JUL13Lifting Points at Front of Liquid System (Stainless)
A - Lift Bar
B - Rear Support Bar
C - Front Lift Points
D - Lifting Straps
This procedure contains steps pertaining to the installation of optional equipment for this machine. Ignore steps that involve equipment not being installed on your machine. CAUTION: Crane or hoist must have a rated lifting capacity of
at least 4536 kg (10,000 lbs) to install liquid system to machine.
Verify any additional lifting or connecting devices, such as anchor
shackles or clevises, are properly rated for the job.
CAUTION: Crane or hoist must have a rated lifting capacity of
at least 4536 kg (10,000 lbs) to install liquid system to machine.
Verify any additional lifting or connecting devices, such as anchor
shackles or clevises, are properly rated for the job.Faulty tank strap lift points or lift straps may allow liquid system to fall during installation and cause severe injury or death to you or others. Inspect tank strap lifting points and lift straps for wear before attaching and lifting.
NOTE: In order to install liquid system on machine, the crane or hoist must be able to lift liquid system at least 76.2 cm (30 in.). Verify there is sufficient clearance above liquid system.
Use ONLY John Deere lift bar approved for this machine.
To maintain proper control of lift bar and load balance, lifting straps or chains MUST be approximately 102 cm (40 in.) long in front and 97 cm (38 in.) long in back (Poly tank only).
Verify lifting straps or chains are not twisted when installed.
Attach lift bar (A) to rear support bar (B) and front lift points (C) with properly rated lifting straps or chains (D).
-
Carefully lift and set liquid system on machine.
-
IMPORTANT: Do not reuse hardware. Always use new hardware when installing liquid system.
To prevent axle guide plate deformation, DO NOT TIGHTEN any hardware until all hardware and shims are installed.
NOTE: Right side of machine shown.
N100988-UN-02NOV12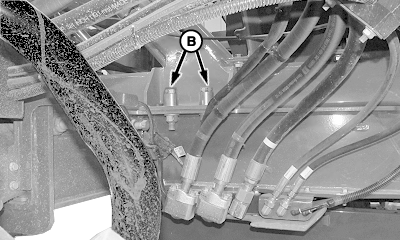
N100986-UN-07NOV12
N100990-UN-07NOV12A - Front Mounting Cap Screw (2 used)
B - Middle Mounting Cap Screw (6 used)
C - Rear Mounting Cap Screw (4 used)
Loosely install retaining hardware (A and B) on both sides of machine. -
Loosely install rear mounting hardware (C) at top of rear axle only.
-
Install provided shims, utilizing “hook” portion of shims, to fill gaps between axle guide plates and skid to minimize guide plate deformation when hardware is tightened.
-
Once gaps have been filled with shims, install lower mounting hardware (C).
-
Starting from rear of machine, tighten retaining hardware (C, B, and A) on both sides of machine to specification.
Item Measurement Specification Mounting Cap Screws Torque 425 N·m (315 lb.-ft.) -
Remove caps and plugs from hoses and fittings.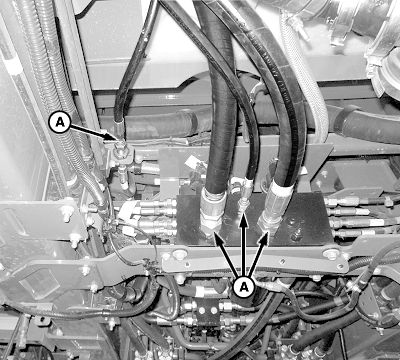
N100924-UN-02NOV12 -
IMPORTANT: Ensure hose labels are installed to corresponding ports on machine.
Damage to hydraulic system can occur if hoses are not installed correctly.
Case drain hose located near frame rail is a low pressure hose. Load sense hose located in valve block is a high pressure hose.
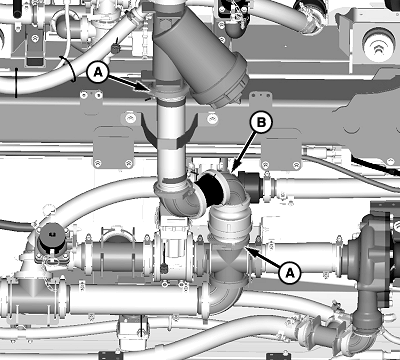
Install four hydraulic hoses (A) to hydraulic ports on underside of sprayer.
-

N110838-UN-20MAR14Suction Hose
N110839-UN-20MAR14Suction Hose—EU Conversion Bundle Installed

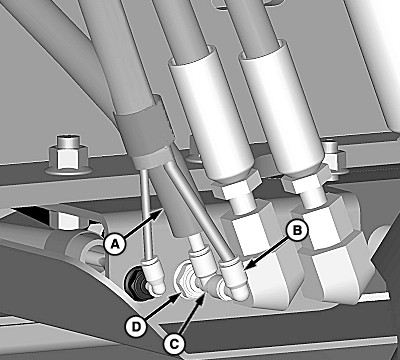
N101130-UN-08NOV12A - Flange Clamps
B - Suction Hose
C - Cap (2 used)
Remove cap (C) and cap on fill strainer. -
Install suction hose (B) using flange clamps (A).
-
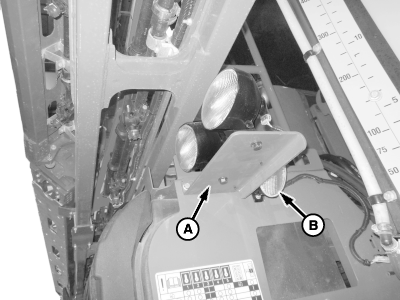
N100931-UN-31OCT12A - Mid-Body Light Bracket Assembly
B - Fill Station Light
Install mid-body light bracket assembly (A) and fill station light (B). -
Remove caps from electrical connectors.
-

N100881-UN-30OCT12A - 30-Pin Connector
B - 9-Pin Connector
C - Electrical Connector
D - Electrical Connector
Connect electrical connectors (A—C). Install CAN terminator to connector (D). -
CAUTION: On board air system is charged at 689 - 896 kPa (8.9
bar) (100 - 130 psi). To avoid injury to yourself or others, wear
safety goggles and gloves and be sure that others are clear of area
before relieving on board air system pressure.
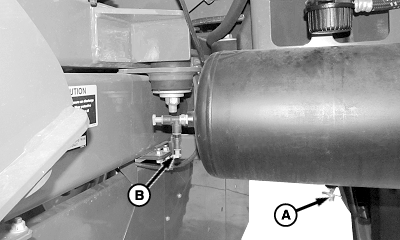
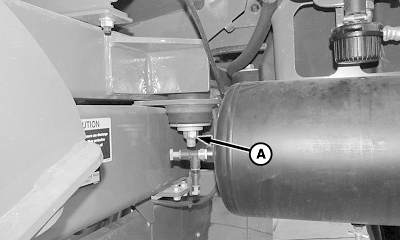
N101127-UN-07NOV12A - Drain Valve
B - Plug
Relieve air system pressure by opening drain valve (A). -
Remove plug (B) from air tank and connect foamer air supply hose (if equipped).
-
Tie band hoses as necessary to prevent damage.
-
N116113-UN-25FEB15A - Boom Air Purge Line
B - Elbow Fitting
C - T-fitting
D - Fitting
Locate boom air purge supply line (A) with T-fitting (C) where tie banded to solution system. -
Disconnect elbow fitting (B) from fitting (D).
-
Connect T-fitting (C) to fitting (D).
-
Connect elbow fitting (B) to T-fitting (C).
-
Tie band line (A) as necessary.
-
Disconnect all chains and lifting straps from liquid system.
-
Raise center frame to highest position.
-
Remove lift cylinder stops from lift cylinders.
-
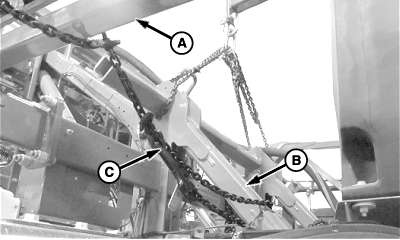
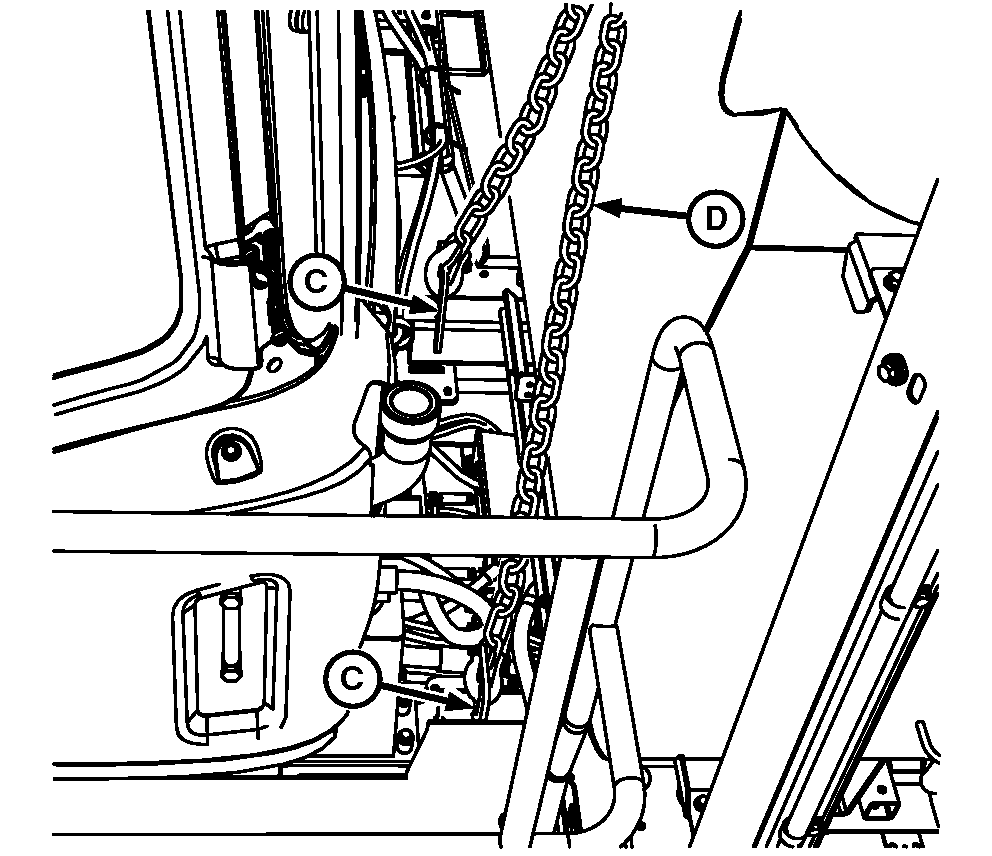
N101015-UN-05NOV12A - Boom
B - Solution Skid
C - Chain
Position booms as needed. Remove chain (C) from boom (A) and solution skid (B). -
Position boom sections as needed to relieve tension on safety chains. Remove safety chains.
-
Fold boom to transport position.
-
Add water to solution tank and flush system.
|
CS12167,0000736-19-20150407 |