Install Dry Spreader
-
 CAUTION: Crane or hoist must have a rated lifting capacity of
at least 2268 kg (5000 lb.). Verify any additional lifting or connecting
devices, such as anchor shackles or clevises, are properly rated for
the job.
CAUTION: Crane or hoist must have a rated lifting capacity of
at least 2268 kg (5000 lb.). Verify any additional lifting or connecting
devices, such as anchor shackles or clevises, are properly rated for
the job.Faulty strap lift points or lift straps can allow dry spreader to fall causing severe injury or death to you or others. Inspect strap lifting points and lift straps for wear before attaching and lifting.
Approximate weight of dry spreader is 1651 kg (3640 lb.) for the 7.38 cu. m (5.64 cu. yd.) (200 cu. ft.) spreader, 1696 kg (3740 lb.) for the 8.46 cu. m (11.06 cu. yd.) (300 cu. ft.) spreader, and 454 kg (1000 lb.) for second product bin insert.
Position chassis with adequate room around the unit. Make sure that endgate or second product bin insert is properly installed.
-
IMPORTANT: Lifting tools available as part of conversion bundle. See your John Deere dealer to order lifting tools.
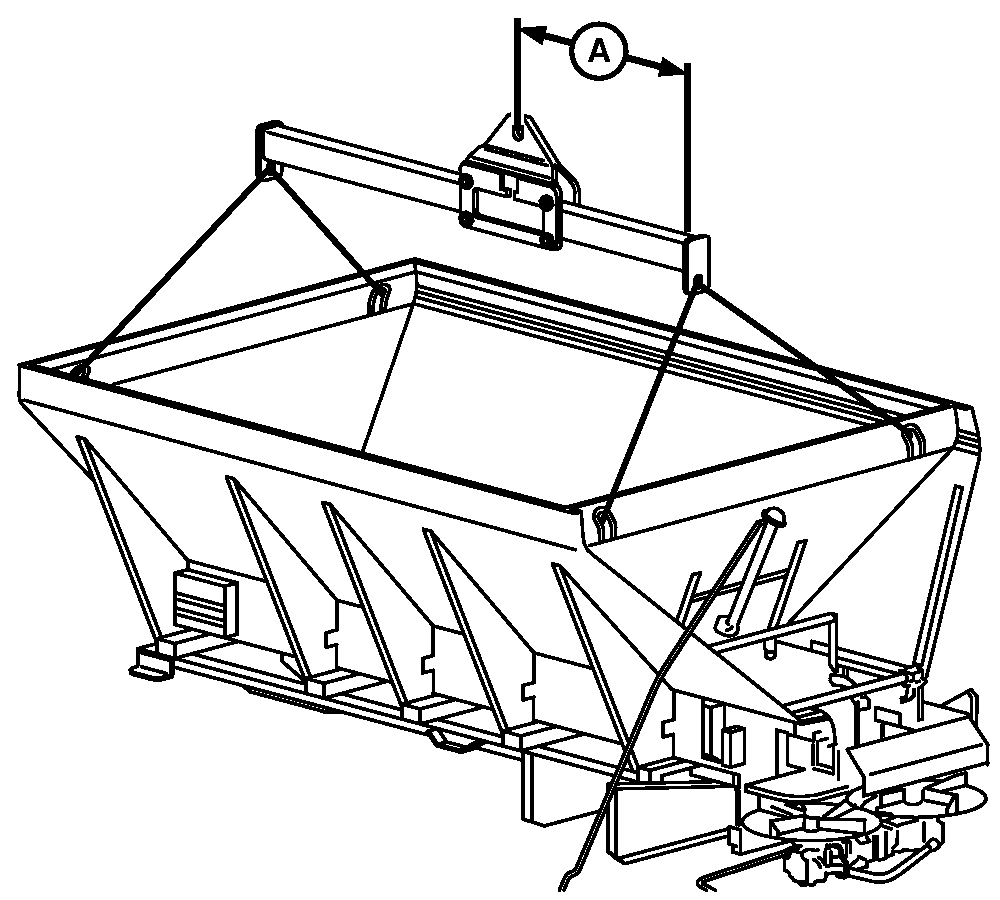
N88104-UN-10MAR10A - Dimension
Attach John Deere lifting device to each corner lift hook inside spreader. -
Adjust lifting device per dimension (A) given in table.
Dry Spreader Body
Dimension A
With Second Product Bin
99.1 cm (39 in.)
Without Second Product Bin
109.2 cm (43 in.)
-
NOTE:
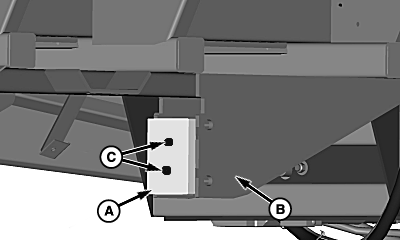
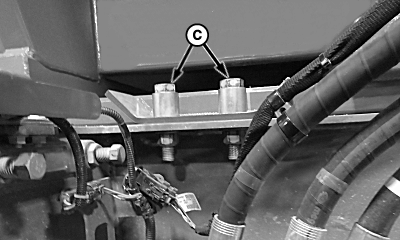
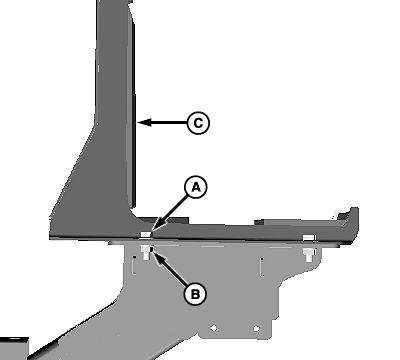
N116427-UN-12MAR15A - Spacer Block (2 used)
B - Rear Mount
C - Hardware
Left-hand side shown. Right-hand side similar.R4030 and R4038 dry spreader only machines:
-
Locate spacer blocks (A) in machine storage compartment.
-
Install spacer blocks to rear mounts (B) using provided hardware (C).
-
Repeat for other side.
-
-
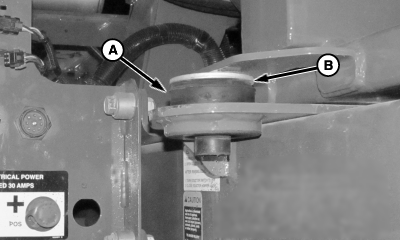
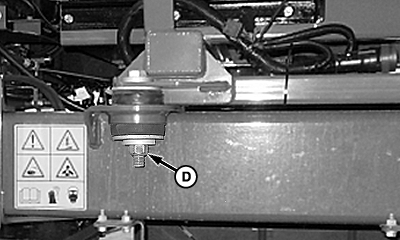
N97504-UN-14NOV12A - Rubber Mount
B - Washer
Install rubber mount (A) and washer (B) at front of chassis on both sides of machine. -
Position spreader with mounts located directly over chassis.
-
CAUTION: DO NOT WELD VEHICLE FRAME! Such welding can lead to
fatigue cracking and must be avoided.
N97030-UN-27FEB12Rear Mounts (First)
N97505-UN-14NOV12Center Mounts (Second)
N101379-UN-26APR13Front Mounts (Third)
A - Shims
B - Hardware, Rear Mount
C - Hardware, Center Mount
D - Hardware, Front Mount
Attach unit to chassis by loosely installing mounting hardware, starting at the rear, and moving forward. Add shims to rear mount between box and chassis. -
Tighten mounting hardware as specified.
Item Measurement Specification Rear Mounts (First) Torque 425 N·m (315 lb.-ft.) Center Mounts (Second) Torque 425 N·m (315 lb.-ft.) Front Mounts (Third) Torque 425 N·m (315 lb.-ft.) -
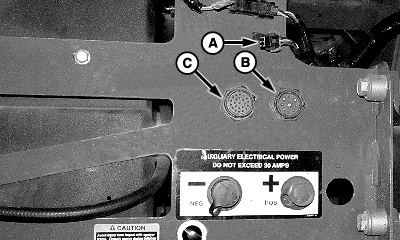
N100787-UN-14NOV12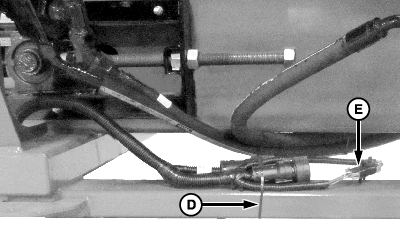
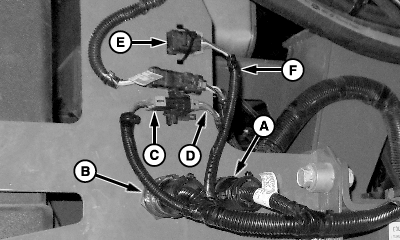
N100788-UN-14NOV12A - CAN Harness Connector
B - 9-Pin Connector
C - 23-Pin Connector
D - Tie Band
E - CAN Harness
Locate harness connection points (A, B, and C). -
Remove CAN termination resistor from CAN harness connector.
-
Remove tie band (D).
-
Disconnect CAN harness (E).
-
N100789-UN-14NOV12A - 9-Pin Connector
B - 23-Pin Connector
C - CAN Harness Connection
D - Machine Harness Connection
E - CAN Termination Resistor
F - Spreader CAN Harness Connection
Connect 9- and 23-pin connectors (A and B) to machine. -
Connect CAN harness (C) to machine harness (D).
-
Install previously removed CAN termination resistor (E) to spreader CAN harness (F).
-
Retain CAN termination resistor as shown and any loose harness with tie bands to prevent damage.
-
IMPORTANT:
N101109-UN-26APR13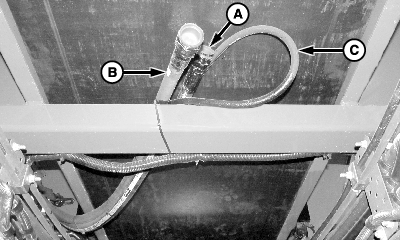
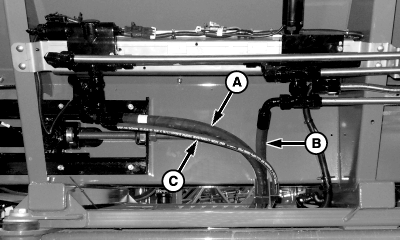
N101110-UN-14NOV12Behind Cab - Between Frame Rails
A - Pressure Line
B - Return Line
C - Load Sense Line
If a threaded connection is tightened too tightly, the fitting or housing into which the fitting is placed could be distorted and an unstoppable leak could occur.See HOSE INSTALLATION GUIDE in Specification section for proper hose assembly.
NOTE: Use thread sealer on all fittings, except O-ring and JIC adapters, O-ring valves and motors, and fittings. When using thread sealer, do not put it on the first three threads of the fitting. Too much on the fitting or on the first three threads will force it into the oil stream where it could damage the system.
See Metric Face Seal and O-ring Stud End Fitting Torque Chart in the Specifications section of this manual for proper fitting torque values.
Identify hydraulic lines (A, B, and C) on spreader.
-
N101113-UN-14NOV12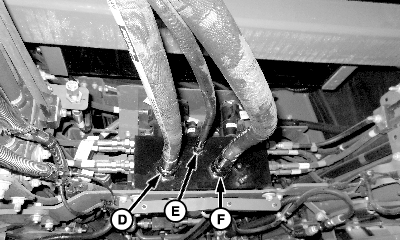
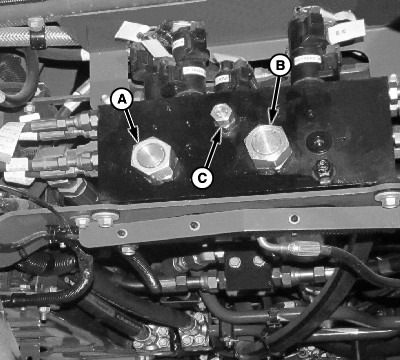
N101114-UN-14NOV12A - Pressure Port—M
B - Return Port—MT
C - Load Sense Port—BLS
D - Pressure Line
E - Load Sense Line
F - Return Line
Remove and retain caps from ports (A—C). -
Install pressure line (D) to M port.
-
Install load sense line (E) to BLS port.
-
Install return line (F) to MT port.
-
Tighten all connections to specification.
NOTE: After starting unit, running spinners and conveyor(s), check hydraulic oil level in reservoir, fill as necessary.
-
NOTE: Lights and brackets are factory installed in tilted position. Assembler must adjust both brackets so perpendicular to unit.
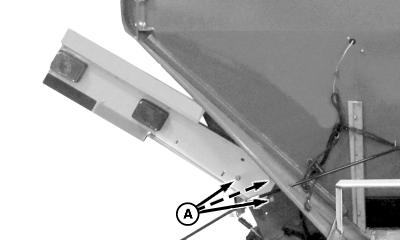
N101191-UN-13DEC12
N101192-UN-14NOV12A - Hardware
B - Correct Position
Remove hardware (A) and adjust bracket to correct position (B). -
Reinstall hardware.
-
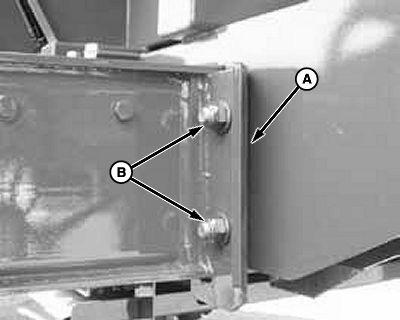
N101122-UN-14NOV12A - Cap Screw, 4 Used
B - Nut, 4 Used
C - Boom Cradle
Remove and retain cap screws (A), nuts (B), and boom cradle (C). Repeat for opposite side. -
N104339-UN-10JUN13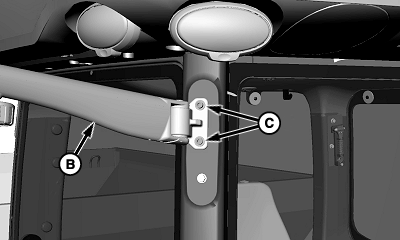
N104340-UN-10JUN13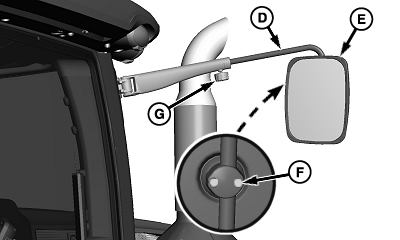
N104341-UN-10JUN13A - Cap Screw
B - Mirror Arm
C - Socket Head Screw and Washer, 2 used
D - Mirror Arm Extension
E - Mirror
F - Screw, 2 used
G - Knob
Remove and retain cap screws (A). -
Install mirror arm (B) as shown. Retain with supplied socket head screws and washers (C).
-
Install mirror arm extension (D) to mirror arm.
-
Install mirror (E) to mirror arm extension.
-
Adjust mirror for desired visibility.
-
Tighten screws (F) and knob (G) to retain mirror in desired position.
-

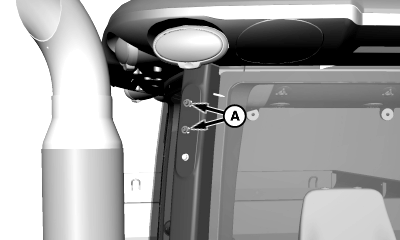
N118273-UN-23JUN15A - Left-Hand Mirror Support
B - M8 Lock Nut (4 used)
C - Mirror
D - Screws
Install left-hand mirror support (A) to handrail using M8 U-bolts and nuts (B). -
Install left-hand mirror (C).
-
Adjust mirror for desired visibility.
-
Tighten screws (D) to retain mirror in desired position.
-
Follow reverse order to remove dry spreader.
-
Refer to Spreadstar Section to operate and calibrate Dry Spreader.
NOTE: Before first-time use download Dry Rate Controller Spreadstar software through Software Delivery System (See your John Deere dealer).
|
CS12167,000080B-19-20150623 |