Remove and Install Stalk Rolls
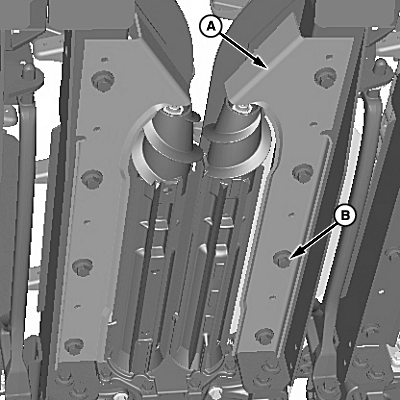
1. Remove four cap screws (B), washers, and trash knife (A) from underside of row unit frame.
|
|
 CAUTION:
Lower hydraulic cylinder safety stop before working under corn head.
CAUTION:
Lower hydraulic cylinder safety stop before working under corn head.
OUO1078,0000611 -19-20MAY08-1/5 |
|
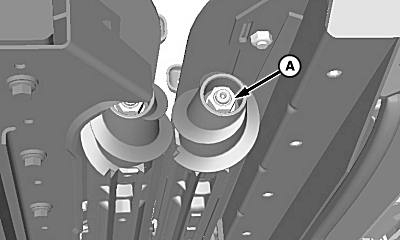
NOTE: Stalk rolls will turn when attempting to remove nut (A). Place a pry bar between the stalk roll and row unit frame to prevent stalk rolls from turning. 2. Remove and discard nut (A).
|
|
OUO1078,0000611 -19-20MAY08-2/5 |
|
3.
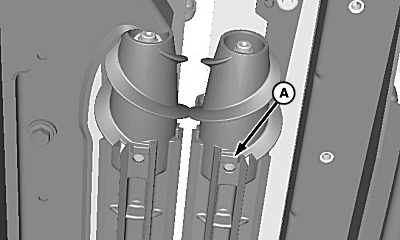
Stalk rolls can typically be pulled off by hand. If unable to do so locate the two ribs (A) on stalk roll. Remove stalk roll from shaft by attaching a 2-jaw puller to ribs.
4. Shaft taper should be free of rust and dirt. Inspect stalk rolls for wear or damage.
|
|
OUO1078,0000611 -19-20MAY08-3/5 |
|
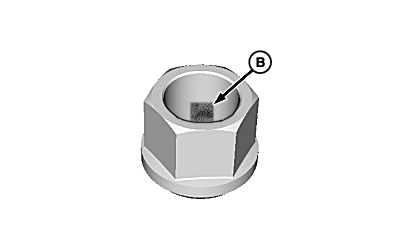
IMPORTANT: Stalk roll spherical nut (A) contains a pre-applied thread locking patch (B) and cannot be reused. A replacement nut must be purchased from John Deere Service Parts. 5. Align splines on stalk roll and shaft and install stalk roll. 6. Install replacement spherical nut (A) and tighten to specification. Specification
|
|
OUO1078,0000611 -19-20MAY08-4/5 |
|
7.
Install trash knife (A) and retain using four washers and cap screws (B).
8. Adjust trash knives. (See ADJUST TRASH KNIVES in the Adjustments section.) 9. Repeat procedure on opposite stalk roll.
|
|
OUO1078,0000611 -19-20MAY08-5/5 |