Use Front 3-Point Hitch (If equipped)
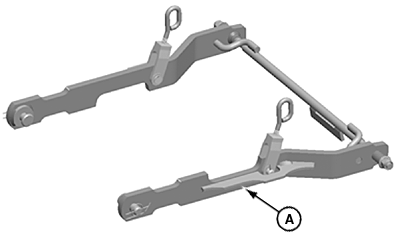
Installing A-Frame
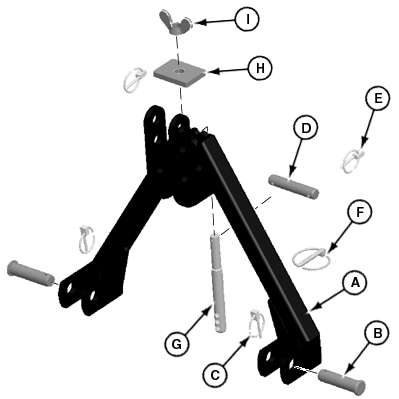
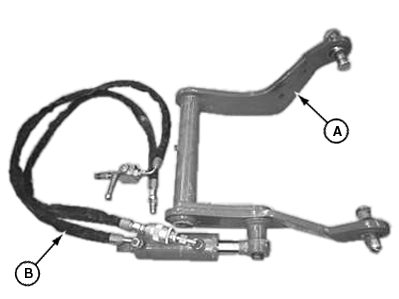
LV17893-UN-31MAY13
A - A-Frame
B - Cylinder pins
C - Lynch pins
D - Hinge pin
E - Lynch pin
F - Quick lock pin
G - Retainer rod
H - Retainer plate
I - Wing nut
List of parts for reference:
-
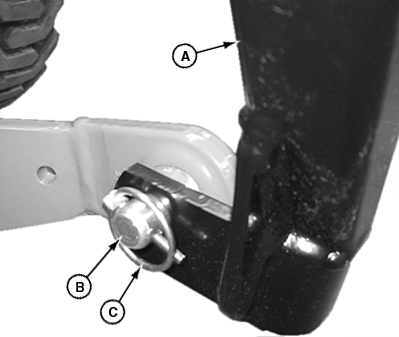
LV17894-UN-29MAY13A - A-Frame
B - Cylinder pins
C - Lynch pins
Install A-Frame (A) on lift arms. Insert cylinder pins (B) through A-Frame and lift arms and secure with lynch pins (C). -
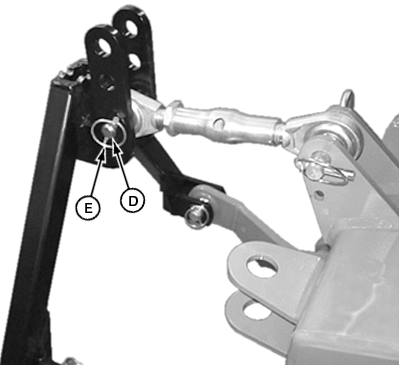
LV17895-UN-29MAY13D - Hinge pin
E - Lynch pin
Install front hitch center link on bottom hole of A-Frame with hinge pin (D) and lynch pin (E). -
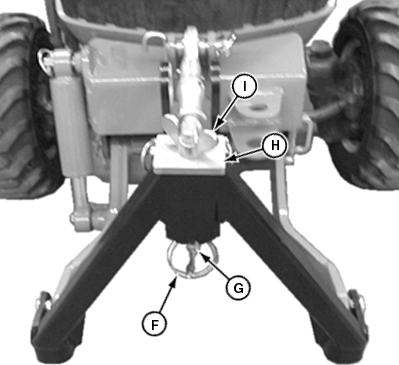
LV17896-UN-29MAY13F - Quick lock pin
G - Retainer rod
H - Retainer plate
I - Wing nut
Install quick lock pin (F) in retainer rod (G). Install retainer rod on A-frame using retainer plate (H), wing nut (I) and quick lock pin. -
Reverse procedure to remove A-frame.
Raising and Lowering Hitch
-
Check to be sure hitch is not in transport lock position.
-
Review instructions on using hydraulic dual selective control valve (SCV) and dual selective control valve lock lever included in your tractor operator’s manual.
-
Move the tractor dual SCV lever:
- To raise the hitch, move the lever rearward.
- To lower the hitch, move the lever forward.
Operating and Installing Loader with Front Hitch Installed
-
LV17900-UN-29MAY13A - Lift Frame
B - Cylinder Assembly
Remove the front hitch lift frame (A) and cylinder assembly (B).- Disconnect hydraulic hoses from mid SCV couplers.
- Remove the top retaining clip from the upper cylinder mount.
- Pull cylinder off the upper cylinder mount, replace retaining clip for future use.
- Remove the lift frame retaining clip from the lift frame pivot.
- Remove the lift frame pivot, lift frame, cylinder and hydraulic hose assembly.
-
Loader cannot be used in combination with the mid driven
front PTO. Remove the mid driven front PTO if installed.
Install and operate loader.
Using Rate of Drop Adjustment
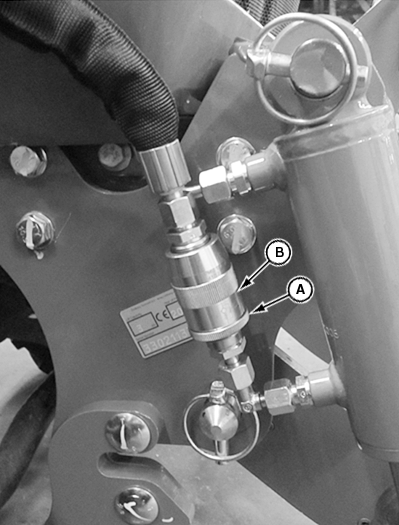
LV17897-UN-29MAY13
A - Lower nut
B - Fitting
- Loosen lower nut (A).
- Turn upper part of fitting (B) clockwise or counterclockwise to adjust.
- Tighten lower nut (A) to lock fitting.
To adjust the rate of drop:
Using Transport Lock Position
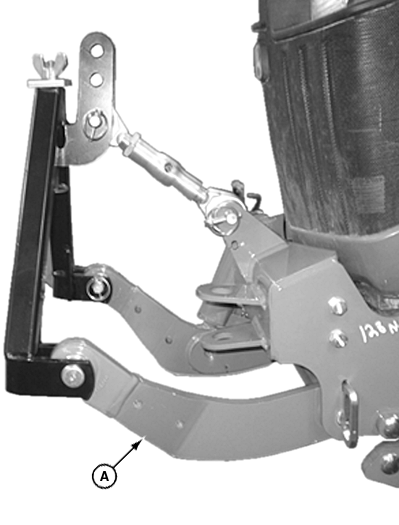
LV17898-UN-29MAY13
A - Lift frame
To place hitch in transport lock position:
-
Fully raise lift frame (A).
-
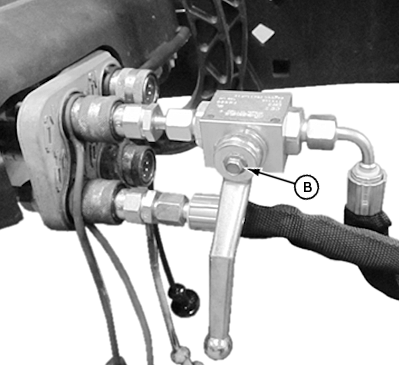
LV17899-UN-29MAY13B - Valve
Rotate valve (B) to the lock position.
Installing Implements on Front Hitch with A-Frame
Installing Implement:
-
Loosen wing nut and remove quick-lock pin.
-
Remove retainer rod with wing nut and retainer plate from A-frame.
-
Check to be sure that the implement hydraulic hoses are out of the way if applicable.
-
Drive tractor forward slowly and align A-frame with mount on implement.
-
Raise hitch to install A-frame on mount.
-
Install retainer rod with wing nut and retainer plate through mount and A-frame. Position wing nut as needed to install quick-lock pin in retainer rod.
-
Tighten wing nut to secure implement to A-Frame.
Removing Implement:
-
Loosen wing nut and remove quick-lock pin.
-
Remove retainer rod with wing nut and retainer plate from A-frame.
-
Disconnect and secure hydraulic hoses if applicable.
-
Lower the hitch to disengage A-frame from implement.
-
Back tractor away from implement slowly to remove A-frame from implement.
-
Install retainer rod with wing nut and retainer plate through mount and A-frame. Install quick-lock pin in retainer rod for future use.
Installing and Using Front Hitch with AutoConnect Mid-Mower
- When using the front hitch only, it is not necessary to remove any of the AutoConnect parts.
- When using the front hitch with the optional push brace kit installed, it is not necessary to remove any of the AutoConnect parts or hitch parts.
-
LV17966-UN-04JUN13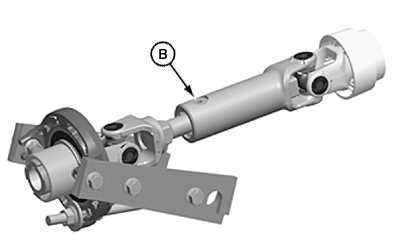
LV17967-UN-04JUN13A - Mower Deck Lift Assembly
B - AutoConnect Drive Shaft
When using the front hitch with a mid driven front PTO kit, the mower deck lift kit and AutoConnect drive shaft must be removed, if installed. -
To remove mower deck lift kit and AutoConnect drive shaft
-
Disconnect the AutoConnect drive shaft (A) from tractor.
LV18140-UN-17JUN13 - Remove retaining clips and pins (B) from left and right side of mower deck lift arms.
- Remove retaining clips and pins (C) from left and right side of mower deck lift arms
- Rotate P-hooks (D) and remove from lift brackets from left and right side.
-
Installing mid mount mower with front hitch:
-
Make sure lift frame is in the transport / highest position.
-
Install mower deck.
|
UP00731,0000197-19-20170127 |