Assemble Dethatcher
-
NOTE: The spacer (gg) fits inside the flange bearing (aa).
Assemble a 3/8 x 1-3/4 in. bolt (R), 3/8 in. washer (jj), flange bearing (aa), spacer (gg), and 3/8 in. locknut (dd) to the right hand bracket (K) as shown. Tighten nylock nut.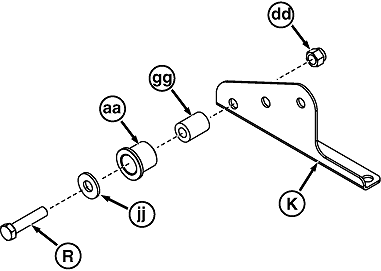
MXT008948-UN-14SEP13 -
Assemble a 3/8 x 1-3/4 in. bolt (R), 3/8 in. washer (jj), flange bearing (aa), spacer (gg), and 3/8 in. locknut (dd) to the left hand bracket (L) as shown. Tighten nylock nut.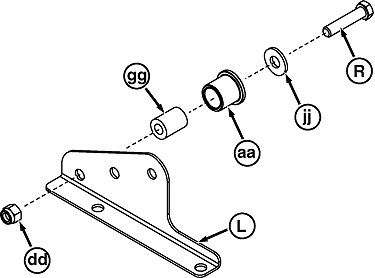
MXT008949-UN-14SEP13 -
Assemble a 3/8 x 0.9 in. shoulder bolt (V) and 3/8 in. locknut (dd) to the right hand bracket (K) and left hand bracket (L) as shown. Tighten nylock nut.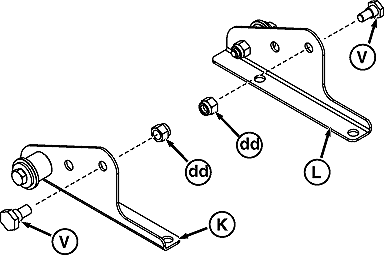
MXT008950-UN-14SEP13 -
Attach the right hand and left hand brackets to the tine spring shield (J) using two 3/8 x 3/4 in. bolts (W), 5/16 in. washers (ii), and 3/8 in. locknuts (dd) as shown. Tighten.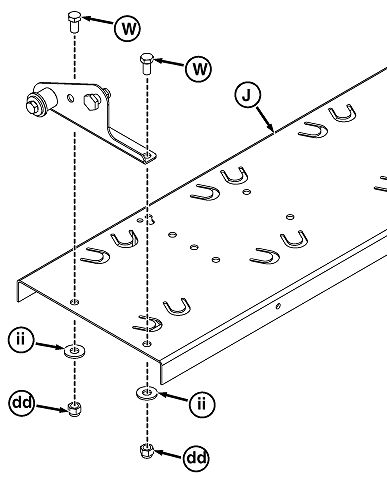
MXT008951-UN-14SEP13 -
Attach the two skid gauges (E) to each side of the tine spring shield (J) using four 1/4 x 3/4 in. bolts (X) and 1/4 in. locknuts (ff) as shown. Tighten locknuts.
MXT008952-UN-14SEP13 -
 CAUTION: Avoid injury! Tines are sharp. Wear heavy gloves when
working around tines.
CAUTION: Avoid injury! Tines are sharp. Wear heavy gloves when
working around tines.NOTE: Slight looseness of the spring tines under the bent tabs is normal.
Starting with the front row of tabs (ll), slide a spring tine under a set of tabs. Insert a screw driver (mm) or punch down into the platform and bend each tab until the end of the tab is bent down even with the surface of the platform. Repeat to attach all spring tines.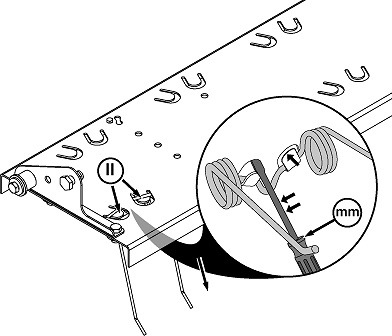
MXT008953-UN-14SEP13
|
OUO2005,00001EB-19-20131023 |