Removing and Installing Wheel Assembly (Models with E-Clip)
Removing
-
Park machine safely. (See Parking Safely in the Safety section.)
-
 CAUTION: The machine can fall or slip from an unsafe lifting
device or supports.
CAUTION: The machine can fall or slip from an unsafe lifting
device or supports.- Use a safe lifting device rated for the load to be lifted.
- Lower machine onto jack stands or other stable supports and block wheels before servicing.
IMPORTANT: Place jack stands under frame, not under transmission or engine, when raising or supporting machine.
Raise machine with a safe lifting device and lower machine onto jack stands or other stable supports. Block wheels remaining on the ground to prevent machine movement.
-
Remove the cap (A) from the end of the axle hub.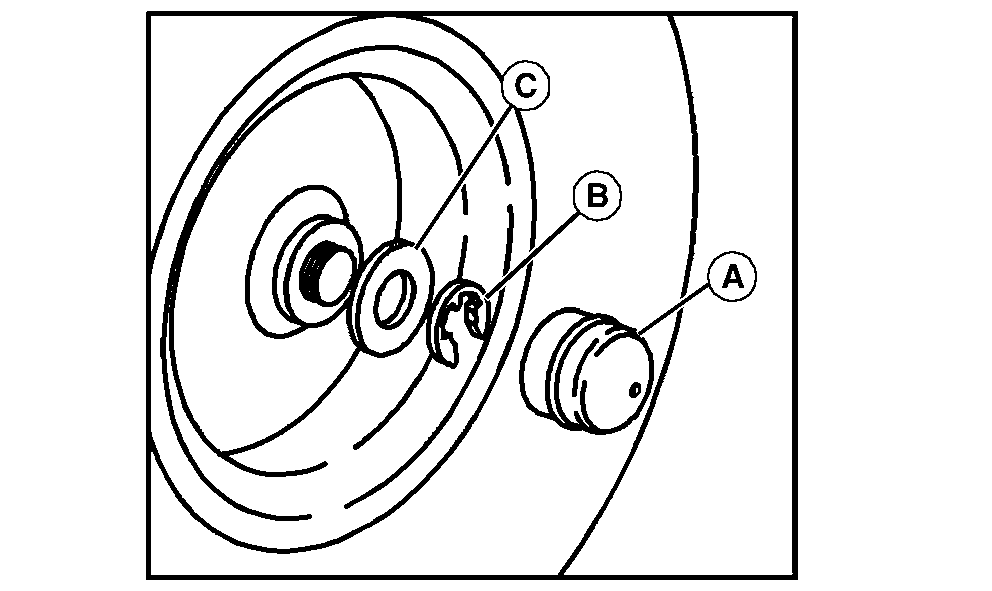
MXAL46438-UN-05APR13 -
CAUTION: Components are installed under spring tension. Wear
eye protection and use proper tools when installing and removing components
with spring tension.
Remove the E-clip (B) and washer (C).
-
NOTE: When removing rear wheel assembly, a shaft key may fall out of the axle shaft. If so, be sure to retain for installation.
Remove the wheel assembly.
-
CAUTION: Explosive separation of tire and rim parts is possible
when they are serviced incorrectly:
- Do not attempt to mount a tire without the proper equipment and experience to perform the job.
Take wheel assembly to an authorized service dealer for repairs.
Installing
-
Apply multipurpose grease to spindle shaft before installing wheel assembly.
-
NOTE: On rear wheel, be sure shaft key is in place on axle shaft before installing wheel assembly.
Install wheel assembly with valve stem to the outside and align slot in wheel assembly with key in axle shaft.
-
Install washer and E-clip.
-
Install cap.
|
SP66632,00044D4-19-20130409 |