Cassette Player

|
|
|
|
|
|
Your tape player is built to work best with tapes that are 30 to 90 minutes in length. Longer tapes may be so thin that whey will not work well in this player. Do not use cassettes that are in bad condition, damaged, dirty, or have been exposed to extreme heat or sunlight. Use of poor quality, damaged or dirty tapes could cause your tape player to fail. Cassette tapes wear out. When they are worn, sound quality is reduced. Always make sure that your tapes are in good condition before you play them. Metal tape sensing and equalization is automatic. An "M" icon will appear on the display when a metal tape is sensed. Your tape player should be cleaned every time it has been used for 35 hours. If it is not cleaned regularly, sound quality may deteriorate and your tapes or tape player could be damaged. See "Cleaning Your Cassette Player," for cleaning information. Playing a Cassette: 1.
Turn the receiver on.
|
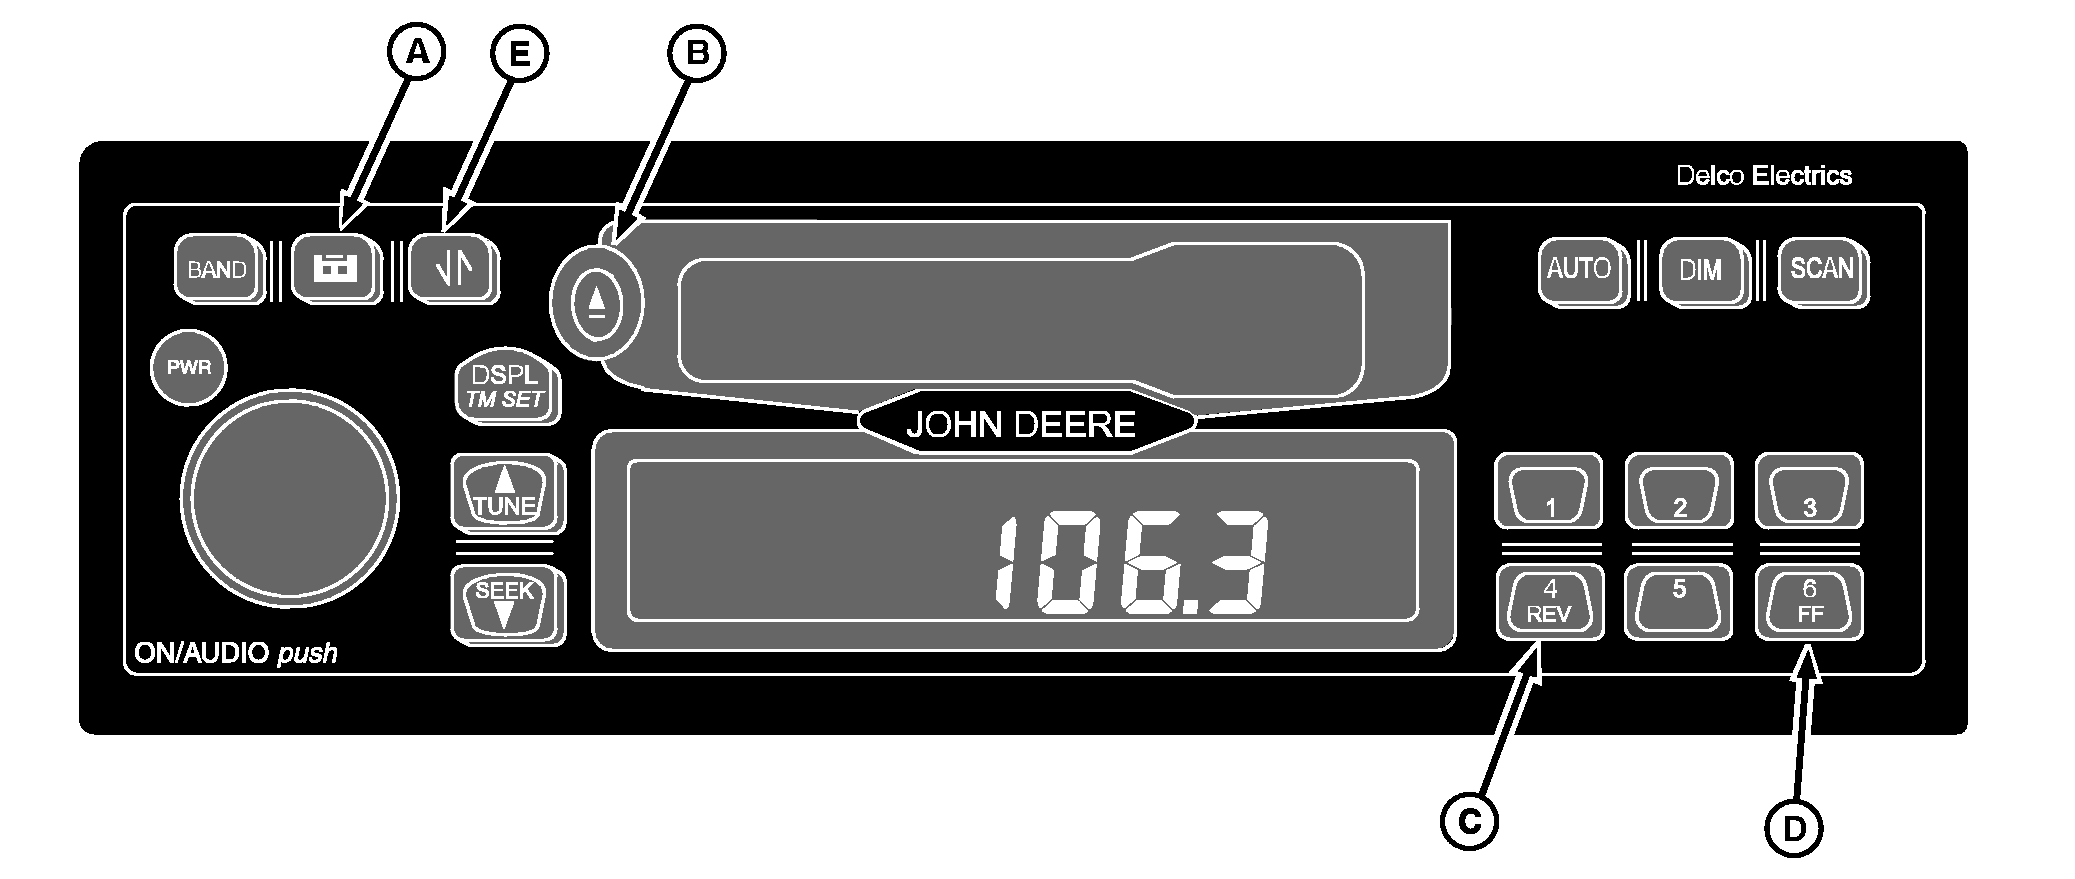
A tape may be inserted when the receiver is off by pressing eject (B) and inserting the tape within 25 seconds. Button Functions: 4/REV (C): Rewind. The tape will continue to rewind until rewind is stopped or the end of the tape is reached. The display will show "". Eject (B): Press to eject your tape from the tape player. When Eject is held, it acts as a stop button. Tape Reverse (E): Press this button to cause the tape to reverse directions and play the opposite side of the tape. Pressing the button again will cause the tape to reverse to the first side again. The tape will automatically reverse when the end of the tape is reached. |
AG,OUO1035,723 -19-21JUN99-1/3 |
|
Bad Tape Detect: If the receiver detects a bad cassette, "BAD TAPE" will appear on the display, and the tape will be ejected. The tape may be damaged or too tight. If it is damaged, try a new tape. If the tape is too tight, the player cannot turn the tape hubs. Remove the tape and hold it with the open end down. Try to turn the right hub counterclockwise with a pencil. Turn the tape over and repeat. If the hubs do not turn easily, your tape may be damaged and should not be used in the player. If you want to use a CD adapter or a cleaning cassette, the bad tape detector must be turned off. To turn the bad tape detector off: 1.
Turn the ignition on and the receiver off.
Cleaning Your Cassette Player: After 35 hours of cassette play, the display will read "TP CLEAN" for five seconds indicating that it is time to clean the cassette player. 1.
Turn the ignition on and the receiver off.
|
Operating Tips About Your Audio System: Hearing damage from loud noise is almost undetectable until it is too late. Your hearing can adapt to high volumes of sound. Sound that seems normal can be loud and harmful to your hearing. Take precautions by adjusting the volume control on your receiver to a safe sound level before your hearing adapts to it. To help avoid hearing loss: Understanding Radio Reception: FM STEREO: FM stereo will give you the best sound, but FM signals will reach only about 16-65 km (10-40 miles). Tall buildings or hills can interfere with FM signals, causing the sound to come and go. AM: The range for most AM stations is greater than for FM, especially at night. The longer range, however, can cause stations to interfere with each other. AM can pick up noise from things like storms and power lines. Try reducing the treble to reduce this noise if you experience it. Care of Your Cassette Player Always avoid: |
AG,OUO1035,723 -19-21JUN99-2/3 |
|
IMPORTANT: Before you add any sound equipment to your machine like a CB radio, mobile telephone or two-way radio, be sure you can add what you want. If you can, it's very important to do it properly. Added sound equipment may interfere with the operation of your vehicle's engine, radio or other systems, and even |
damage them. Your vehicle's systems may interfere with the operation of sound equipment that has been added improperly. Before adding sound equipment, check with your dealer and be sure to check Federal Regulations covering mobile radio and telephone units. |
AG,OUO1035,723 -19-21JUN99-3/3 |