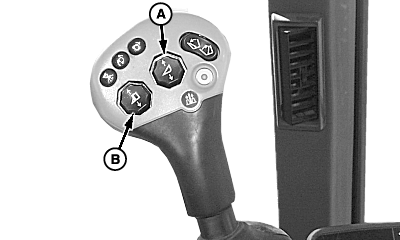
Changing Row SpacingNOTE: When changing row spacing always start with the No. 1 row unit. See Row Spacing Diagram in this section of manual. 1. Park on level surface.2. Remove row unit drive sheave. (See procedure in INSTALLING HEADER DRIVE ASSEMBLY in this section.) 3. Lower header to ground with button (A). Lower units to ground with button (B). 4. Turn off engine and remove key. |
|
OUO6043,0001583 -19-12DEC02-1/8 |
|
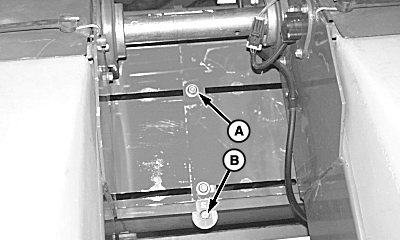
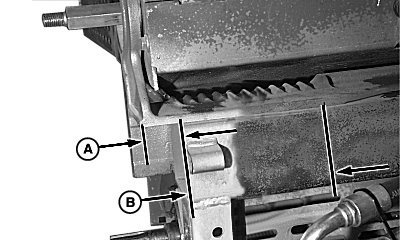
5.
Loosen two nuts (A) and slide plates together.
6. Remove flange head cap screw (B) and remove cover plate, if necessary. Repeat procedures on remaining cover plates.
|
|
OUO6043,0001583 -19-12DEC02-2/8 |
|
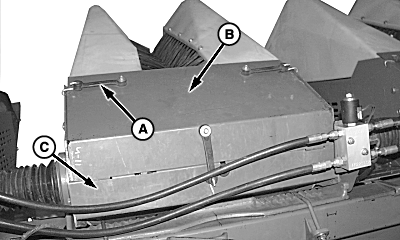
7.
Unfasten three hooks (A) and remove shield (B) and shield (C).
|
|
OUO6043,0001583 -19-12DEC02-3/8 |
|
8.
Remove flange head cap screw (B) and slide drive coupler (A) back into row unit.
|
|

OUO6043,0001583 -19-12DEC02-4/8 |
|
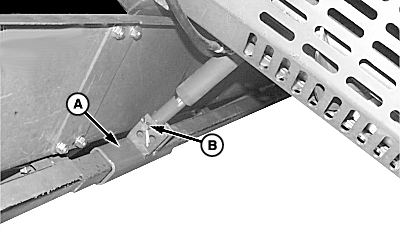
9.
Remove pin (B) from bracket (A) and remove cylinder from No. 1 row unit.
|
|
OUO6043,0001583 -19-12DEC02-5/8 |
|
10. Attach lifting device to row unit. Remove four flange nuts (B), two clamps (A) and two V-bolts (C).
|
|
 CAUTION:
Use extreme care when lifting row unit and NEVER permit any part of the body to be positioned under a load being lifted or suspended. The approximate weight of the row unit is 227 kg (500 lb).
CAUTION:
Use extreme care when lifting row unit and NEVER permit any part of the body to be positioned under a load being lifted or suspended. The approximate weight of the row unit is 227 kg (500 lb).

OUO6043,0001583 -19-12DEC02-6/8 |
11.
Determine which row spacing is being used and position row unit using the table below for proper dimension. Dimension (A) is measured from end of extension to outer edge of row unit. Dimension (B) is measured from end of extension towards the center of the row unit.
|
|
||||||||||||||||||||||||||||||||||
OUO6043,0001583 -19-12DEC02-7/8 |
|
NOTE: Maximize width of V-bolt placement on row unit mounting clevis. Position V-bolts within mounting pockets of top surface of mounting clevis. 12. Attach row unit to head using two V-bolts (C), two clamps (A) and four flange nuts (B). Tighten flange nuts using the following sequence: a. Snug bottom flange nuts. b. Tighten top flange nuts to specification. c. Tighten bottom flange nuts to specification. Specification
13. Position remaining row units to desired row setting using the same procedures. 14. Assemble in reverse order as removed. |
|
OUO6043,0001583 -19-12DEC02-8/8 |