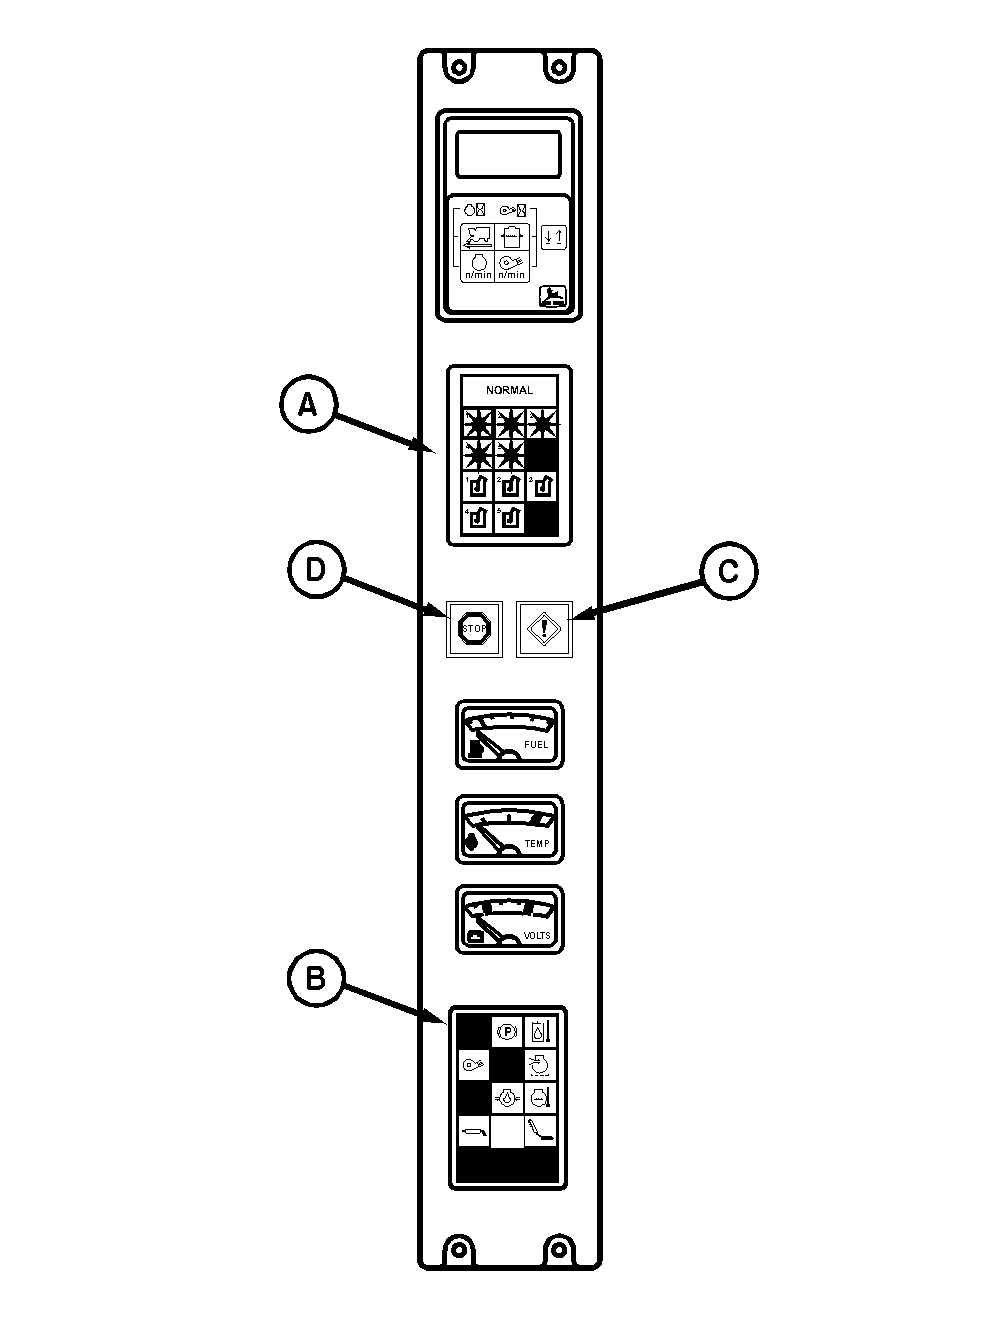
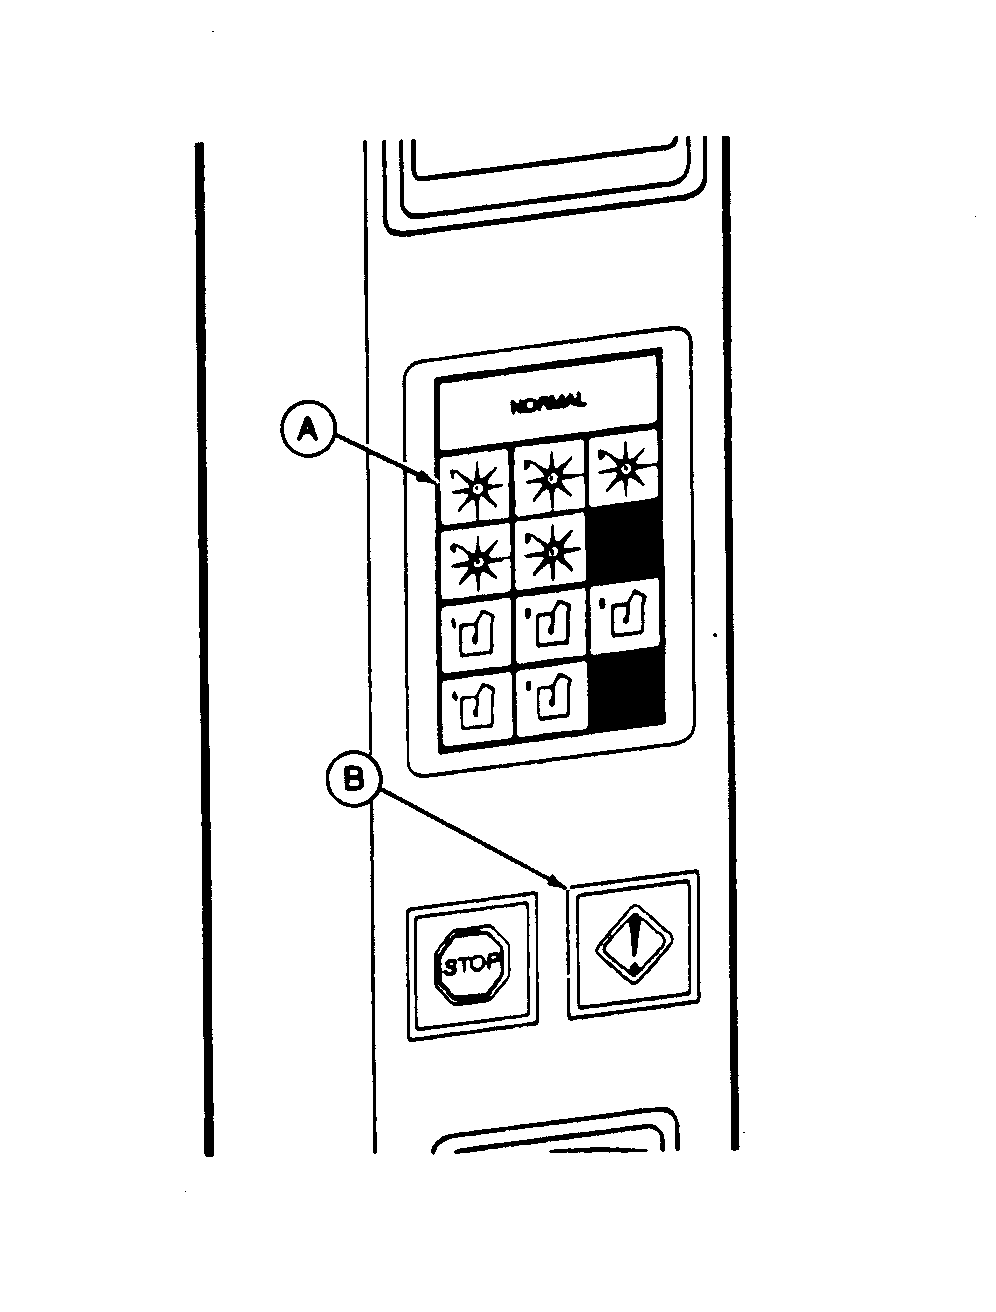
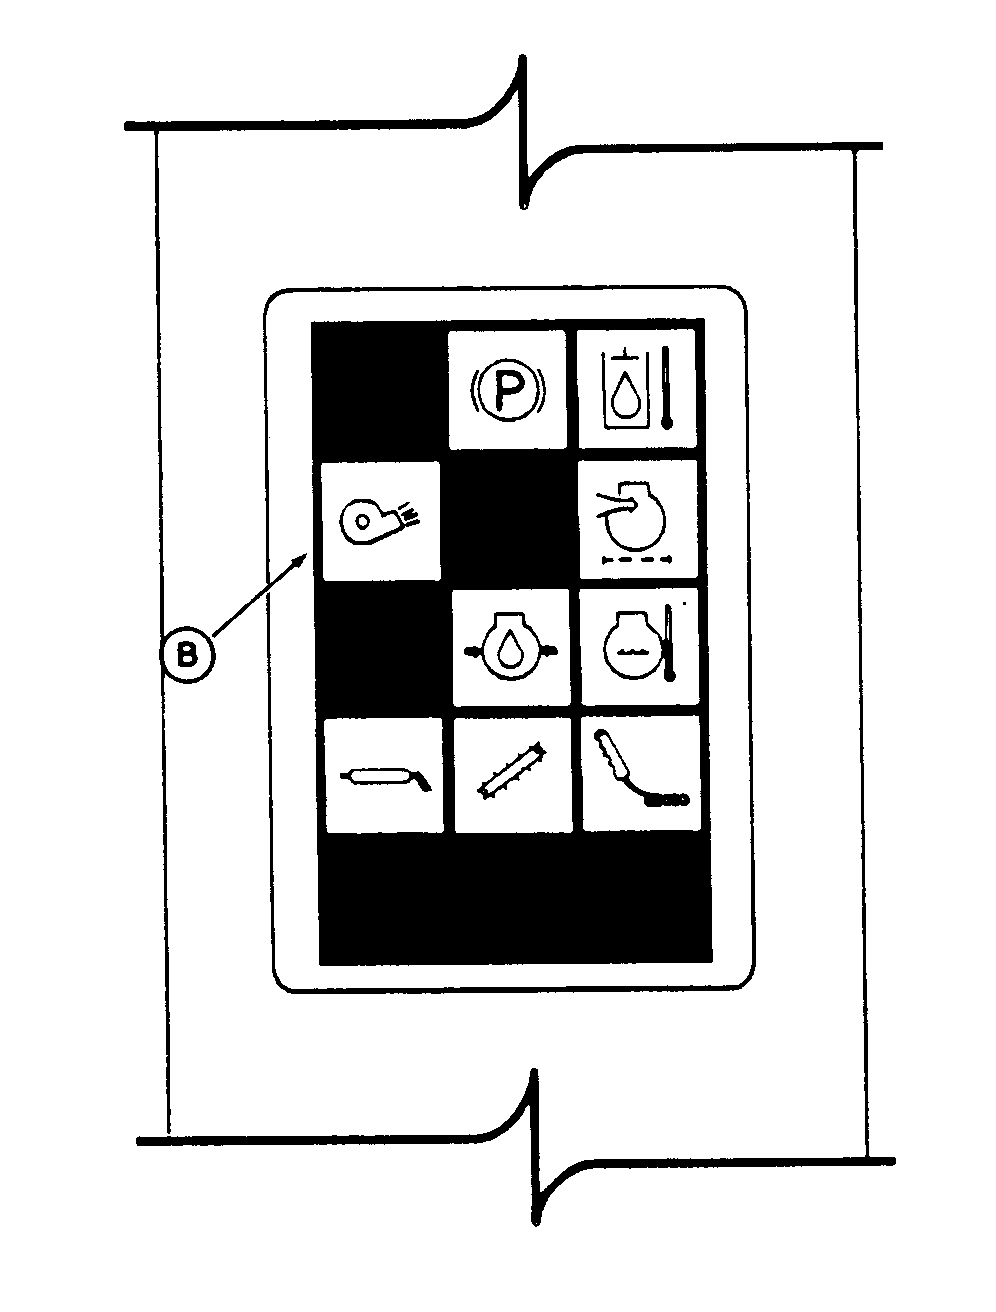
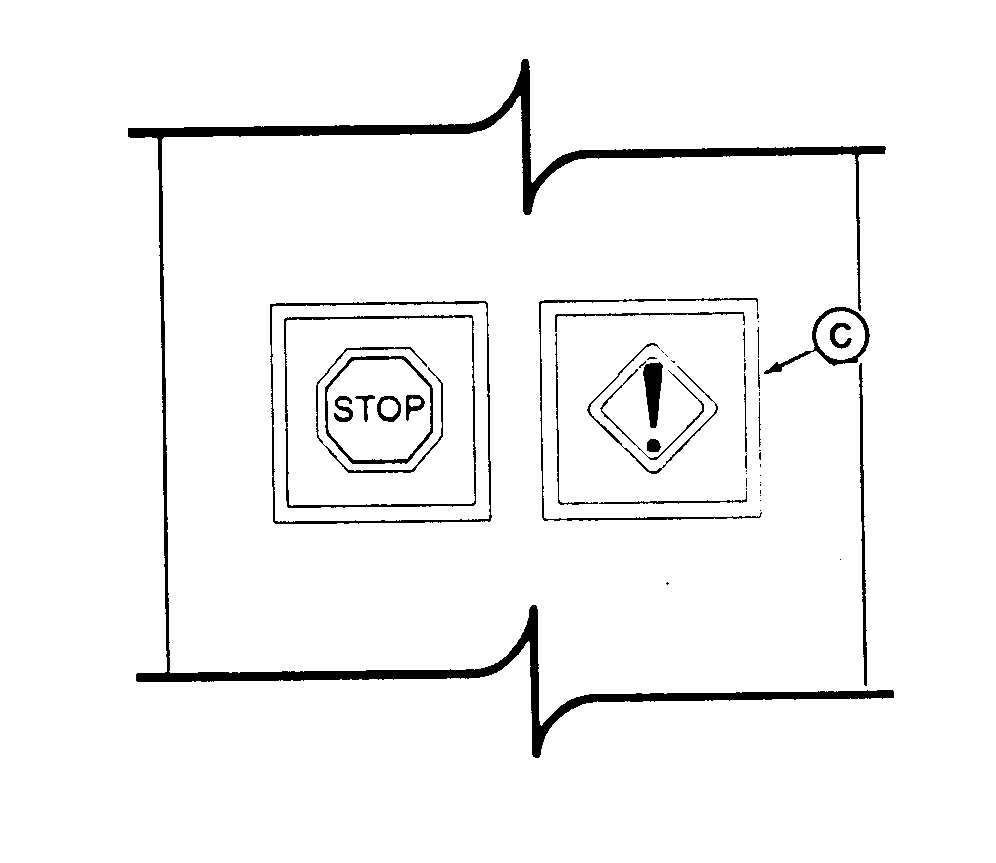
Monitor Checkout ProcedureNOTE: If any of the following steps do not perform as indicated, see your John Deere dealer. 1. Checking power, bulbs and alarm: a. Verify row units are disengaged. b. Place transmission in neutral. Move hydro handle to forward position. Engage park brake. c. Turn key switch to just before start position. d. LOOK: Monitor lights (A), indicator display lights (B), CAUTION indicator (C) and STOP indicator are all on.
|
|
OUO6043,000153E -19-25OCT01-1/6 |
|
NOTE: An assistant is required for the following procedure. 2. Checking Drum Rotation Monitor: a. With engine not running, transmission in "neutral", park brake engaged and row units disengaged, turn key switch to ON position. b. LOOK: Lights (A and B) are ON. c. LISTEN: ALARM is ON.
|
|
 CAUTION:
If you or others become entangled in moving parts, serious injury or death can result. Be sure machine is "OFF" and park brake is engaged before performing this step to prevent injury.
CAUTION:
If you or others become entangled in moving parts, serious injury or death can result. Be sure machine is "OFF" and park brake is engaged before performing this step to prevent injury.
OUO6043,000153E -19-25OCT01-2/6 |
|
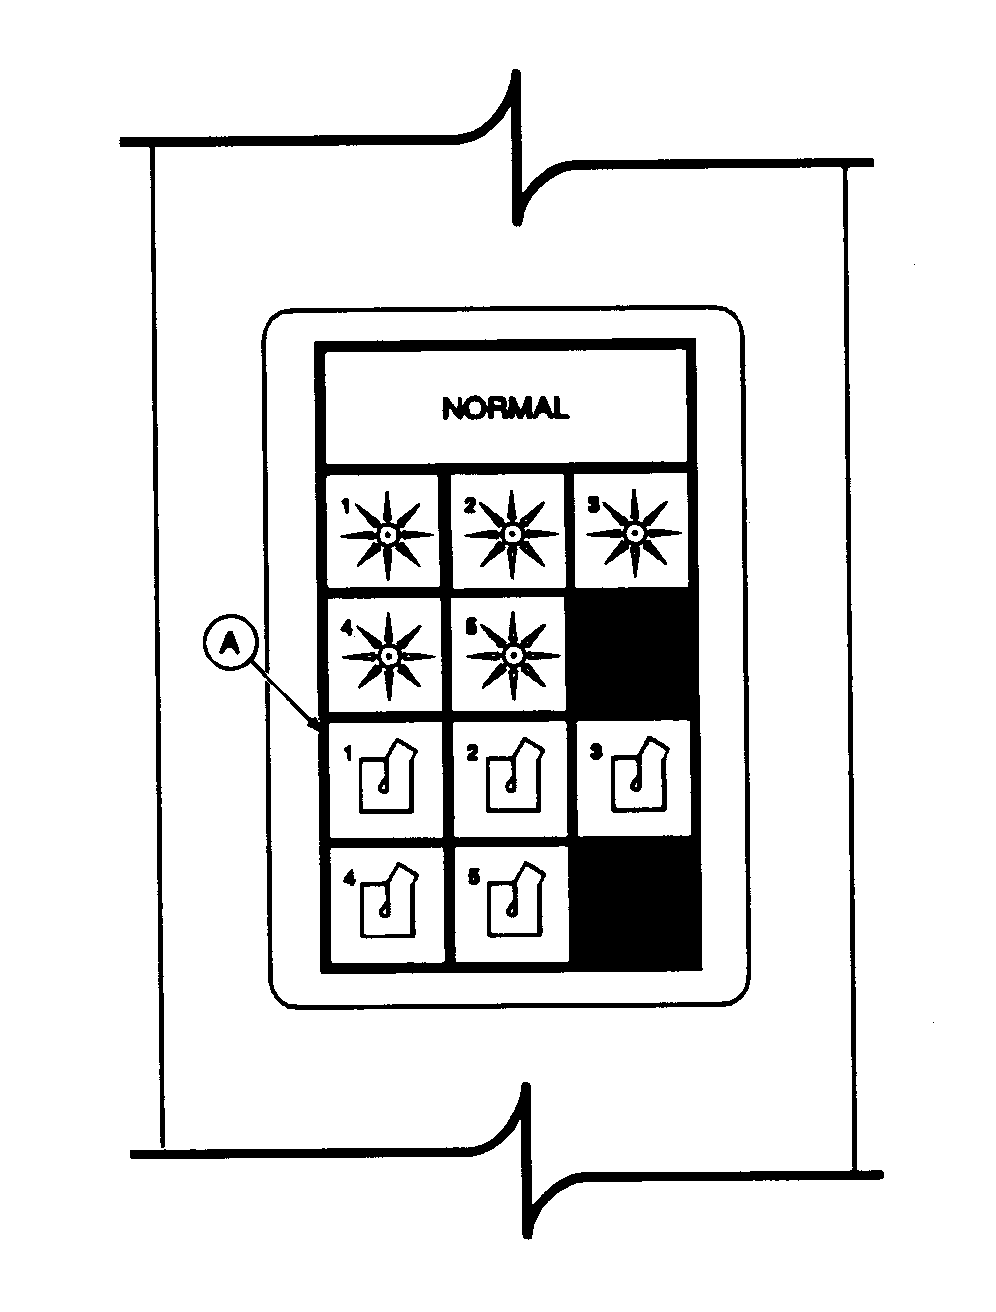
d. Have assistant rotate all drums backwards, causing idler clutch to slip. e. LOOK: Respective row unit light (A) and "STOP" indicator (B) is on for each individual unit. f. LISTEN: Alarm is ON.
|
|

OUO6043,000153E -19-25OCT01-3/6 |
|
|
|
NOTE: An assistant is required for the following procedure. 3. Verify correct operation of suction door indicators: a. With transmission in "neutral", park brake engaged and row units disengaged, turn key switch to ON position. DO NOT START ENGINE. b. LOOK: Door lights (A) and STOP indicator (B) are off. c. LISTEN: Alarm is off.
|
|

OUO6043,000153E -19-25OCT01-4/6 |
|
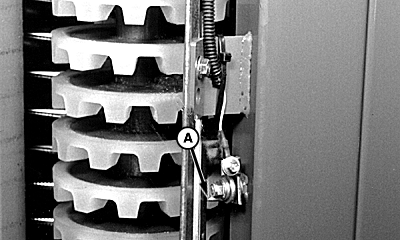
d. Have assistant push contact flap against grounding clip (A). e. LOOK: Respective door light and STOP indicator are on. f. LISTEN: Alarm is off. g. Repeat steps on remaining suction doors. h. If system does not react for all suction doors as stated above, contact flap and/or grounding clip may be dirty or out of adjustment. See ADJUSTING DOFFER ZONE MONITOR in this section. If cleaning or adjustment does not solve problem, see your John Deere dealer. |
|
OUO6043,000153E -19-25OCT01-5/6 |
|
|
|
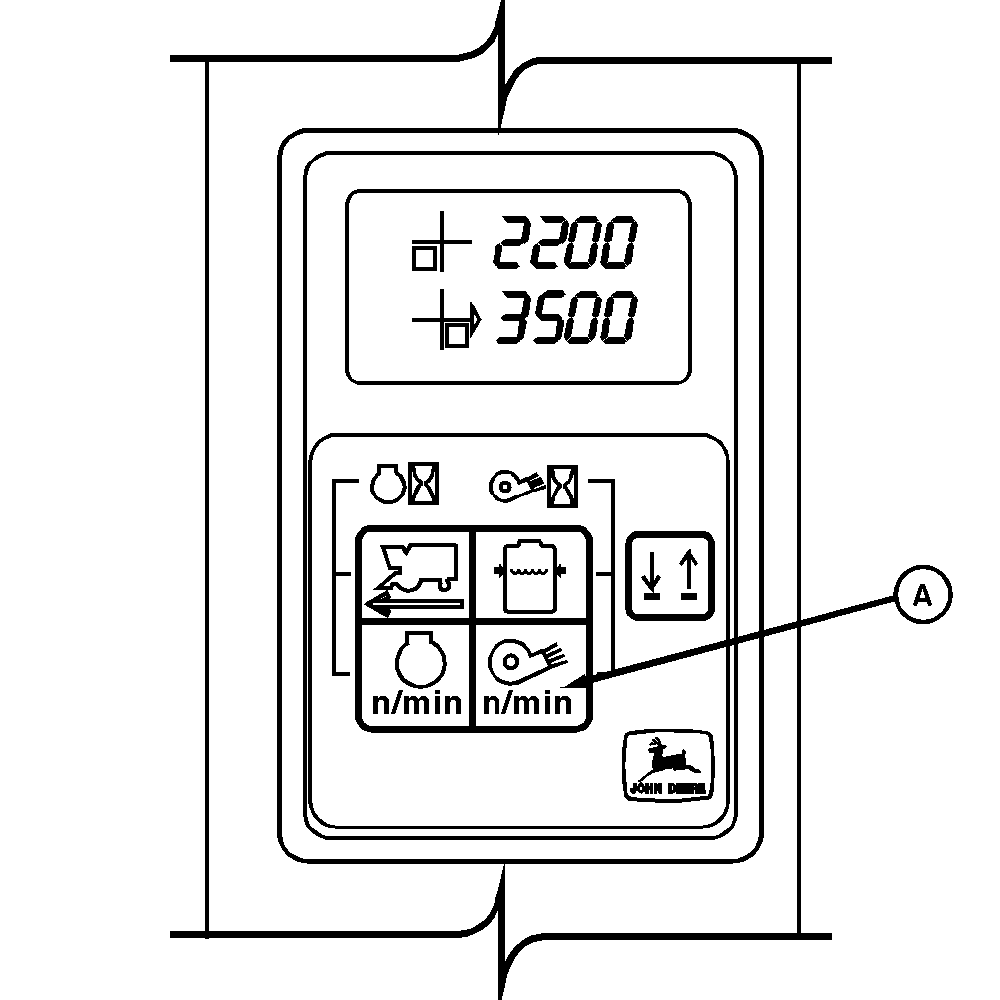
1.
Check fan speed:
a. Check fan speed by pressing switch (A). NOTE: See SETTING FAN SPEED ALARM SET POINT. b. Lower fan speed below set point rpm. LOOK: Fan light (B) and "CAUTION" light (C) is on. LISTEN: Alarm sounds for three seconds. c. Raise fan speed above set point rpm. LOOK: Fan light (B) and "CAUTION" light (C) are OFF. 2. If system does not react as stated, see your John Deere dealer.
|
|
OUO6043,000153E -19-25OCT01-6/6 |