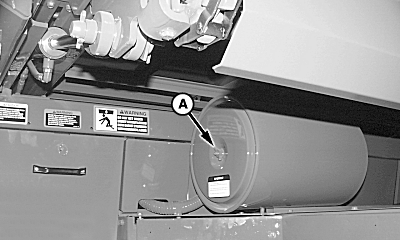
Removing And Replacing Air Cleaner ElementsIMPORTANT: Costly engine damage can result from excessive servicing of air cleaner elements. Install new primary and secondary elements at the beginning of each harvest season. Do not remove air cleaner elements unless air restriction indicator on overhead console comes on. When indicator light comes on, replace primary element. Only replace secondary element every other time that primary element is replaced.
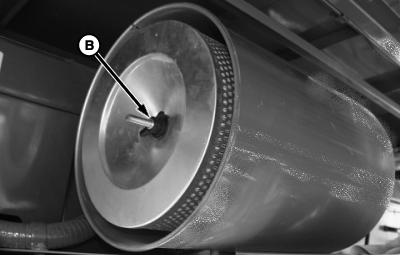
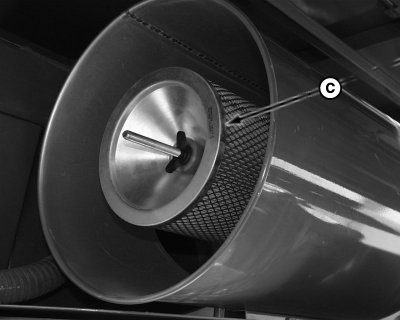
1. Remove cover wing nut (A) and cover. 2. Remove wing nut (B) and primary element. 3. Wipe inside of canister and cover with clean cloth. 4. Remove secondary element (C) ONLY if it is to be replaced. DO NOT ATTEMPT TO CLEAN SECONDARY ELEMENT. 5. Install element(s) with wing nut making sure elements are properly seated. 6. Replace cover, tighten wing nut.
|
|
|||||||
OUO6043,000149A -19-10SEP04-1/1 |