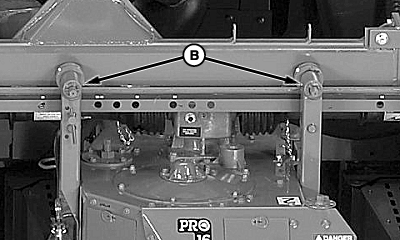
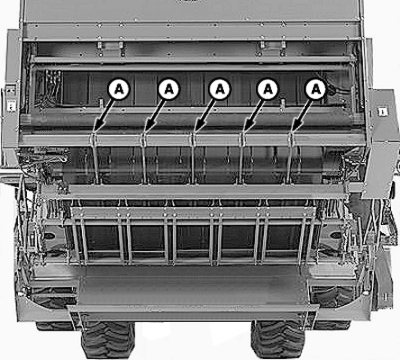
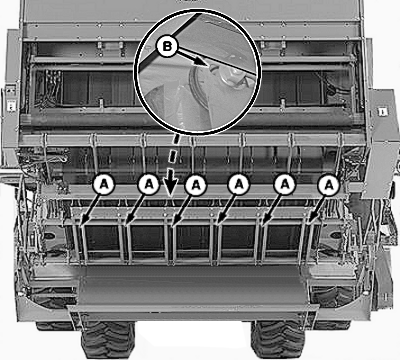
Every 100 Hours of Operation1. Lubricate universal joints and shafts on unit drive cross-shafts (A).2. Lubricate fittings (B) on unit support frame rollers (2 per unit).
|
|
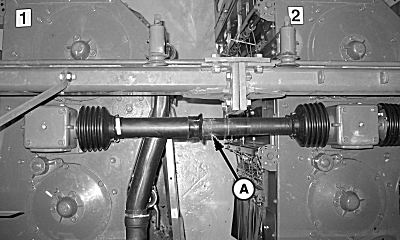
OUO1078,0000271 -19-15APR09-1/16 |
|
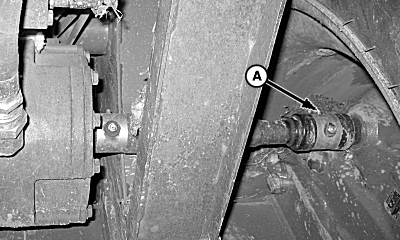
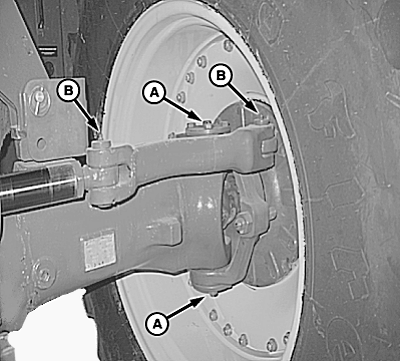
3.
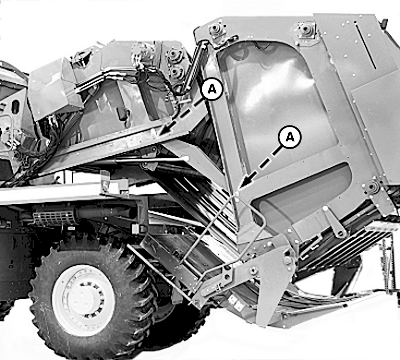
Lubricate fitting (A) on both final drive axle couplers.
|
|
OUO1078,0000271 -19-15APR09-2/16 |
|
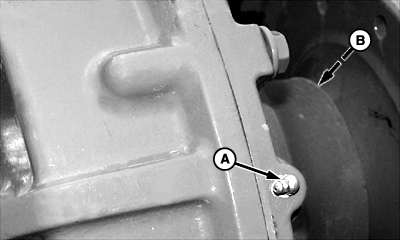
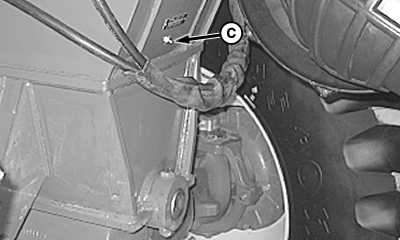
4.
Lubricate final drive outer axle bearings:
NOTE: Final drive grease fitting is located on edge of final drive next to inside rim of front tires. a. Locate final drive lubrication fitting (A). b. Lubricate final drive outer axle bearing using JDMJ13E4 Severe-Duty (SD) Polyurea Grease UNTIL grease comes out of external oil seal (B). c. Verify that grease has come out around the external oil seal completely by wiping around seal with clean rag. d. Repeat procedure for other side. |
|
OUO1078,0000271 -19-15APR09-3/16 |
5.
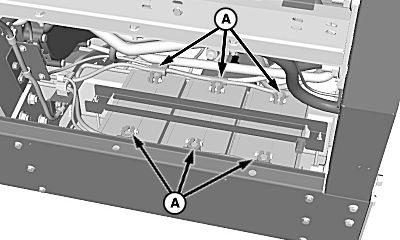
Lubricate grease fittings on rear powered axle.
|
|
OUO1078,0000271 -19-15APR09-4/16 |
|
IMPORTANT: Check wheel hardware torque after one hour and one day of operation, each time bolts are loosened. 6. Tighten drive wheel cap screws to specification. Specification
|
|
OUO1078,0000271 -19-15APR09-5/16 |
|
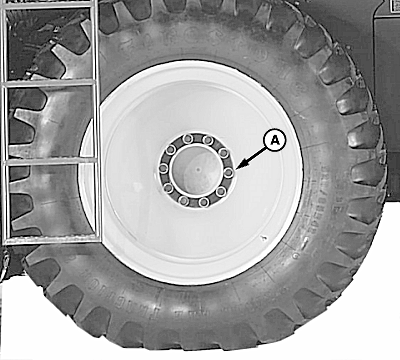
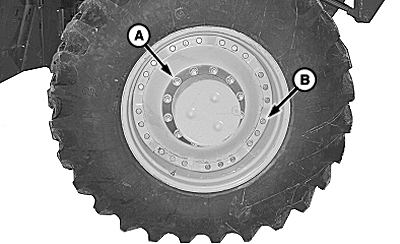
IMPORTANT: Check wheel hardware torque after one hour and one day of operation, each time bolts are loosened. 7. Tighten power rear axle wheel cap screws (A) to specification. Specification
8. Tighten power rear wheel center disk to waffle rim cap screws (B) to specification. Specification
|
|
OUO1078,0000271 -19-15APR09-6/16 |
|
IMPORTANT: Module Builder should be in lowered transport position before attempting belt maintenance procedures. 9. Check lower feeder belt tension (A). (See CHECKING AND ADJUSTING LOWER FEEDER BELT TENSION in Module Builder section.)
|
|

OUO1078,0000271 -19-15APR09-7/16 |
|
10.
Check wrap floor belt tension (A). (See CHECKING AND ADJUSTING WRAP FLOOR BELT TENSION in Module Builder section.)
|
|
OUO1078,0000271 -19-15APR09-8/16 |
|
11.
Check wrap feeder belts (A) for proper tension. Adjust using slots (B). (See CHECKING AND ADJUSTING WRAP FEEDER BELTS in Module Builder section).
|
|
OUO1078,0000271 -19-15APR09-9/16 |
|
12.
Lubricate module builder gate link bushing pivots (A), three on each side.
|
|
OUO1078,0000271 -19-15APR09-10/16 |
|
13.
Clean all battery connections (A). (See SERVICING BATTERIES in Batteries section for proper procedure).
|
|
OUO1078,0000271 -19-15APR09-11/16 |
|
14.
Check transmission fluid level. Fluid should be in between the two lines on sight glass (A). Add proper lubricant as needed. (See HYDRAULIC/HYDROSTATIC AND TRANSMISSION/BRAKE OILS in Fuels, Lubricants, and Coolants section for proper lubricant specifications.)
|
|

OUO1078,0000271 -19-15APR09-12/16 |
|
15.
Check pump drive gearbox oil level. Oil level should be visible halfway on gearbox sight glass (A). (See HYDRAULIC/HYDROSTATIC AND TRANSMISSION/BRAKE OILS in Fuels, Lubricants, and Coolants section for proper lubricant specifications.)
|
|

OUO1078,0000271 -19-15APR09-13/16 |
|
IMPORTANT: The gearbox pump drive filter should be changed after the initial 100 hours ONLY. After this initial change, resume normal service intervals. 16. Change gearbox pump drive filter (A). (See HYDRAULIC/HYDROSTATIC AND TRANSMISSION/BRAKE OILS in Fuels, Lubricants, and Coolants section for proper lubricant specifications.)
|
|

OUO1078,0000271 -19-15APR09-14/16 |
|
Adjust Laydown Roller Chain
1. Position machine in transport mode. (See Positioning Machine For Transport in Operating The Machine Section.) 2. Remove three lynch pins (A) and shield (B).
|
|

OUO1078,0000271 -19-15APR09-15/16 |
|
3.
Place a straight edge (B) from drive sprocket (A) to idler sprocket (C).
4. Center deflection of the chain should be within specification. Specification
5. If the center displacement of the chain does not fall in this range, loosen the idler sprocket nut and adjust to specification. 6. If adjustment is done to the idler sprocket, tighten idler sprocket nut to specification. Specification
7. Recheck chain tension after tightening the idler sprocket nut. Adjust again if necessary. 8. Install shield and lynch pins. |
|

OUO1078,0000271 -19-15APR09-16/16 |