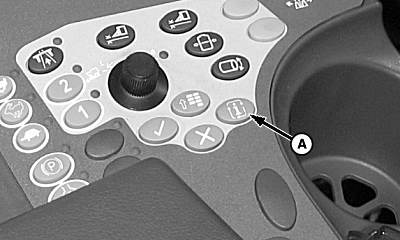
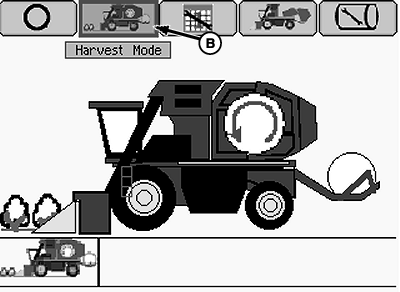
Calibrate Row UnitsNOTE: Machine must be in field configuration before beginning calibration procedures. 1. Locate cotton picker on a level concrete surface. NOTE: The hydraulic system needs oil temperature to be approximately 50 °C (120 °F). 2. Start engine and let idle until oil temperature is approximately 50 °C (120 °F). 3. Raise and lower row units several times to warm up components. 4. Press info button (A). 5. Highlight (B) and press enter to put machine into harvest mode.
|
|
OUO1078,0000289 -19-17APR09-1/6 |
|
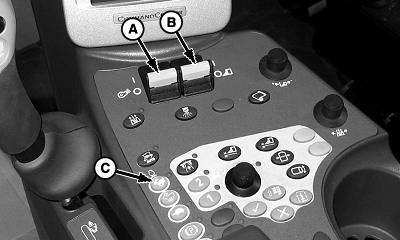
6.
Enable fan switch (A) and row unit switch (B).
NOTE: The hydraulic system needs oil temperature to be approximately 50 °C (120 °F). 7. Press button (C) to run engine at high idle.
|
|
OUO1078,0000289 -19-17APR09-2/6 |
|
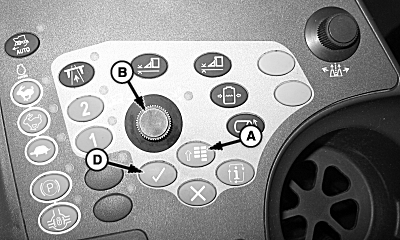
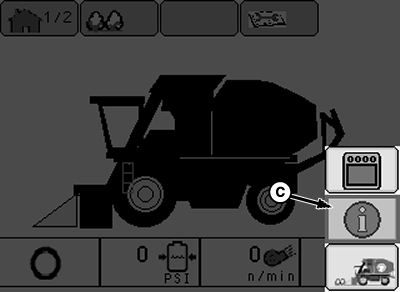
8.
Press the menu button (A) and select the info icon (C) using display dial (B).
9. Press the enter button (D) to enter the info screen.
|
|
OUO1078,0000289 -19-17APR09-3/6 |
|
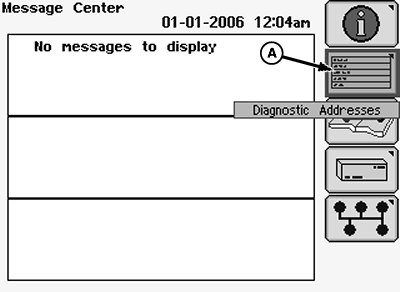
10.
Using the display dial, select the diagnostic addresses icon (A) and press the enter button.
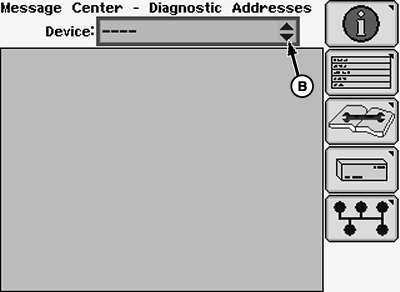
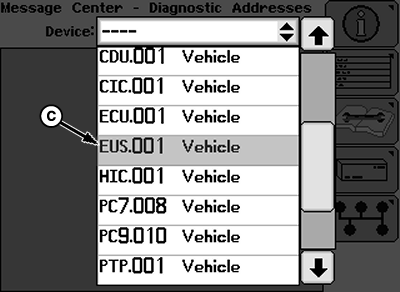
11. Select the drop-down menu (B) and scroll to find "EUS.001 Vehicle". 12. Select "EUS.001 Vehicle" and press the enter button.
|
|
OUO1078,0000289 -19-17APR09-4/6 |
|
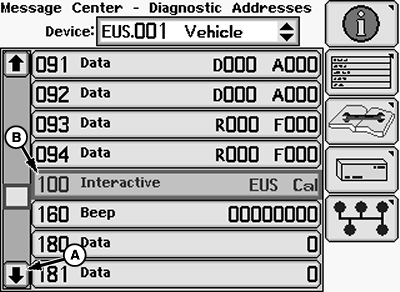
13.
Using the display dial, select the down scroll arrow (A) until "100 Interactive EUS Cal" is found.
14. Select "100 Interactive EUS Cal" (B) and press enter on the armrest.
|
|
OUO1078,0000289 -19-17APR09-5/6 |
|
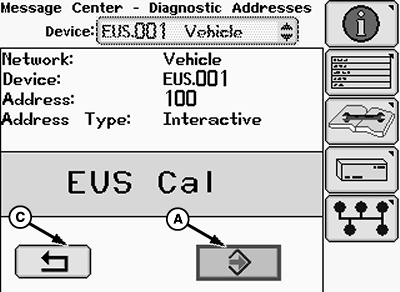
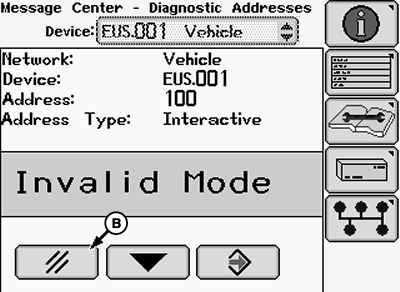
15. Highlight (A) and press enter to begin row unit calibration. NOTE: If screen appears reading "Invalid Mode," select cancel (B), and ensure steps 1-4 have been completed. 16. Row units will begin to run at different speeds. 17. Once calibration is complete "DONE" will be displayed on the Armrest Display Unit (ADU). 18. Highlight (A) and press enter to save calibration. 19. "EOC" will be displayed on the Armrest Display Unit (ADU). 20. Highlight return icon (C) and press enter to exit address. 21. Press the menu button on the armrest and select the home screen icon to return to the home screen. 22. If more calibrations will be done select "keep diagnostics running," if not select "close diagnostics." |
|
 CAUTION:
Moving spindles and drive shafts can cause death or injury if you or others become entangled. Stay clear and use caution around moving parts.
CAUTION:
Moving spindles and drive shafts can cause death or injury if you or others become entangled. Stay clear and use caution around moving parts.
OUO1078,0000289 -19-17APR09-6/6 |