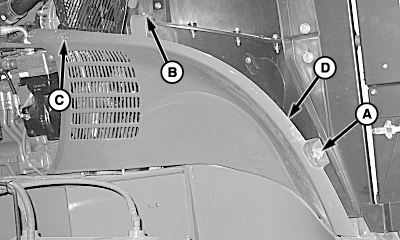
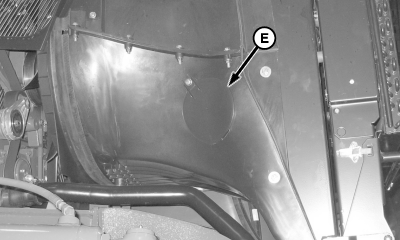
Cleaning Cooling Package1. Stop engine and remove key.2. Raise hood. 3. Remove cap screws (A and C), cap screw and nut (B), and lift side shield (D) off of alignment studs. 4. Remove cap screw and cleaning access cover (E).
|
|
DP99999,0000176 -19-23JAN07-1/3 |
|
|
|
5.
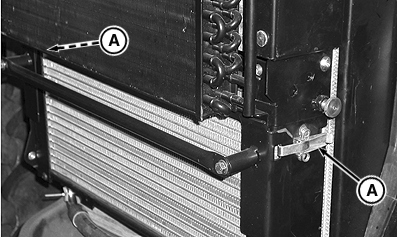
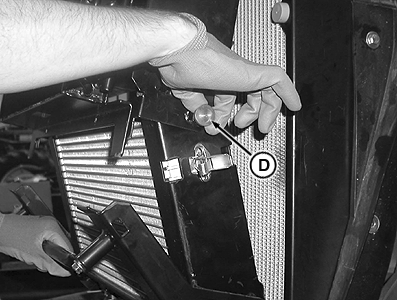
Release latches (A) along side of hydraulic oil cooler and pull forward, away from radiator using handle (B).
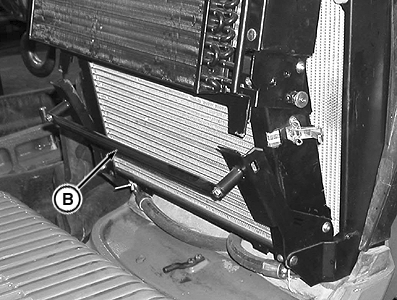
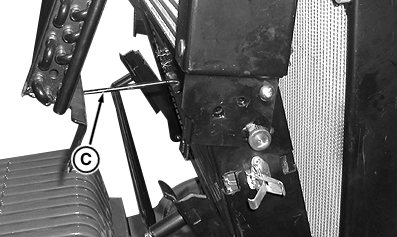
6. Pull out on cooler/condenser and insert prop rod (C).
7. Use compressed air or water to clean all cooling package components. Straighten any bent fins. 8. Release spring pin (D) and push cooler/condenser toward radiator and engage latches.
|
|
 CAUTION:
Reduce compressed air to 210 kPa (2 bar) (30 psi) or less when using for cleaning purposes. Clear area of bystanders, guard against flying debris, and wear personnel protection equipment, including eye protection. A filter type respirator is also advised to avoid inhalation of harmful particles.
CAUTION:
Reduce compressed air to 210 kPa (2 bar) (30 psi) or less when using for cleaning purposes. Clear area of bystanders, guard against flying debris, and wear personnel protection equipment, including eye protection. A filter type respirator is also advised to avoid inhalation of harmful particles.
DP99999,0000176 -19-23JAN07-2/3 |
|
IMPORTANT: Air flow inside shroud compartment will not circulate properly if cover is not installed correctly. Make sure to install cover with tab inside slot in shroud. 9. Install cover with tab (A) INSIDE slot in shroud. Fasten with cap screw. 10. Install side shield and lower hood.
|
|
DP99999,0000176 -19-23JAN07-3/3 |