Draining, Flushing and Refilling Cooling System—Every 5000 Hours or Five Years
TS281-UN-23AUG88
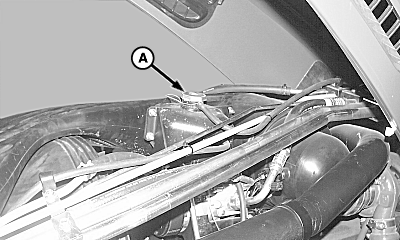
N67838-UN-24SEP04
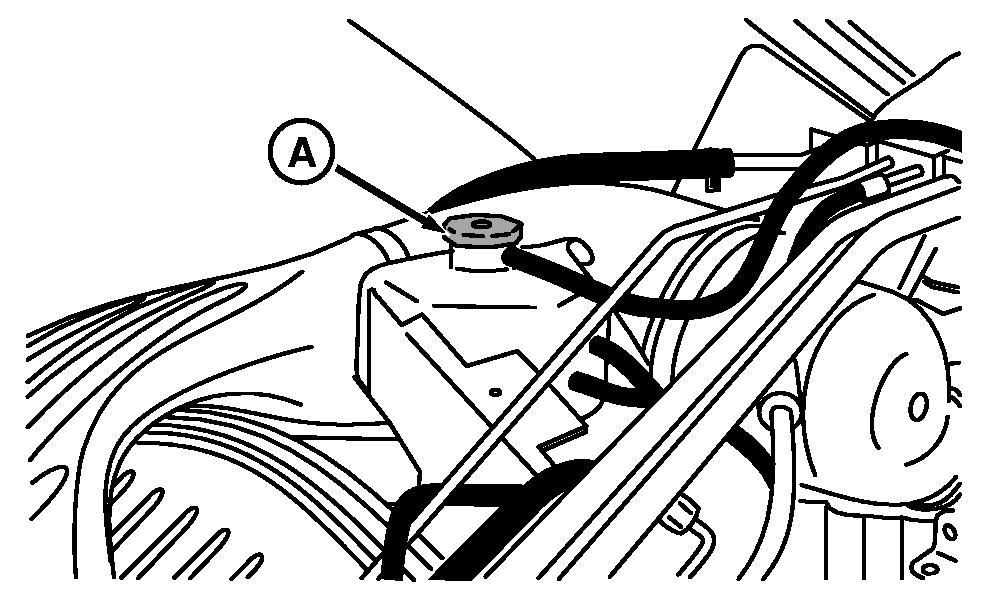
N67839-UN-24SEP04
A - De-Aeration Tank Cap
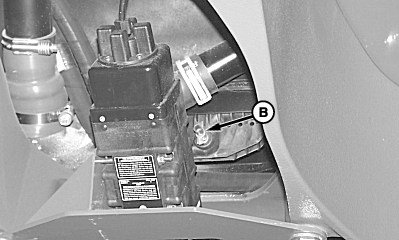
B - Radiator Drain Cock
Initial service is 3 years / 3000 hours. After initial service, drain interval would be every 5 years / 5,000 hours if John Deere COOL-GARD is used and coolant is tested at recommended intervals. If other coolants are used, drain interval would be 2 years / 2,000 hours. Follow recommendations in Fuel, Lubricants and Coolant section of this manual.
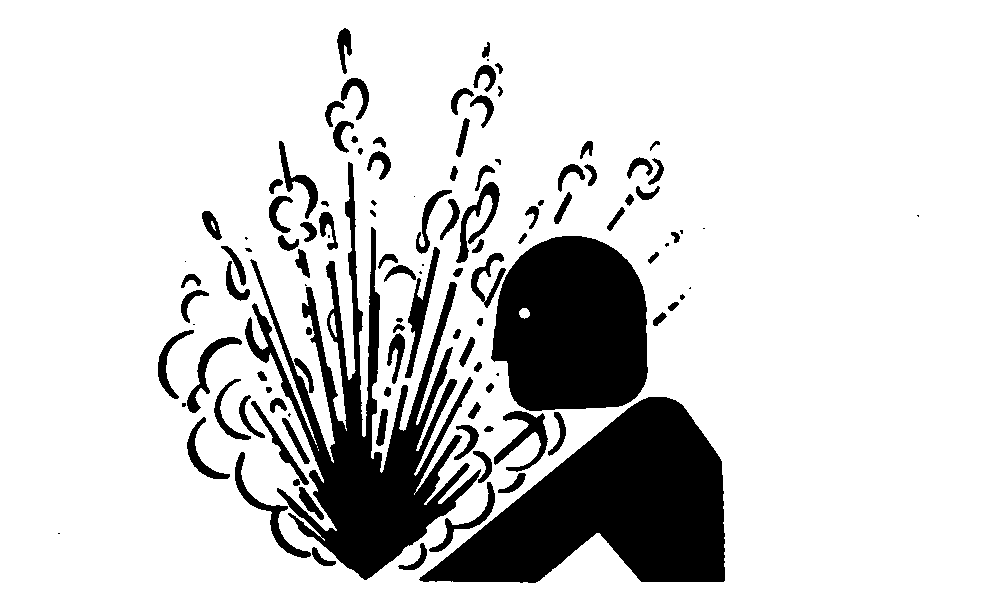
 CAUTION: Explosive release of fluids from pressurized cooling system can cause serious burns.
Shut off engine. Only remove cap when cool enough to touch with bare hands. Slowly loosen cap to first stop to relieve pressure before removing completely.
IMPORTANT: Avoid cooling system damage. Test or replace thermostats and de-aeration tank cap whenever cooling system is flushed. See your John Deere dealer.
Check de-aeration tank level. If tank is empty and recovery tank has been kept at least full cold, this indicates a leak that prevents system from recovering coolant from recovery tank. If recovery tank does not change levels between engine being cold and being warmed up, this is a sign of a leak or of being very low on coolant in the pressurized circuit.
After flushing system, cooling system should be checked for leaks and de-aeration cap should be pressure checked. See your John Deere dealer for testing.
RXA0068472-UN-28AUG03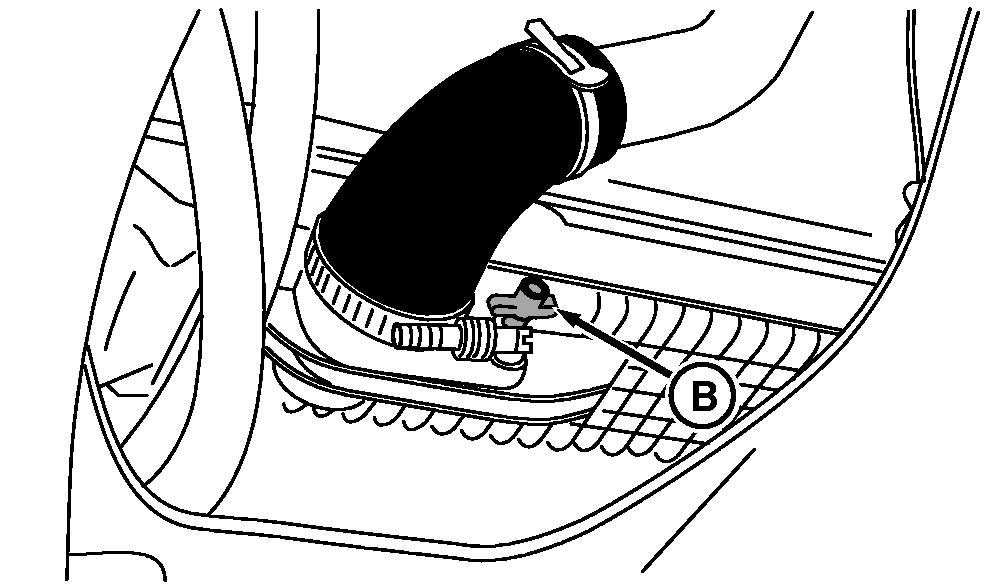
RXA0068473-UN-28AUG03
N80074-UN-14FEB08Hose (Right-Hand Side)
A - De-Aeration Tank Cap
B - Radiator Drain Cock
C - Fitting
D - Hose
Remove de-aeration tank cap (A) to drain cooling system.Open radiator drain cock (B).
Remove hose (D) from fitting (C) and drain engine block. Reinstall hose and torque to specification.
Item Measurement Specification Hose Torque 24 Nm (17.7 lb-ft) 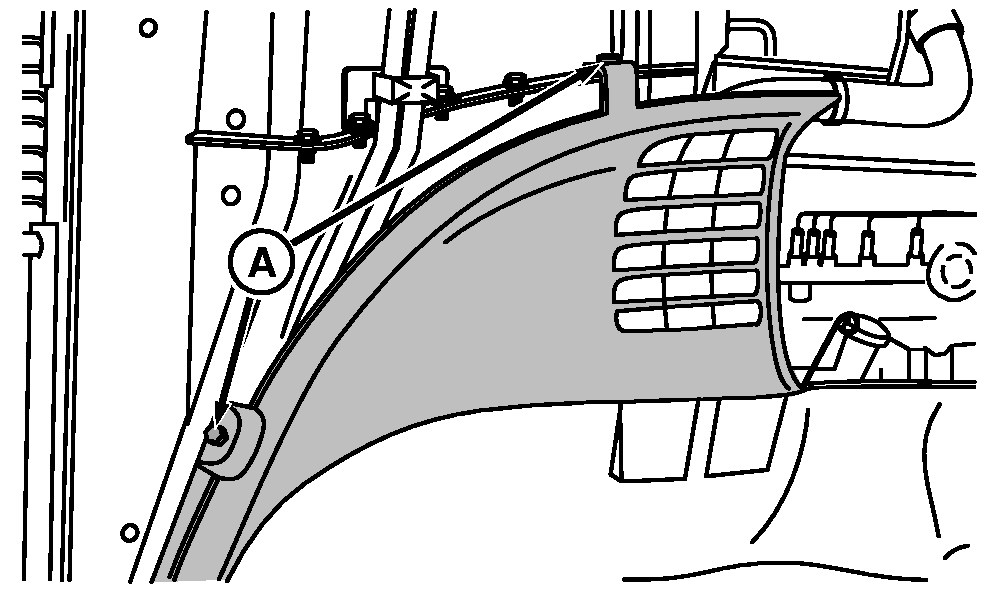
RXA0068475-UN-28AUG03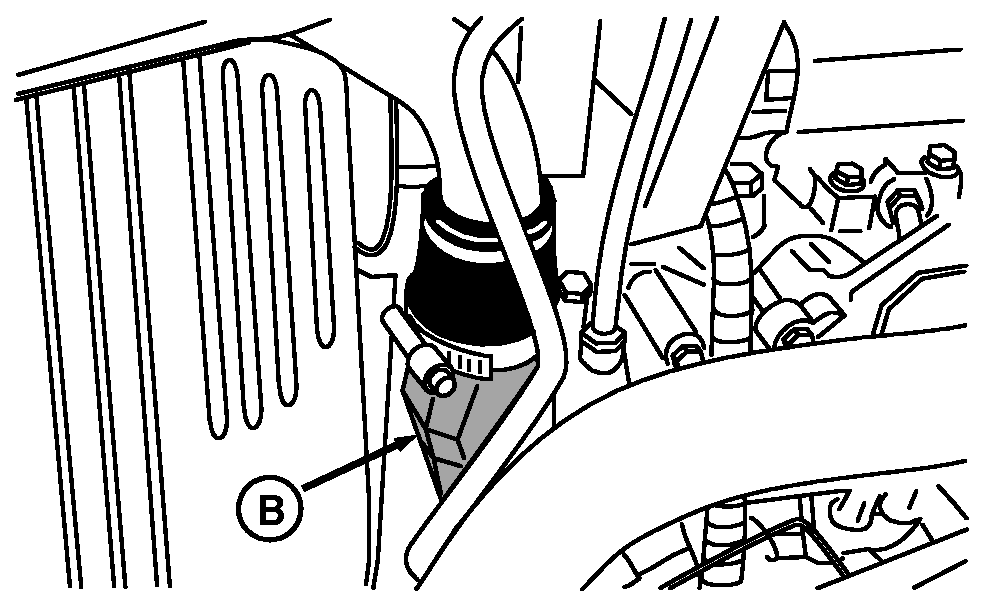
RXA0068476-UN-28AUG03A - Cap Screws
B - Thermostat Cover
Remove cap screws (A) and lift left-hand side shield off of alignment studs.Remove three cap screws, cover (B), gasket and thermostats.
Install cover and gasket without thermostats. Tighten cap screws to specifications.
Item Measurement Specification Thermostat Cover Cap Screws Torque 48 N·m (35 lb-ft) Turn heater temperature control clockwise to the full on position. For tractors equipped with Automatic Temperature Control, temperature readout must say ”HI” and key must be in ON position for coolant drain, flush, refill and de-aeration process.
NOTE: This is the only way to get old coolant and air out of circuit.
NOTE: See your John Deere Dealer for recommendations on cleaning solutions.
Close radiator drain cock, install engine drain plug and O-ring and fill system with cooling system cleaning solution. With de-aeration tank cap ON, operate engine up to operating temperature. Stop engine and drain system.
IMPORTANT: Never pour cold water or coolant into hot engine.
- CAUTION: Do NOT use tap water as this contains minerals that will corrode the radiator and cylinder liners and can cause overheating and early engine or radiator failures.
Repeat drain and flush procedure using distilled or de-mineralized water.
Install New Thermostats
Remove thermostat cover and clean sealing area.
Apply RTV silicone sealant to new gasket.
IMPORTANT: Thermostats should be replaced whenever system is flushed.
Install new thermostats, new gasket and cover. Tighten cap screws to specifications.
Item Measurement Specification Thermostat Cover Cap Screws Torque 48 N·m (35 lb-ft) Close drain cock and install plug and O-ring.
Fill Cooling System
IMPORTANT: Use coolant as specified in Fuel, Lubricants and Coolant section.
Fill high pressure coolant circuit at de-aeration tank.
Fill coolant recovery tank to Full Hot mark.
NOTE: Coolant level in recovery tank will drop the first few cycles unless there is a leak.
With de-aeration tank cap ON, start engine and run at idle for 1 to 5 minutes.
- CAUTION: Explosive release of fluids from pressurized cooling system can cause serious burns.
Shut off engine. Only remove cap when cool enough to touch with bare hands. Slowly loosen cap to first stop to relieve pressure before removing completely.
Shut off engine, top off high pressure circuit at de-aeration tank and reinstall cap.
TS281-UN-23AUG88 Start engine and warm up engine for 15 minutes. If the coolant recovery tank loses coolant to the ground, repeat previous step and top off until it doesn’t. Loosing coolant to the ground indicates air in high pressure circuit is being discharged through coolant recovery bottle.
Shut off engine and allow to cool. Observe coolant level dropped below Full Hot in the recovery tank.
NOTE: If coolant level did not drop below Full Hot, there is a leak in cooling system that could lead to engine damage.
Monitor coolant recovery tank level for next few warm up and cool down cycles. Refill coolant recovery tank as required.
NOTE: It is normal and desirable for level to go down with the first few cycles and then range somewhere between Full Hot and Full Cold.
NOTE: It is normal and desirable for de-aeration tank to be partially full of air when cap is removed when system is completely deaerated. When looking in tank, if tank is at least half full, do not add additional coolant. Topping off tank may cause coolant to be expelled onto the ground and/or cavitation of water pump.
Install side shield and lower hood.
Check Cooling System for Leaks
RXA0064100-UN-06DEC02
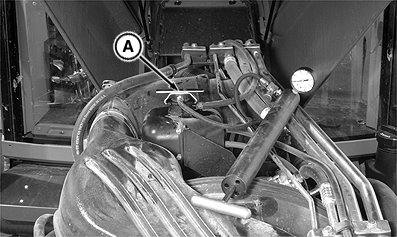
A - Radiator Tester
Raise hood.
Check radiator for leaks or damage.
Slowly turn de-aeration tank cap to relieve pressure. Remove cap.
Attach Radiator Tester (A) to filler neck.
Pressurize system.
Item Measurement Specification Radiator Pressure Test 60 kPa (0.6 bar) (9 psi) If pressure drops immediately, or will not build pressure, have John Deere dealer check and repair system.
Test and/or replace de-aeration cap whenever cooling system is flushed. Use suitable equipment or see your John Deere dealer for testing equipment.
NOTE: Cap gasket should be visually checked for sealing effectiveness. A good functioning gasket should have the imprint of the mating surface with no apparent scratches or leak paths. If gasket is damaged, replace cap and test new cap.
NOTE: Cap should hold pressure within specifications. Relief occurs at top of range.
Pressurize cap.
Replace cap if does not test within specification.Item Measurement Specification Radiator Cap Pressure Test 60–80 kPa (0.6–0.8 bar) (9–12 psi)
LOCTITE is a trademark of Loctite Corp. ULTRA BLUE is a trademark of Loctite Corp. | OUO6041,00000DD-19-20090209 |