Every 100 Hours of Operation
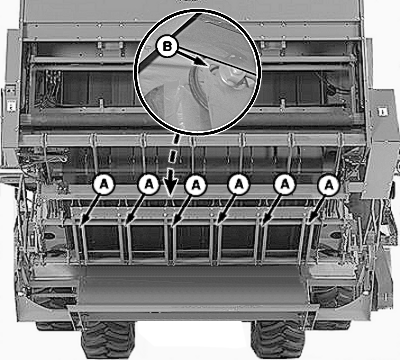
N80533-UN-17APR08
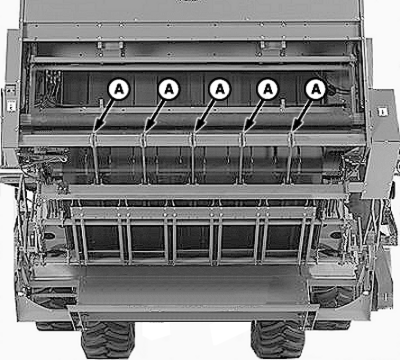
N80534-UN-16APR08
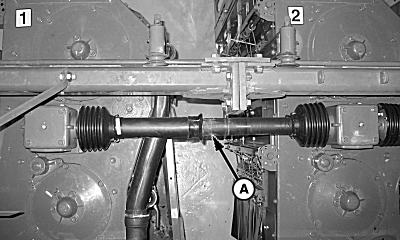
A - Cross-Shafts
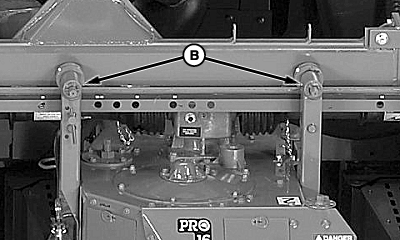
B - Roller Lubrication Fittings
-
Lubricate universal joints and shafts on unit drive cross-shafts (A).
-
Lubricate fittings (B) on unit support frame rollers (2 per unit).
-
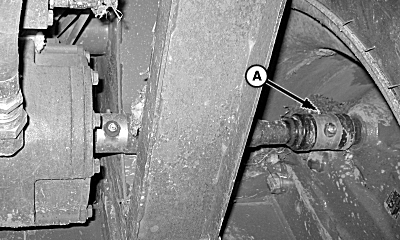
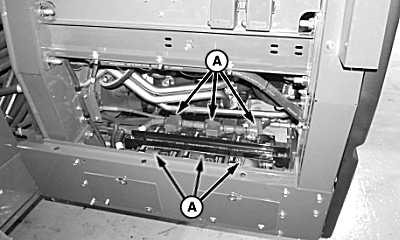
N80535-UN-17APR08A - Fitting
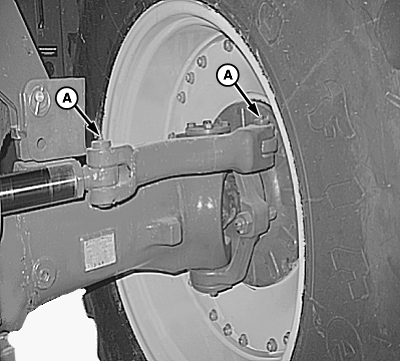
Lubricate fitting (A) on both final drive axle couplers. -
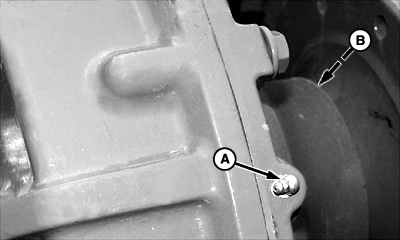
N61063-UN-22OCT02A - Final Drive Lubrication Fitting
B - External Oil Seal
Lubricate final drive outer axle bearings:-
NOTE: Final drive grease fitting is located on edge of final drive next to inside rim of front tires.
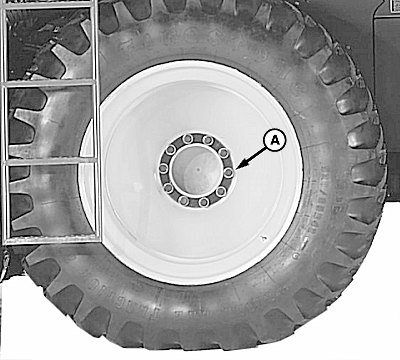
Locate final drive lubrication fitting (A).
-
Lubricate final drive outer axle bearing using JDMJ13E4 Severe-Duty (SD) Polyurea Grease UNTIL grease comes out of external oil seal (B).
-
Verify that grease has come out around the external oil seal completely by wiping around seal with clean rag.
-
Repeat procedure for other side.
-
-
N88228-UN-23MAR10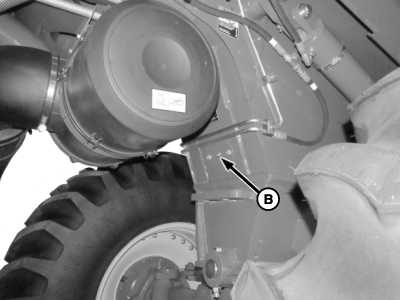
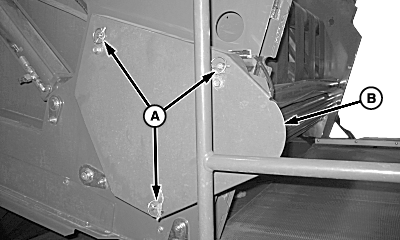
N96622-UN-23JAN12A - Tie Rod Ends
B - Guide Axle Pivot
Lubricate grease fittings on powered rear axle.- Tie rod ends (A), two grease fittings on each side of machine.
- Guide axle pivot (B), one grease fitting.
-
IMPORTANT: Check wheel hardware torque after 1 hour and 1 day of operation, each time bolts are loosened.
N75318-UN-23APR07A - Drive Wheel Bolts
Tighten drive wheel bolts to specification.Item Measurement Specification Drive Wheel Bolts Lubricated Torque 610 N·m (450 lb.-ft.) -
IMPORTANT: Check wheel hardware torque after 1 hour and 1 day of operation, each time bolts are loosened.

N75310-UN-27MAR07A - Rear Axle Wheel Nuts
B - Center Disk To Waffle Rim Bolts
Tighten rear axle wheel nuts (A) to specification.Item Measurement Specification Rear Axle Wheel Nuts Lubricated Torque 610 N·m (450 lb.-ft.) -
Tighten rear wheel center disk to waffle rim bolts (B) to specification.
Item Measurement Specification Rear Wheel Center Disk to Waffle Rim Bolts Dry Torque 332 N·m (245 lb.-ft.) -
IMPORTANT: Module builder must be in lowered transport position before attempting belt maintenance procedures.
N75297-UN-02APR07A - Lower Feeder Belt
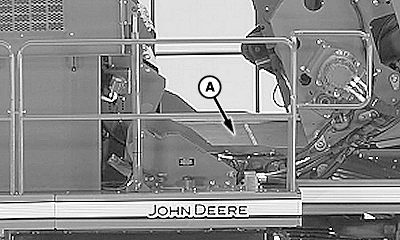
Check tracking on lower feeder belt (A). (See CHECKING LOWER FEEDER BELT TRACKING in Round Module Builder section.) -
N75640-UN-19MAY08A - Wrap Floor Belts
Check wrap floor belt tension (A). (See CHECKING AND ADJUSTING WRAP FLOOR BELT TENSION in Round Module Builder section.) -
N83977-UN-08APR09A - Wrap Feeder Belts
B - Adjusting Slot
Check wrap feeder belts (A) for proper tension. Adjust using slots (B). (See CHECKING AND ADJUSTING WRAP FEEDER BELT TENSION in Round Module Builder section). -
N96623-UN-23JAN12A - Battery Connections
Clean all battery connections (A). (See SERVICING BATTERIES in Batteries section for proper procedure). -
N84322-UN-16APR09A - Lynch Pins
B - Shield
Check laydown roller chain tension and lubricate chain as follows:-
Position machine in transport mode. (See POSITIONING MACHINE FOR TRANSPORT in Operating the Machine section.)
-
Remove three lynch pins (A) and shield (B).
-
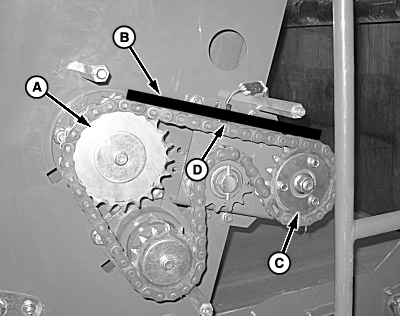
N84323-UN-16APR09A - Drive Sprocket
B - Straight Edge
C - Idler Sprocket
D - Chain Deflection Loaction
Place a straight edge (B) from drive sprocket (A) to idler sprocket (C). -
Center deflection of the chain must be within specification.
Item Measurement Specification Drive Sprocket-to-Idler Sprocket Chain Deflection 8—12 mm (5/16—1/2 in.) -
If the center displacement of the chain does not fall in this range, loosen the idler sprocket nut and adjust to specification.
-
If adjustment is done to the idler sprocket, tighten idler sprocket nut to specification.
Item Measurement Specification Idler Sprocket Nut Torque 610 N·m (450 lb.-ft.) -
Recheck chain tension after tightening the idler sprocket nut. Adjust again if necessary.
-
Install shield and lynch pins.
-
|
DP99999,0000810-19-20120124 |