Checking Lower Feeder Belt Tracking
|
Recommended Service Interval |
|
|---|---|
|
Check Belt Tracking. Adjust Tracking as Necessary. |
Every 100 Hours |
NOTE: Module builder must be in transport position to check belt tracking.
-
N87838-UN-26FEB10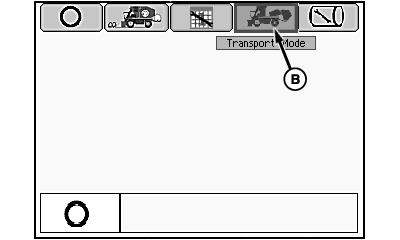
N87842-UN-12MAR10Mode Management Screen

N87845-UN-03MAR10Transport Mode Screen
N88163-UN-19MAR10RMB Latch Lever in Locked Position
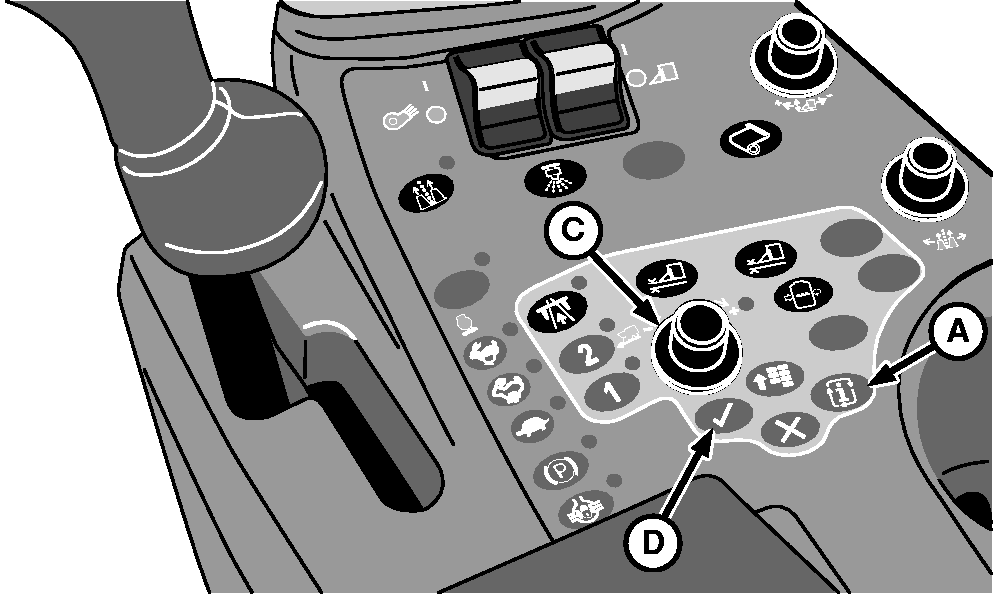
A - Mode Select Button
B - Transport Mode Icon
C - Selection Dial
D - Confirm Button
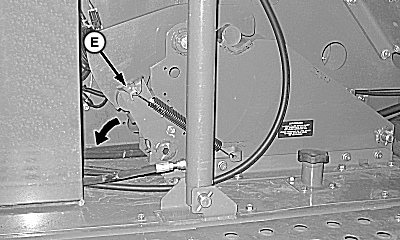
E - Latch Lever
Park machine on level surface. -
Place machine in transport mode and lower module builder into transport position as follows:
-
Start engine and run at slow idle.
-
Press mode select button (A). Mode management screen appears on armrest display unit (ADU).
-
Highlight transport mode icon (B) using selection dial (C), then press confirm button (D). Transport mode screen appears on ADU.
-
 CAUTION: RMB latch lever (E) is spring loaded. Release latch
using foot to avoid injury.
CAUTION: RMB latch lever (E) is spring loaded. Release latch
using foot to avoid injury.NOTE: Operator does not need to reset spring. Latch resets while machine goes into transport mode.
Rotate latch lever (E) in direction shown.
-
Remove tether control from bracket on front of power module.
-
NOTE: Short delays in machine motion are normal. Continue to hold button D until machine is fully configured in transport mode.
Press and hold button D on tether control to unfold module builder into transport configuration.
-
-
N96832-UN-02FEB12Mode Management Screen
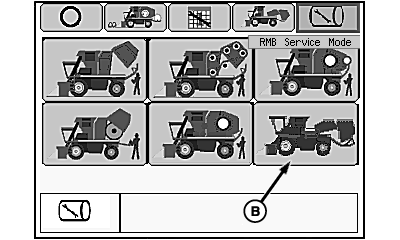
N96833-UN-02FEB12RMB Service Mode Selection Screen
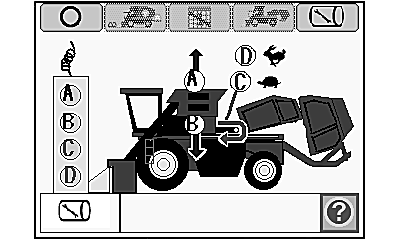
N88040-UN-02MAR10Feeder Belt Service Mode Functional Diagram
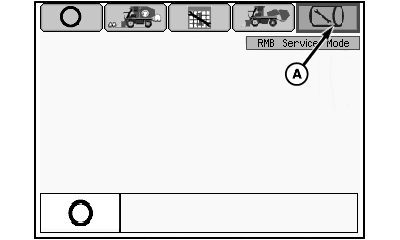
A - RMB Service Mode Icon
B - Feeder Belt Service Mode Icon
Place machine in RMB service mode:-
Highlight RMB service mode icon (A) using selection dial.
-
Press confirm button. RMB service mode selection screen appears on ADU.
-
Rotate selection dial to highlight feeder belt service mode icon (B).
-
Press confirm button to activate service mode. Feeder belt service mode functional diagram appears on ADU.
-
-
Press button A on tether control unit to raise accumulator to full height.
-
Install appropriate blocking to support accumulator in raised position. Press button B on tether control unit to lower accumulator onto blocking.
-
Shut off engine and remove key.
-
NOTE: Access ports are located in the platform behind the belt drive roller.
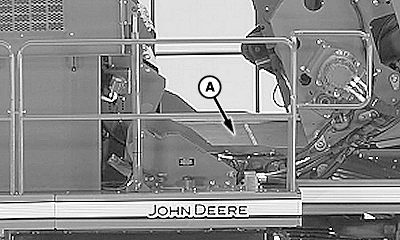
N75297-UN-02APR07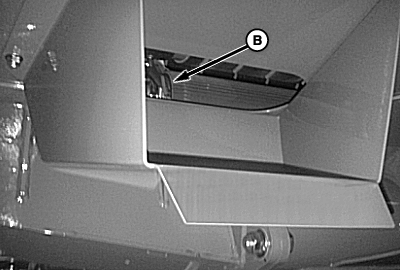
N96834-UN-02FEB12Left Side Access Port
N96835-UN-02FEB12Right Side Access Port
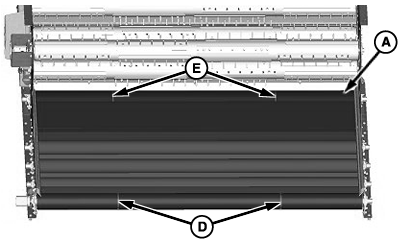
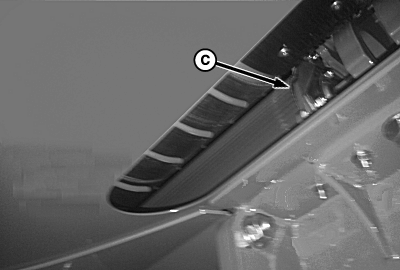
N96836-UN-02FEB12Feeder Belt Tracking
A - Feeder Belt
B - Drive Roller (Left-hand End)
C - Drive Roller (Right-hand End)
D - Grooves in Drive Roller
E - Grooves in Tensioning Roller
Check feeder belt (A) for proper tracking. There are two indications that the feeder belt tension is not properly adjusted:-
Belt is not centered on drive roller and
tracks toward one side.
- From beneath platform, observe position of edge of feeder belt in relation to left-hand end of drive roller (B). Repeat at right-hand end of drive roller (C).
- Verify that distance from belt edge to end of roller is approximately the same at both ends and that black rubber covering on roller does not show beyond edge of belt.
-
NOTE: The inner side of the feeder belt has two V-shaped guide
treads protruding from the surface of the belt approximately 23 inches
from each edge of the belt. These two treads extend the length of
the belt and ride in grooves in the drive roller and tensioning roller.
Guide treads on inner side of belt are tracking out of grooves in drive roller and tensioning roller.- From top of platform, check feeder belt (A) for bulging or signs that guide treads on belt are tracking out of grooves in drive roller (D).
- Check for signs that guide treads are tracking out of grooves in tensioning roller (E).
-
Belt is not centered on drive roller and
tracks toward one side.
-
If tension is not correct, the belt tracks toward the slack side. If belt is not tracking properly, adjust tension on the slack side. See ADJUSTING LOWER FEEDER BELT TENSION in this section.
-
Start engine. Press button A on tether control to raise accumulator slightly.
-
Remove blocking from under accumulator. Press button B on tether control unit to lower accumulator to operating position.
-
Highlight transport mode icon at top of display screen and press confirm button.
-
Press and hold button C on tether control unit to return machine to harvest configuration.
-
Select harvest mode icon on display screen and press confirm button to enter harvest mode.
|
DP99999,0000824-19-20120202 |