Every 12 Hours of Operation
The following services on the cotton picker must be performed at least every 12 hours of operation. When operating in adverse conditions, cleaning must be performed more frequently.
- Cleaning
- Lubrication
- Checking fluid levels
Clean the Machine
- Shut off engine and remove key before cleaning.
- Clean machine from the top down.
- Clean cooling package last.
-
Place machine in transport configuration.
N87845-UN-03MAR10 -
After machine is unfolded, press and hold button C on tether control until accumulator extension is fully raised.
-
Shut off engine and remove key.
-
 CAUTION: Falling from machine can cause serious injury or death.
Always raise handrails and use extreme caution when climbing and working
on accumulator hood.
CAUTION: Falling from machine can cause serious injury or death.
Always raise handrails and use extreme caution when climbing and working
on accumulator hood.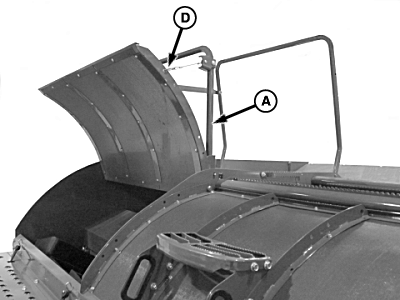
N96912-UN-11FEB12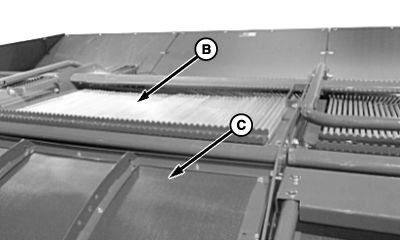
N96913-UN-11FEB12A - Handrail (2 used)
B - Finger Grate (6 used)
C - Screen (3 used)
D - Cable
Raise handrails (A). -
IMPORTANT: When cleaning, do not let debris fall onto cooling module and engine air intake area.
Clean and inspect finger grates (B) and screens (C). Look for missing or damaged fingers on grates.
-
If screens must be raised, attach cable (D) from handrail to screen to prevent screen from falling.
-
IMPORTANT: Module builder must be in lowered transport position before attempting maintenance procedures.
N96742-UN-22FEB12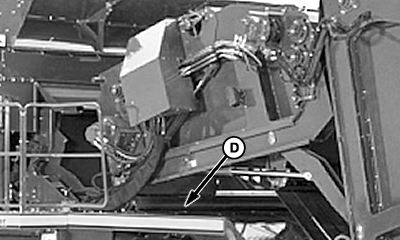
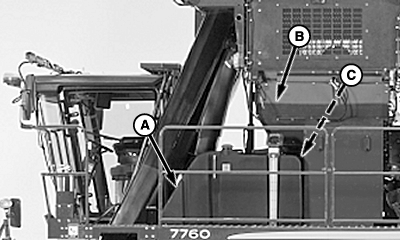
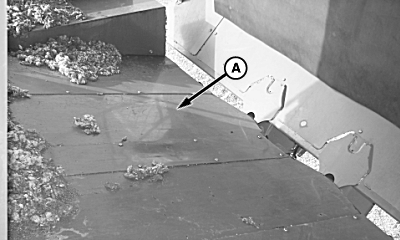
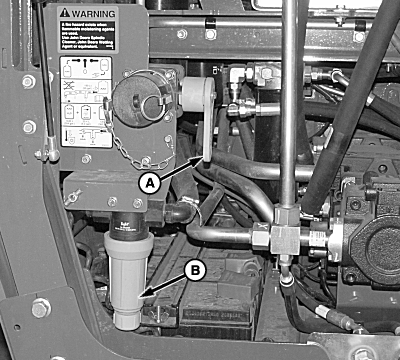
N96743-UN-22FEB12A - Tanks
B - Accumulator
C - Feeder Assembly
D - Feeder Belt
Clean area behind cab around tanks (A) and ducts. -
Clean area in front of accumulator (B).
-
Clean under accumulator and feeder assembly (C).
-
Clean between feeder assembly and tanks.
-
Clean cotton buildup and debris from under feeder belt (D) using compressed air and cleaning wand.
-
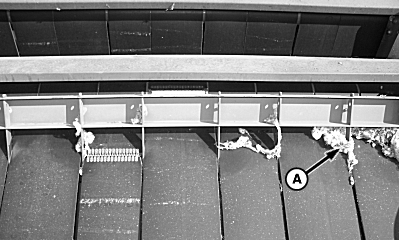
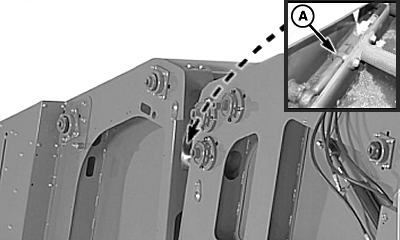
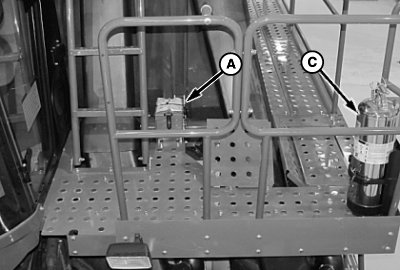
N96619-UN-23JAN12A - Frame Latch (2 used)
Clean debris from platform around module builder frame latches (A) and latch switches. -
N97014-UN-22FEB12A - Guard Rollers
Clean guard rollers (A) and check for freedom of movement. -
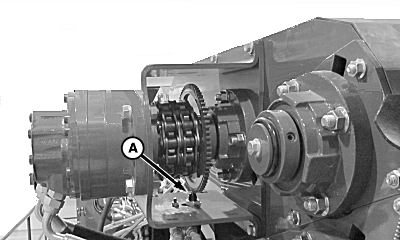
N97015-UN-22FEB12A - Speed Sensor and Tone Wheel
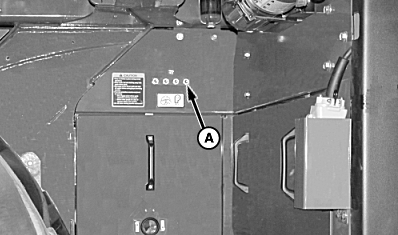
Clean upper RMB speed sensor and tone wheel (A). -
IMPORTANT: DO NOT direct high-pressure air blast at electrical connections.
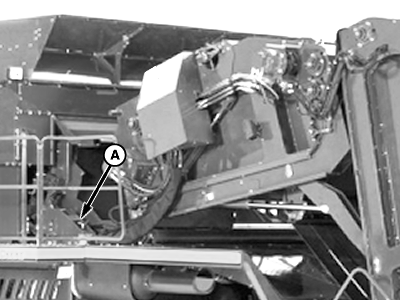
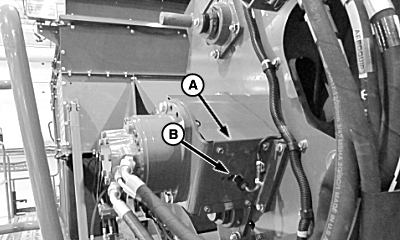
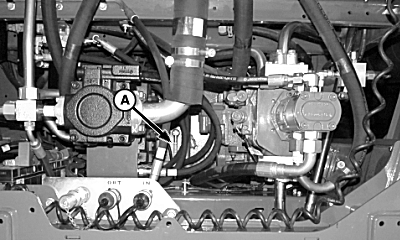
Clean area around accumulator and feeder valve stack (A) and electronic control unit (B). Clean around speed sensors and tone wheels on beater roller and metering roller.
N97016-UN-22FEB12 -
Inspect for signs of oil leaks. Repair any leaks and remove oil residue immediately.
-
Clean around feeder belt speed sensor and tone wheel.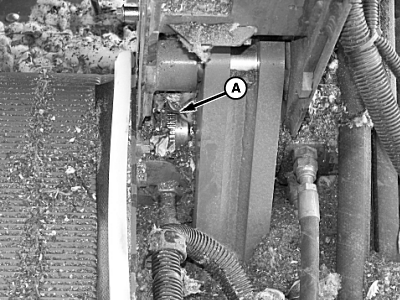
N97017-UN-22FEB12 -
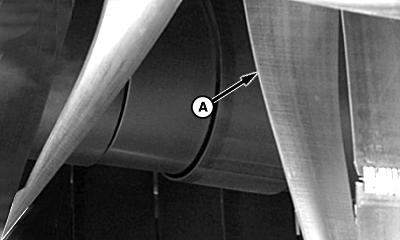
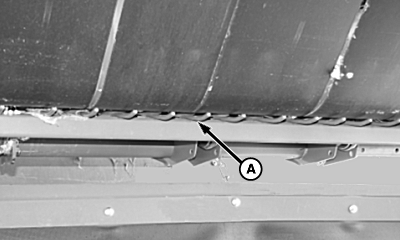
Clean RMB belt brush (A) on top of RMB near RFID reader.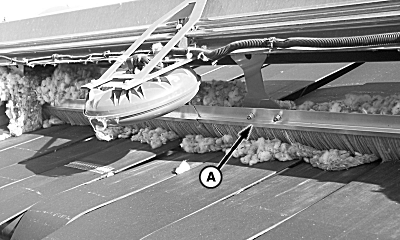
N97018-UN-22FEB12 -
N97019-UN-22FEB12A - Belt Guides
Clean belt guides (A) at upper drive roller, between module builder and accumulator. Check belt tracking. -
N97020-UN-22FEB12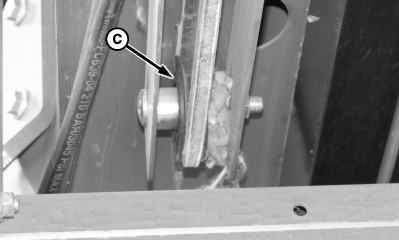
N97021-UN-22FEB12A - Wrap Feed Belts (5 used)
B - Wrap Floor Belts (6 used)
C - Front Sheaves (6 used)
Clean lint and trash from wrap feeder belts (A) and wrap floor belts (B). Check belts for proper tension. -
Clean lint and trash from front sheaves (C) on wrap floor belts.
-
N97022-UN-22FEB12A - Wrap Feed Fingers
Check plastic wrap feed fingers (A) at front of wrap floor. -
Start machine and select transport mode on armrest display unit (ADU).
N87845-UN-03MAR10 -
Press and hold button C on tether control until baler frame rotates into harvest position and RMB latches engage to retain baler to platform.
-
Select RMB belts service mode on ADU.
N88032-UN-02MAR10 -
Press and hold button C on tether control to raise rockshaft and loosen RMB belts.
-
Shut off engine and remove key.
-
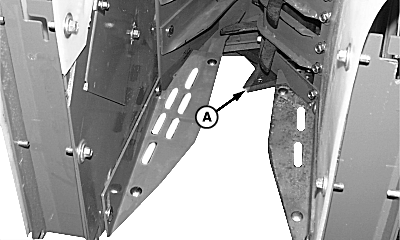
N97023-UN-22FEB12A - Pivot
B - Gate Latch Sensor
Clean area around baler pivot (A) and gate latch sensor (B) on both sides of baler. -
N97024-UN-22FEB12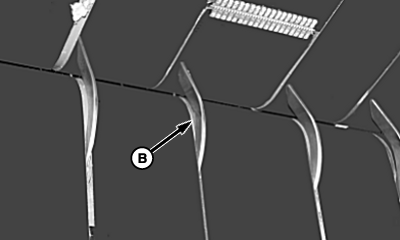
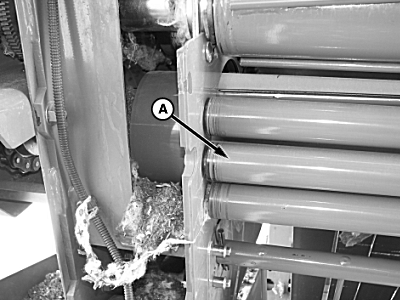
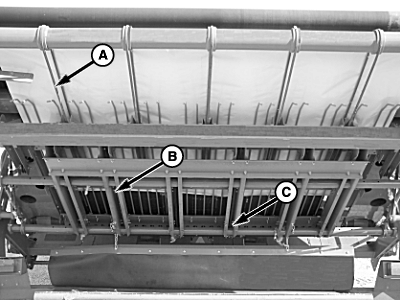
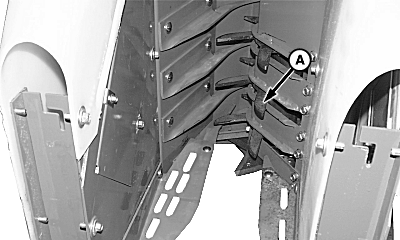
N97025-UN-22FEB12A - RMB Belts
B - Rockshaft Rollers and Belt Guides
Clean and inspect belts (A) and rollers inside RMB frame. Look for any signs of friction and heat. -
Check rockshaft rollers and belt guides (B). Check belt tracking.
-
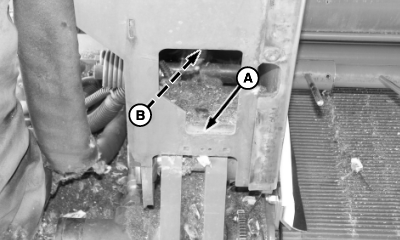
N97053-UN-22FEB12A - Module Ramp
Clean cotton buildup and trash from module ramp area (A). -
N97054-UN-22FEB12A - Wrap Feed Rods
Clean and inspect wrap feed rods (A) at front of wrap floor. -
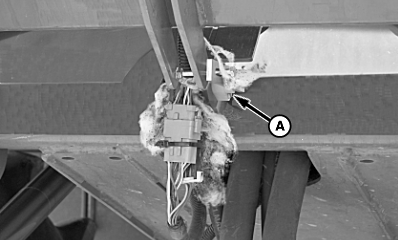
N97055-UN-22FEB12A - Handler Position Sensor
Clean and inspect handler position sensor (A). -
Start engine and select RMB belts service mode on ADU.
N88032-UN-02MAR10 -
Press button D on tether control to lower rockshaft and apply tension to belts.
-
Select transport mode on ADU.
-
Press and hold button D on tether control to fold machine into harvest configuration.
-
Shut off engine and remove key.
-
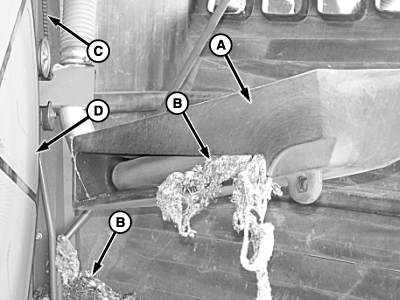
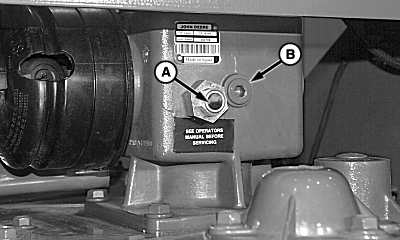
N97056-UN-22FEB12A - Shield (2 used)
B - Speed Sensor
Remove upper and lower shields (A) and clean around lower RMB speed sensor (B) and tone wheel. -
N97057-UN-22FEB12A - Turnbuckle (2 used)
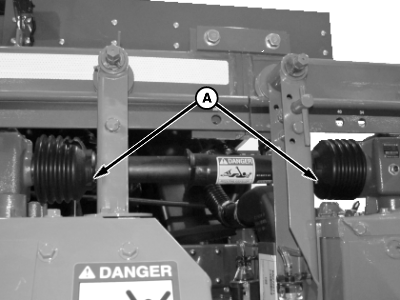
Clean cotton buildup and debris from area around upper turnbuckle (A) on both sides of machine. -
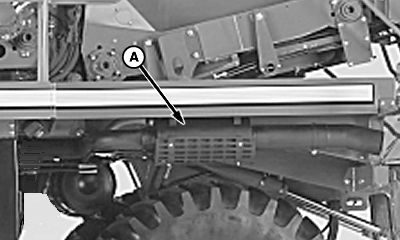
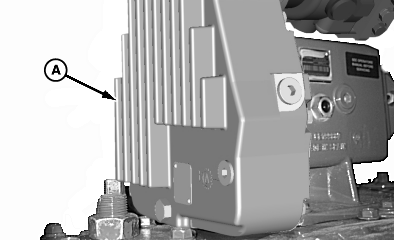
N97060-UN-23FEB12A - Muffler Assembly
Clean trash and debris from around muffler assembly (A) and platform area above muffler. -
CAUTION: Lint and debris can ignite causing serious injury or
death to you or others. Be sure to remove all lint and debris from
the following areas at least every 12 hours to prevent fire. When
operating in adverse conditions, clean machine more frequently.
N96605-UN-19JAN12
N96606-UN-10FEB12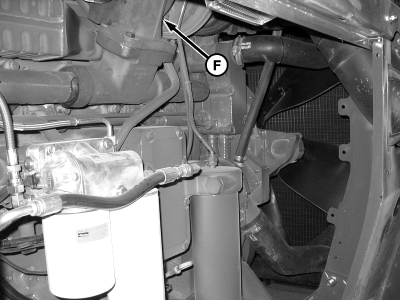
N96915-UN-11FEB12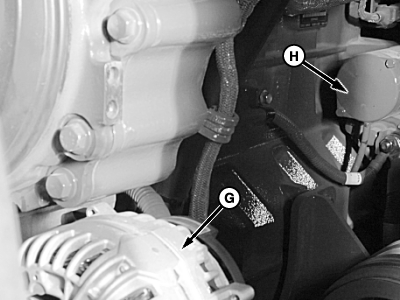
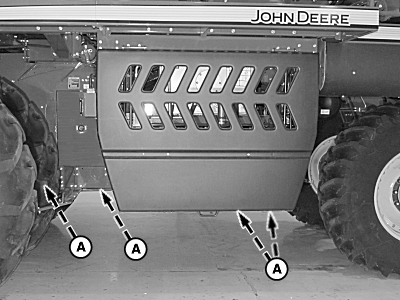
N96608-UN-10FEB12A - Belly Shield (4 used)
B - Battery Compartment Cleanout Doors
C - Cotton Fan Rotors
D - Fuse Block (2 used)
E - Batteries
F - Turbocharger
G - Alternator
H - Starter
Unlatch and lower belly shields (A) beneath power module, engine, cotton fans, and front axle and transmission. -
Unlatch and open battery compartment cleanout doors (B).
-
Open power module door. Remove access panels on fan compartment, power module, and engine compartment.
-
Thoroughly clean lint and debris from the following areas. The use of compressed air and a cleaning wand is recommended. Pay special attention to the components listed in following steps.
- Cotton Fan Rotors
- Power Module
- Engine Compartment
- Grease Pump
- Grease Manifold
- Transmission Area
-
Clean cotton fan rotors (C) and drive belts.
-
Clean fuse blocks (D) and batteries (E).
-
Clean turbocharger (F) and exhaust manifold area on engine.
-
Clean area around alternator (G) and starter (H). Clean engine belts and sheaves and rotary screen drive belt.
-
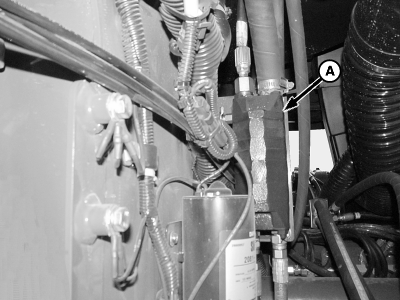
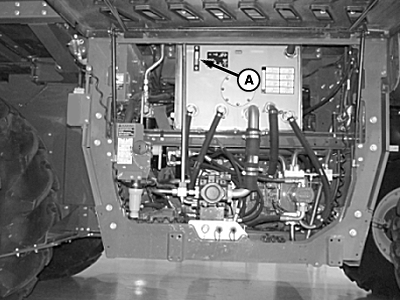
Clean top of hydraulic reservoir (A) using compressed air and a cleaning wand.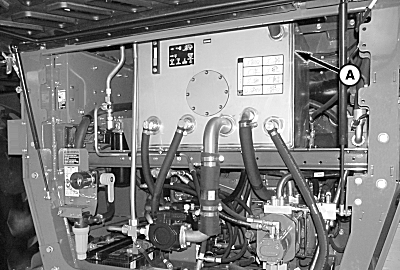
N97061-UN-24FEB12 -
N96609-UN-19JAN12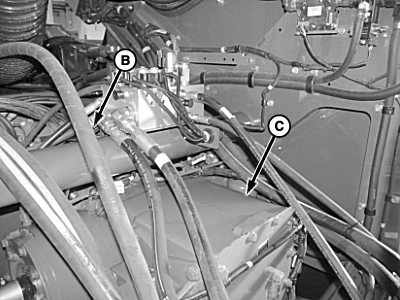
N96610-UN-19JAN12A - Grease Pump
B - Grease Manifold
C - Transmission
Clean area around grease pump (A). -
Clean area around grease manifold (B).
-
Clean area around transmission (C).
-
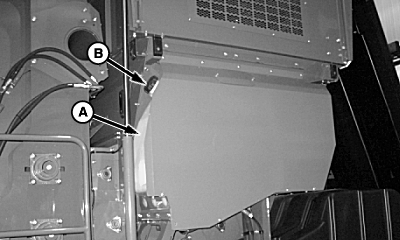
N97058-UN-22FEB12A - Trash Expeller
B - Cotton Buildup
C - Drive Belt
D - Rotary Screen
Open cooling module door and swing out trash expeller (A). -
Clean cotton buildup (B) from trash expeller and corners of door.
-
Clean outer rotary screen drive belt (C) and rotary screen (D).
-
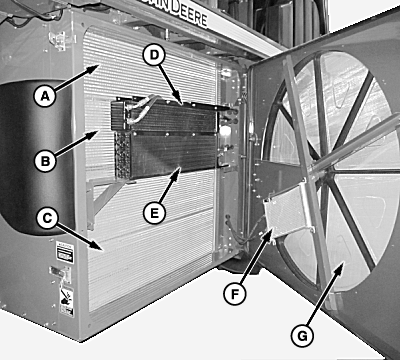
N96535-UN-16JAN12A - Charge Air Cooler
B - Hydraulic Oil Cooler
C - Radiator
D - Transmission Oil Cooler
E - Air Conditioner Condenser
F - Fuel Cooler
G - Rotary Screen
Clean cooling cores (A—F) and rotary screen (G). -

N86619-UN-22SEP09A - Air Inlet Screens
Wipe outside of cab air inlet screens (A) to remove lint and debris. -
NOTE: If operating in normal conditions, filter service interval can be extended to every 200 hours.
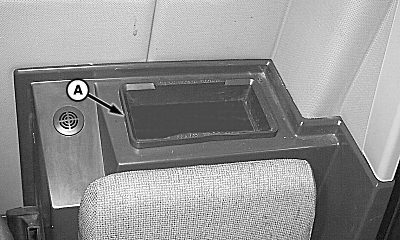
N56520-UN-19MAR01A - Tray
If operating in dusty conditions, remove and clean primary cab recirculating air filter, located beneath tray (A) behind instructional seat. (See EVERY 200 HOURS OF OPERATION in Lubrication and Maintenance section.) -
NOTE: If operating in normal conditions, filter service interval can be extended to every 50 hours.
N97059-UN-22FEB12A - Cab Fresh Air Filter
If operating in dusty conditions, remove and clean cab fresh air filter (A). (See EVERY 50 HOURS OF OPERATION in Lubrication and Maintenance section.) -
Clean mud buildup between the inner dual tire and vehicle chassis to avoid excess sidewall abrasion and damage.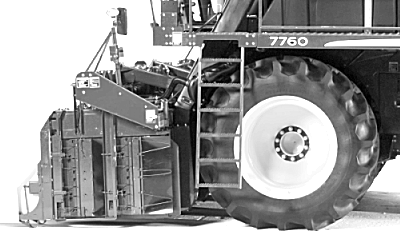
N96615-UN-20JAN12 -
Visually inspect all tires for damage or noticeably low pressure. Replace tire if any of the following conditions exist:
- Worn tread
- Unusual or spotty tread wear
- Isolated bulges or bubbles in tread or sidewall
- Torn or missing drive lugs
- Deep cracks or cuts in tread or sidewall that extend to the cord body
- If the tire repeatedly loses more than 20% of its rated pressure without explanation, and repair does not eliminate repeated pressure loss
-
IMPORTANT: Maintain correct tire pressure to prevent damage to tires. Verify that tires are inflated to specifications.
Check tires for proper inflation.
Tire
Size
Inflation Pressure
Dual Drive Tires
520/85R42 (R1, R2)
248 kPa
(2.5 bar)
(38 psi)
Rear Axle Steering Tires
520/85R34 (R1)
IF580/80R34 (R1W)
324 kPa
(3.2 bar)
(47 psi)
-
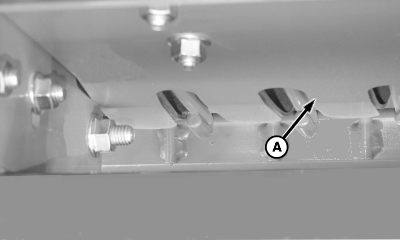
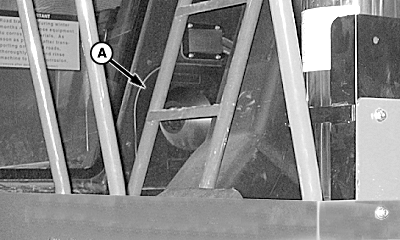
N64594-UN-21NOV03A - Cutter Knife
VRS ONLY — Check cutter knives (A) for missing or damaged knives. -
N64595-UN-21NOV03A - Front Feeder Finger
VRS ONLY — Check front feeder fingers (A) for missing or damaged fingers. -

N64596-UN-21NOV03A - Rear Feeder Finger
VRS ONLY — Check rear feeder fingers (A) for missing or damaged fingers.
Lubricate the Machine
-
IMPORTANT: Premature wear of pivot joints can occur if not properly lubricated. Remove weight from pivot joints to allow lubricant to distribute thoroughly and avoid premature wear.
N96617-UN-20JAN12A - Rockshaft Lubrication Fittings
Lower row units onto suitable blocks to remove weight from pivot joints. -
Lubricate unit lift rockshaft bearings (four places) using rockshaft lubrication fittings (A).
-
N96618-UN-20JAN12A - Lubrication Fitting
On machines where plastic covers on unit drive cross-shafts are chained to units, lubricate two fittings (A) on each cover. -
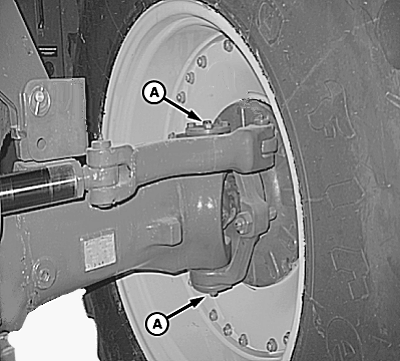
N88345-UN-09APR10A - Kingpin Bearing
Lubricate upper and lower kingpin bearings (A) on each side of machine.
Check Fluid Levels
-
N96914-UN-11FEB12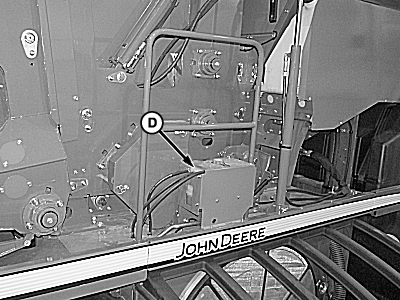
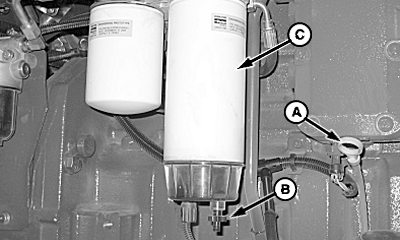
N96531-UN-16JAN12A - Dipstick
B - Drain Valve
C - Fuel Filter
D - Surge Tank
Check engine oil level on dipstick (A). Add oil if necessary. (See DIESEL ENGINE OIL in Fuels, Lubricants, and Coolants section for proper oil.) -
Open drain valve (B) and drain water and sediment from water separator on fuel filter (C).
-
Check coolant level in surge tank (D). Add coolant if necessary. (See HEAVY DUTY DIESEL ENGINE COOLANT in Fuels, Lubricants, and Coolants section for proper coolant.)
-
N96272-UN-09JAN12A - Lubrication Reservoir
B - Filler Cap
Remove filler cap (B) from lubrication reservoir (A) and check level of lubricant. Add lubricant if necessary. (See PICKER BAR AND SPINDLE LUBRICANT in Fuels, Lubricants, and Coolants section for proper lubricant.) -
N96532-UN-17JAN12A - Sight Gauge
Check level of spindle cleaner solution in moistener system tank on sight gauge (A). Add solution if necessary. (See FILLING MOISTENER SYSTEM TANK in Moistener System section.) -
NOTE: Moistener system tank must contain at least 190 L (50 gal.) of solution for proper operation of auxiliary water system.
As spray nozzle is depressed, a slight pause occurs before pump provides full stream.
N96537-UN-24FEB12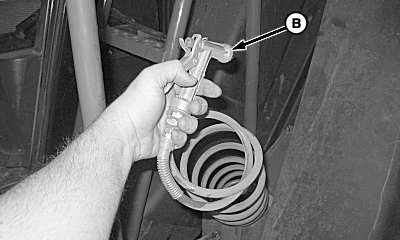
N83568-UN-08APR09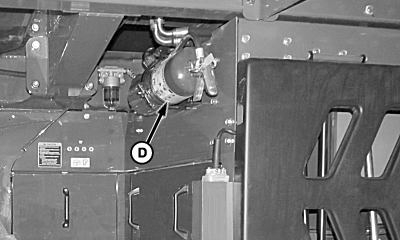
N96538-UN-24FEB12A - Auxiliary Water System
B - Spray Nozzle
C - Water-type Fire Extinguisher
D - Dry Chemical Fire Extinguisher
Check for proper operation of auxiliary water system (A). Remove spray nozzle (B) and hose from storage box and verify operation of system as shown on decal. -
Inspect water-type fire extinguisher (C) and dry chemical fire extinguisher (D) for proper charge. (See fire extinguisher labels for inspection and maintenance information.)
-
NOTE: Machine must be in harvest mode configuration with row units on the ground to check oil level accurately.
N96018-UN-08FEB12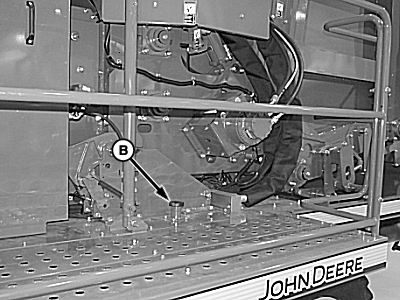
N96019-UN-12DEC11A - Sight Gauge
B - Fill Port
Check oil level in sight gauge (A) on hydraulic oil reservoir. Add oil if necessary at fill port (B). (See HYDRAULIC, HYDROSTATIC, AND TRANSMISSION OILS in Fuels, Lubricants, and Coolants section for proper oil.) -
N96539-UN-18JAN12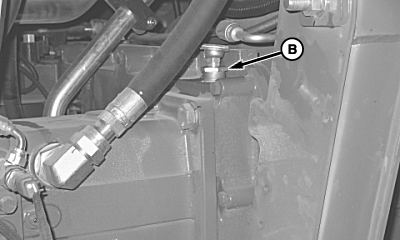
N92647-UN-20MAY11A - Sight Gauge
B - Breather
Check pump drive gearbox oil level. Oil level must be visible in middle of sight gauge (A). -
Add oil if necessary. To add oil, remove breather (B) from top of gearbox. Use funnel with long flexible spout to add oil through breather port. (See HYDRAULIC, HYDROSTATIC, AND TRANSMISSION OILS in Fuels, Lubricants, and Coolants section for proper oil.)
-
N58591-UN-12OCT01A - Sight Gauge
B - Plug
Check row unit gear case oil level. With row units level, oil must be in center of sight gauge (A). -
If necessary, remove plug (B) and add oil as needed. (See ROW UNIT GEAR CASE LUBRICANT in Fuels, Lubricants, and Coolants section for proper oil.)
-
Reinstall plug in fill port.
-
N88353-UN-14APR10A - Row Unit Drive Gearbox
Inspect unit drive gearboxes (A) for leaks. -
N96604-UN-18JAN12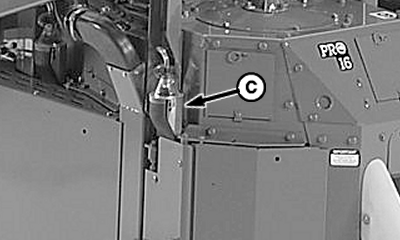
N75315-UN-28MAR07A - Moistener System Valve
B - Strainer
C - Nozzles
Close moistener system valve (A). -
Remove and clean solution strainer (B). (See CLEANING SOLUTION STRAINER in Moistener System section.)
-
Remove and clean nozzles (C) on row units. (See CLEANING NOZZLES in Moistener System section.)
-
TS202-UN-23AUG88
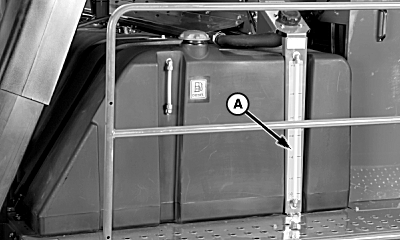
N96616-UN-20JAN12A - Fuel Tank
B - Filler Cap
C - Sight Gauge
To fill fuel tank (A), remove filler cap (B). -
Remove fuel screen from tank neck and clean if needed. Replace screen.
-
NOTE: View sight gauge (C) while fueling to help prevent overfilling.
Fill tank with proper grade of diesel fuel. (See DIESEL FUEL in Fuels, Lubricants, and Coolant Section.)
-
Replace filler cap (B).
|
DP99999,0000849-19-20120224 |