StarFire iTC ReceiverStarFire iTC AccuracyStarFire iTC is a twelve channel, dual-frequency differential GPS receiver with integrated Terrain Compensation (iTC). The integration eliminates the need for a stand-alone Terrain Compensation Module (TCM) for improved guidance performance. Starfire iTC provides three different levels of accuracy. It can be upgraded to higher levels of accuracy as farming needs change without buying a new receiver. Receiver is located on cab of machine. It receives global positioning and differential correction signal through a single receiver and integrates signal for use with system. Terrain Compensation Module (TCM) is integrated into receiver and is a navigational aid used with receiver to enhance vehicle position and course parameters that GPS provides. TCM corrects for vehicle dynamics such as roll on side-slopes, rough terrain or varying soil conditions.
StarFire iTC Original Shroud Bracket Mounting Instructions 1. Read "Install and Remove StarFire Receiver and Brackets Safely" in the Safety section. |
JS56696,00005F0 -19-14MAY09-1/8 |
|
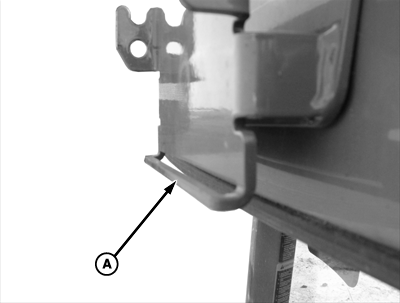
2.
Verify that vehicle side receiver bracket bar (A) is not bent inward or outward.
|
|
JS56696,00005F0 -19-14MAY09-2/8 |
|
|
|
|
|
|
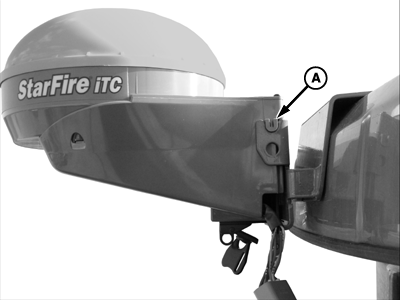
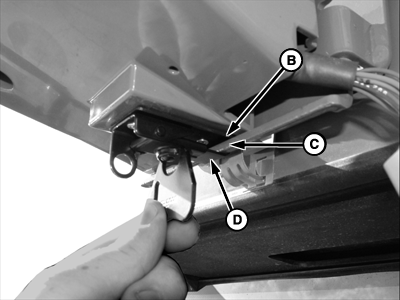
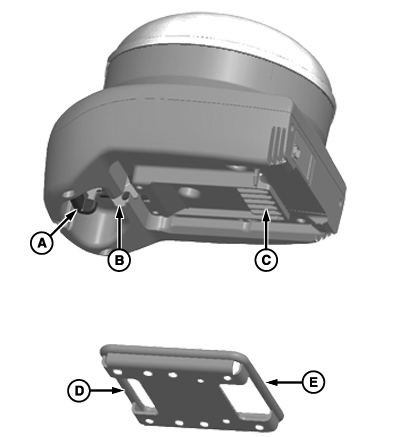
| 3. Position StarFire iTC on bracket. Align mounting pegs (A) on receiver with notches in vehicle bracket. Ensure pegs are firmly seated in notches and metal tab (B) is above bracket bar (C). |
4. Position receiver latch (D) around bracket bar. Turn latch handle to tighten latch around bracket bar. Bracket bar should compress slightly. |
JS56696,00005F0 -19-14MAY09-3/8 |
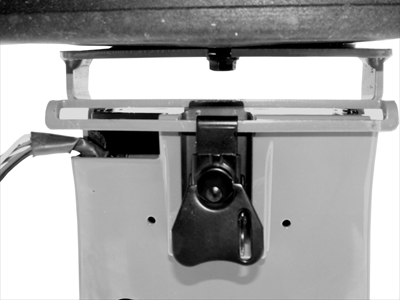
| 5. Fold latch handle upwards against receiver. |
|
JS56696,00005F0 -19-14MAY09-4/8 |
|
StarFire iTC Deluxe Shroud
Bracket Mounting Instructions 1. Read "Install and Remove StarFire Receiver and Brackets Safely" in the Safety section.
|
|
JS56696,00005F0 -19-14MAY09-5/8 |
|
2.
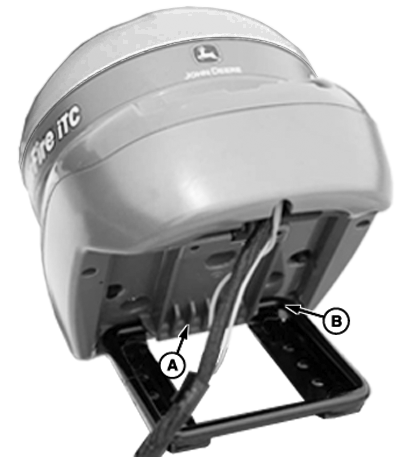
Slide rear hook (A) back under rear hook pivot bar (B).
|
|
JS56696,00005F0 -19-14MAY09-6/8 |
|
3.
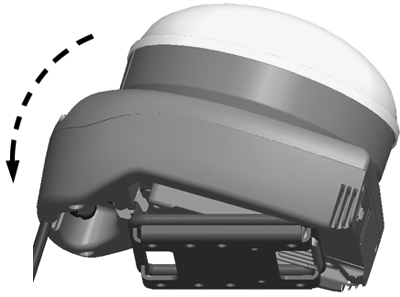
Pull receiver shroud downward until latch locks.
Pull upward on front of shroud to verify positive latch. |
|
JS56696,00005F0 -19-14MAY09-7/8 |
|
Remove Deluxe Shroud
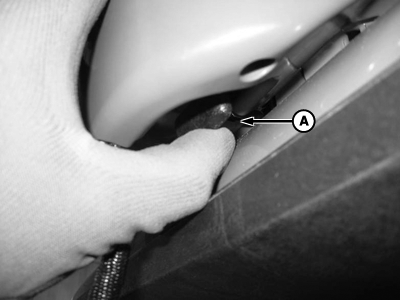
1. Pull release lever (A) to release latch. 2. Pull up on front of shroud to remove.
|
|
JS56696,00005F0 -19-14MAY09-8/8 |