Create Network
-
Ensure that Power/Data cable is properly installed (A). When radio has power, the LED (C) on radio turns green. To install radio, refer to Machine Communication Radio Assembly Instructions.
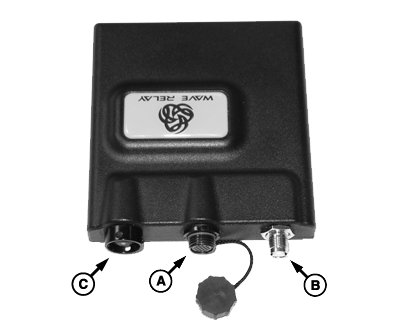
PC14281-UN-05DEC11A - Power/Data (Ethernet)
B - Antenna (Coax)
C - LED
NOTE: MCR LED blinks until it has been correctly configured. When LED is solid, the radio is correctly configured (network name and ID are set). Once the radio is configured, it is ready to join other radios in the network.
-
On GS3 display, press Menu button and select GS3 button.

PC8663-UN-08DEC14MENU button

PC12685-UN-08DEC14GREENSTAR 3 PRO button

PC8677-UN-05AUG05EQUIPMENT softkey
-
Select Equipment softkey on the right side of main menu.
-
From Equipment screen, select Network tab.
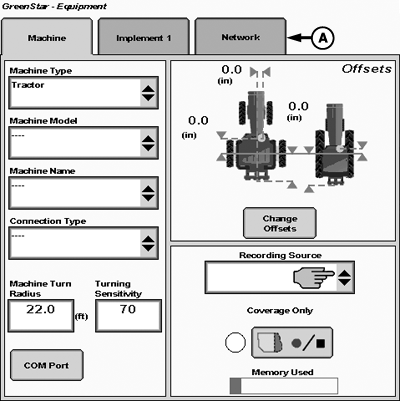
PC14286-UN-06DEC11A - Network Tab
-
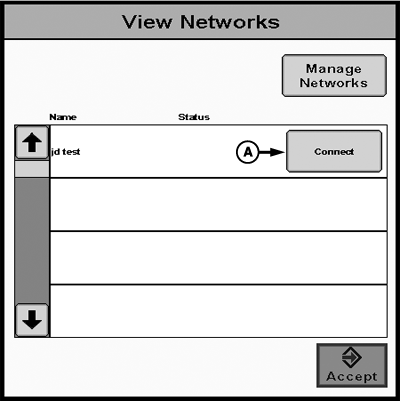
Select View Networks.
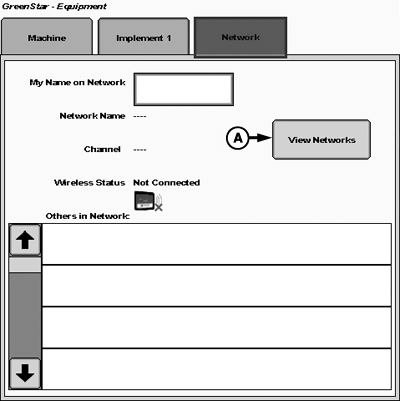
PC14287-UN-06DEC11A - View Networks
-
Select Manage Networks button.
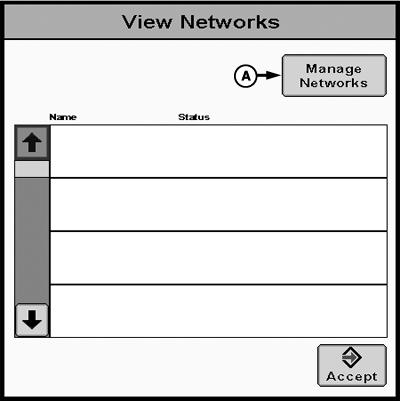
PC14288-UN-06DEC11A - Manage Networks
-
Select Add New on manage networks screen.
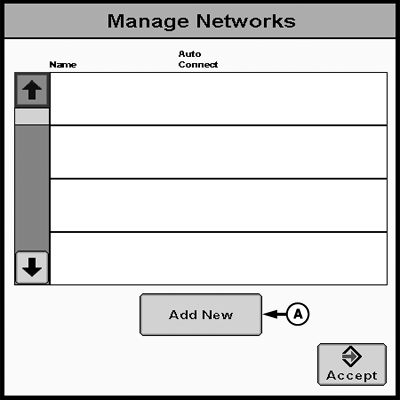
PC14289-UN-06DEC11A - Add New
-
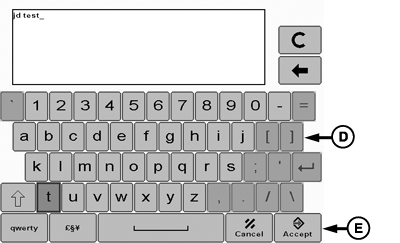
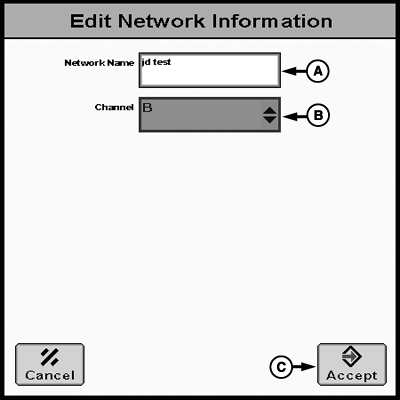
Select Network Name box and use keyboard to type name of new network. Once network name is entered press Accept button.
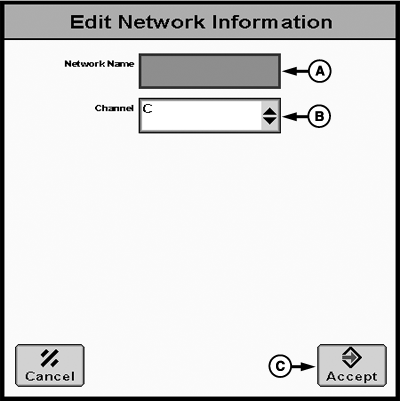
PC14290-UN-06DEC11A - Network Name
PC14291-UN-06DEC11A - Network Name
B - Channel
C - Accept Button
D - Keyboard
E - Keyboard Accept Button
NOTE: Network Name must be 6-20 characters in length and can contain lower case letters (a-z), numbers (0-9), spaces, hyphens or dashes, and underscores.
-
Select a Channel on Edit Network Information screen
NOTE: For more details regarding channel selection, see the Radio Specifications section.
-
Select Accept button once Network Name and Channel are set. The new network now exists on Manage Networks screen.
PC14292-UN-06DEC11A - Network Name
B - Channel
C - Accept
-
Select Accept button on the Manage Networks screen. The new network now exists on View Networks screen.
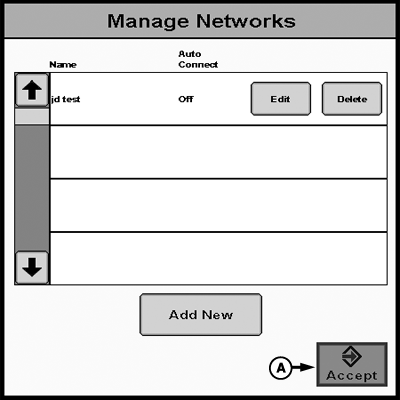
PC14293-UN-06DEC11A - Accept
-
Next to the network name, select Connect button to join. A status symbol with three arrows in a circular formation appears. This step can take up to 90 seconds to complete. Press Accept button to return to Network tab during (or after) this time.
PC14300-UN-06DEC11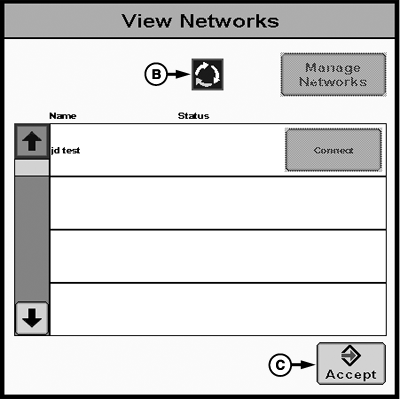
PC14295-UN-06DEC11A - Connect
B - Status
C - Accept Button
NOTE: While connecting, Data Transfer (Import/Export Data) feature is disabled.
NOTE: Each display must add each network to its network list. Repeat previous steps to add networks to each display. Every machine in network must connect to same network, even if there is no one else in network yet.
|
RW00482,0000153-19-20130419 |