Detach D120 Loader
-

Prevent possible injury caused by a falling or shifting loader. Always detach the loader on a hard, level surface. DO NOT detach the loader equipped with a pallet fork. A materials bucket is recommended.
W14000-UN-05OCT88Remove the ballast box. (See Remove Ballast Box in this section.)
-
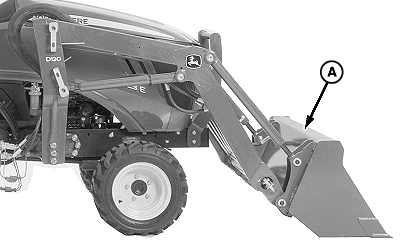
W27337-UN-21MAR16A - Materials Bucket
Verify that the loader is equipped with a materials bucket (A). -
Start the engine.
-
Release the park brake and place the transmission in NEUTRAL.
-
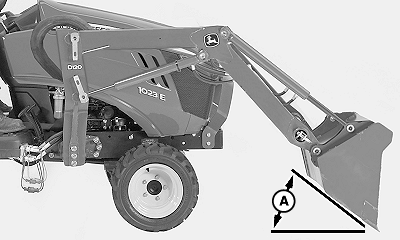
W27338-UN-21MAR16A - 45° Angle
Raise the boom slightly and dump the bucket to 45° (A) as shown. -
Lower the bucket to the ground and apply slight down-pressure. Do not raise the front tires off the ground.
-
Apply the park brake and shut off the engine.
-
W27339-UN-21MAR16A - Parking Stand
B - Pin
C - Spring Pin
Remove parking stands (A) from the storage position. -
Install parking stands (A). Retain with the pin (B) and spring pin (C).
-
Prevent possible injury from slipping or falls. DO
NOT place pivot pins on the tractor floorboards.
Start the engine.
-
W27340-UN-21MAR16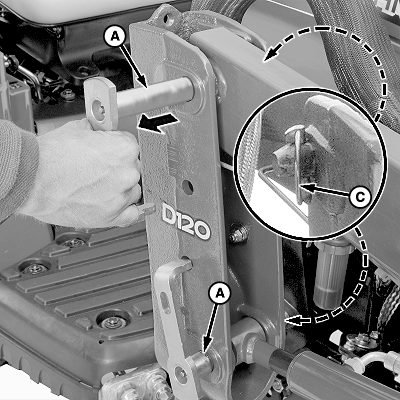
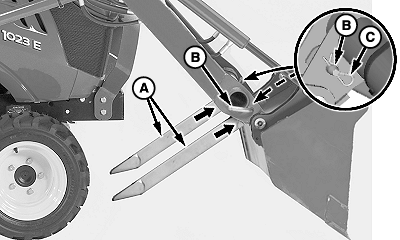
W23100-UN-04OCT12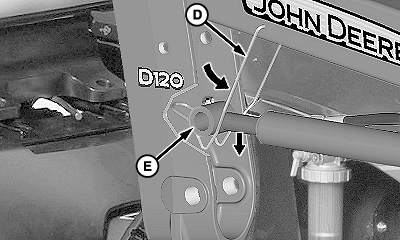
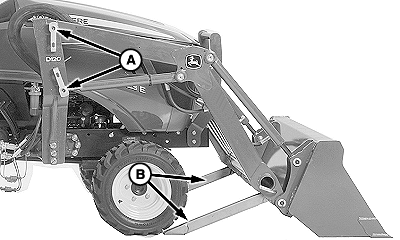
W23101-UN-04OCT12A - Pivot Pin (2 each side)
B - Parking Stand (2 used)
C - Quick-Lock Pin (2 each side)
D - Support (1 each side)
E - Cylinder Rod (1 each side)
Tilt the bucket until parking stands (B) rest on the ground. -
Engage the park brake and place the transmission in PARK. Shut off engine and remove ignition key.
-
Move hydraulic control levers back and forth and side-to-side several times until the pressure is removed from pivot pins (A). See the tractor Operator's Manual for more information.
-
Place lift cylinders in the storage position:
-
Remove quick-lock pins (C) and pivot pins (A).
-
Raise the end of the cylinder rod (E), lower the support (D), and place the end of the cylinder rod in the support as shown.
-
Repeat on the opposite side.
-
-
W23303-UN-11DEC12Pin Storage Bracket (Left-Hand Side Shown)
A - Storage Bracket
B - Pivot Pin (2 each side)
Place pivot pins (B) in storage brackets (A) on both sides. -
Avoid hose damage. Verify that the hoses DO NOT catch on the tractor when backing away.
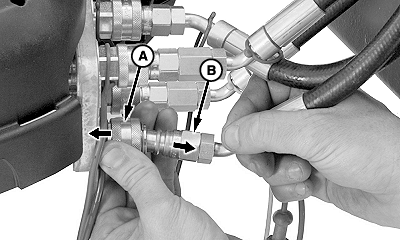
W23102-UN-04OCT12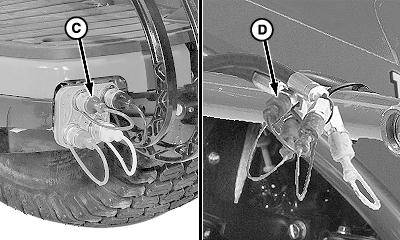
W23103-UN-04OCT12A - Collar (4 used)
B - Coupler, Male (4 used)
C - Plug (4 used)
D - Cap (4 used)
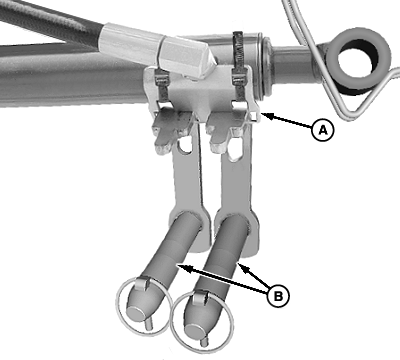
Disconnect the hoses by pushing back the collar (A) on each female coupler and removing male couplers (B). -
Install dust plugs (C) and caps (D) as shown.
-
Remove hydraulic hoses from the guide.
-
Store the hoses on the lift cylinder. DO NOT lay the hoses on the ground.
-
Start the engine.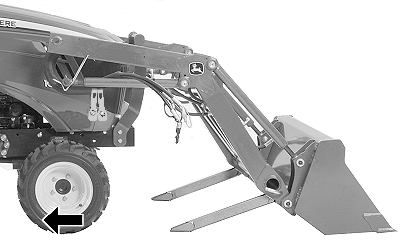
W27341-UN-21MAR16 -
Back the tractor away from the loader.
|
OUO6064,000179F-19-20180828 |