Attach D120 Loader
-

W27345-UN-21MAR16A - Mast (1 each side)
B - Boom (1 each side)
Prevent possible injury from tractor instability. Verify that the tractor is prepared for loader operation. (See Prepare Tractor section.)Prepare the tractor for loader operation. (See Prepare Tractor section.)
-
Inspect the loader for damaged or missing parts.
-
Verify that all hydraulic fittings are free of dirt.
-
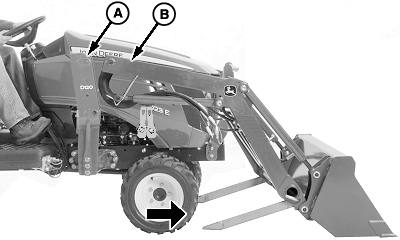
Drive the tractor between the loader booms. Stop when masts (A) are near the loader booms (B).
-
Engage the park brake and place the transmission in PARK.
-
Shut off engine and remove ignition key.
-
Avoid injury from escaping hydraulic oil under pressure. Relieve the pressure in the hydraulic system.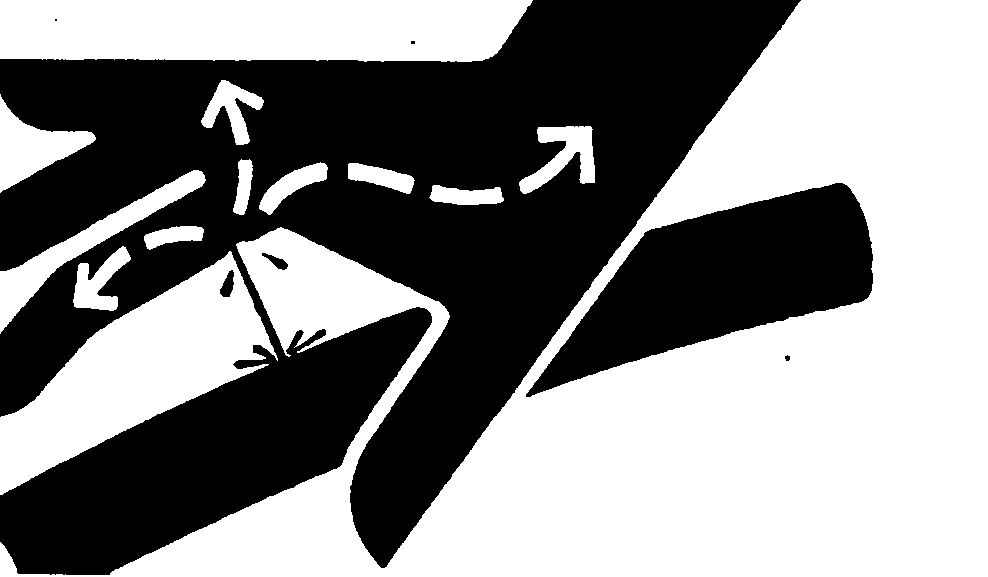
X9811-UN-23AUG88Move the hydraulic control lever back and forth and side-to-side several times. See the tractor Operator's Manual for more information.
-
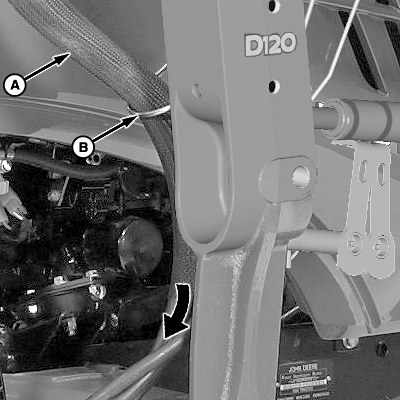
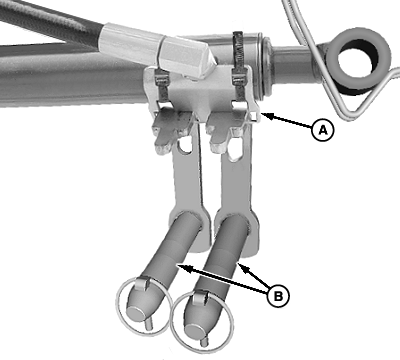
W23300-UN-14DEC12A - Hose (4 used)
B - Guide
Route the hoses (A) through the hose guide (B). -
Connect hydraulic couplers using color-coded caps and plugs.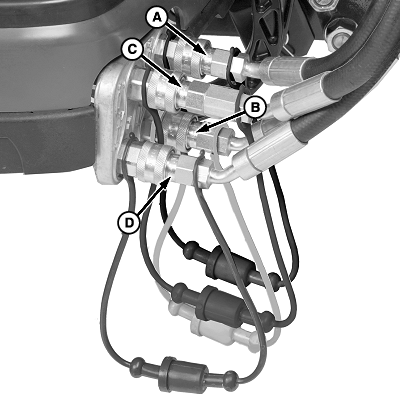
W23106-UN-05OCT12Key
Dust Cap/Plug Color
Hydraulic Function
A
Black
Bucket Cylinder—Rod End
B
Yellow
Bucket Cylinder—Head End
C
Blue
Lift Cylinder—Head End
D
Red
Lift Cylinder—Rod End
-

W20683-UN-17FEB10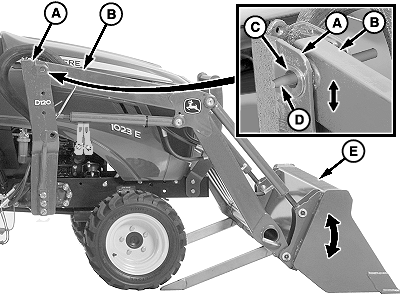
W27346-UN-21MAR16A - Mast (1 each side)
B - Boom (1 each side)
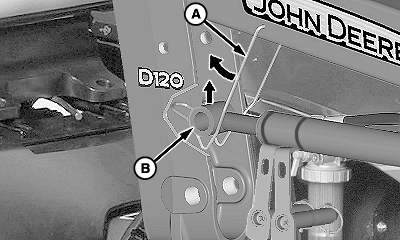
C - Hole, Mast (1 each sides)
D - Tapered Pin
E - Bucket
Prevent possible injury. DO NOT insert fingers into holes while aligning components.Use a tapered pin (D) or drift tool to assist in the alignment of the boom and mast.
To align holes in both booms (B) with holes (C) in both masts (A), start the engine and move the tractor or pivot the bucket (E).
-
To align holes in booms and masts, insert a tapered pin (D) or drift tool through the back of both masts (A).
-
Engage the park brake and place the transmission in PARK.
-
W23110-UN-14DEC12Lift Cylinder (Right-Hand Side Shown)

W23309-UN-11DEC12Support (Right-Hand Side Shown)
A - Support
B - Lift Cylinder
C - Boom
Shut off engine and remove ignition key. -
Remove lift cylinders (B) from the storage position:
-
Raise the end of the lift cylinder (B) out of the support (A), and remove from the support as shown.
-
Place the support into the storage position on the back of the boom (C).
-
Repeat on the opposite side.
-
-
W23303-UN-11DEC12Storage Bracket (Right-Hand Side Shown)
W23307-UN-11DEC12Top Pin
W23308-UN-11DEC12Bottom Pin
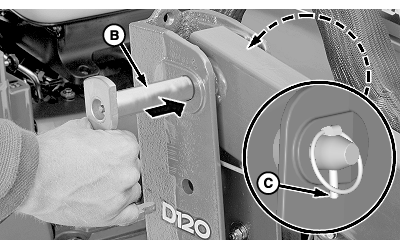
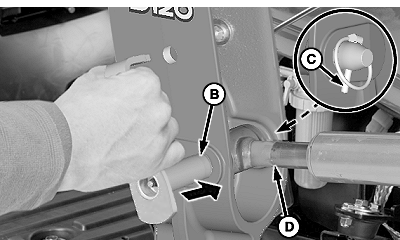
A - Storage Bracket (1 each side)
B - Pivot Pin (2 per side)
C - Quick-Lock Pin (2 per side)
D - Lift Cylinder (1 each side)
Prevent possible injury from slipping or falls. DO NOT place pivot pins on the tractor floorboard.Remove pivot pins (B) from the storage bracket (A).
-
To align the cylinder with the mast, use the control lever and manually extend or retract lift cylinders.
Align the end of the lift cylinder (D) with the bottom holes in the mast.
-
Install both pivot pins (B) through the mast as shown. Retain using quick-lock pins (C).
-
Repeat on the opposite side.
-
W27347-UN-21MAR16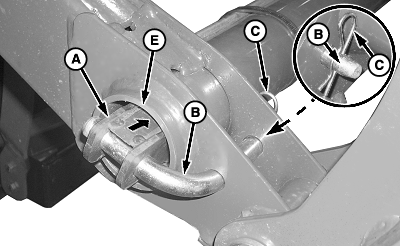
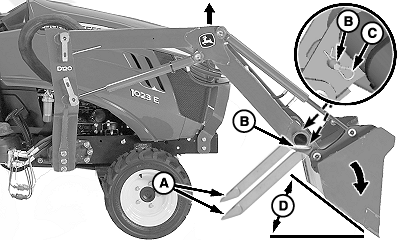
W23311-UN-13DEC12Parking Stand (Right-Hand Side Shown)
A - Parking Stand (2 used)
B - Pin (4 used)
C - Spring Pin (4 used)
D - 45° Angle
E - Storage Tube
Start the engine, raise the boom slightly, and dump the bucket to 45° (D) as shown. -
Lower the bucket to the ground and apply slight down-pressure. Do not raise the front tires off the ground.
-
Shut off engine and remove ignition key.
-
Remove spring pins (C) and pins (B).
-
Remove parking stands (A) and slide them in ends of the storage tube (E). Retain using pins (B) and spring pins (C) as shown.
-
Start the engine and check for proper loader operation in response to the control lever. (See Loader Controls in Operate Loader section.)
|
OUO6064,00017A2-19-20180828 |