Check Parking Stand and Weight Bracket Engagement (300R and 320R Loaders)
-
Prevent damage to the loader and tractor. Make sure that the top bar of the parking stand is on the top of the front weight bracket. Make sure that the bottom bar is securely hooked to the bottom of the front weight bracket.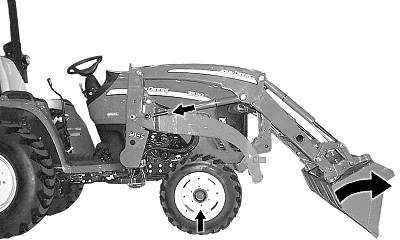
W28203-UN-21JUL17Make sure that the loader is equipped with a materials bucket.
-
Start the engine and lower the ballast box or rear implement to the ground.
-
Dump the bucket 10°—20° and lower to the ground.
-
Retract lift cylinders raising the front wheels 25—50 mm (1—2 in) off the ground. (Do not retract lift cylinders completely.)
-
Engage the park brake and place the transmission in PARK.
-
Shut off engine and remove ignition key.
-
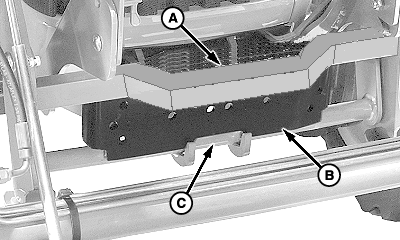
Make sure that there is no dirt or debris between the bottom of the front weight bracket (B) and bottom bar (C) of the parking stand. Top bar (A) of the parking stand rests on the top of the front weight bracket with at least 25 mm (1 in) (D) of engagement (measured from the rear of the top bar).
W24413-UN-07OCT13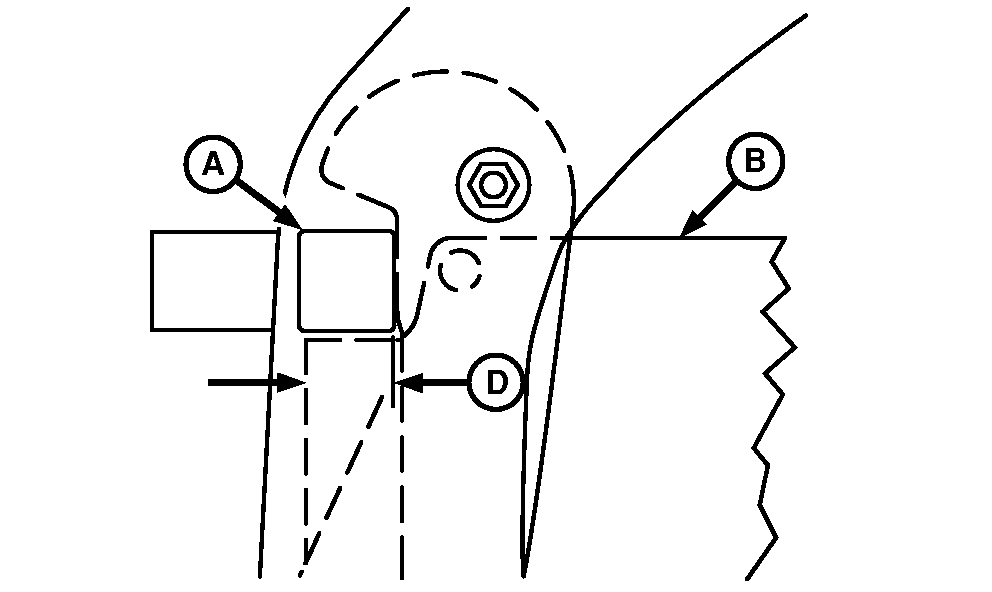
W24415-UN-22OCT13All EXCEPT 4105 Tractor
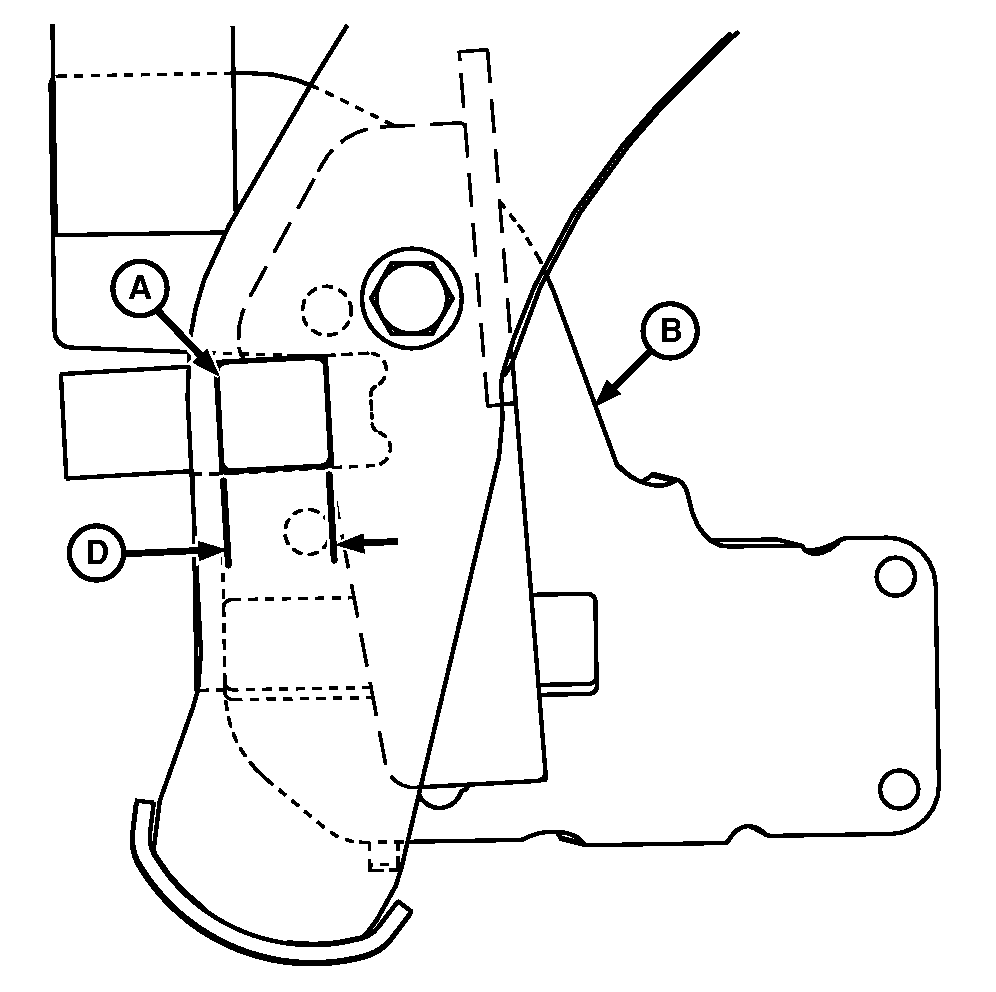
W24414-UN-22OCT134105 Tractor
A - Top Bar
B - Weight Bracket
C - Bottom Bar
D - Dimension, 25 mm (1 in)
All EXCEPT 4105 tractor: Check that the bottom bar (C) of the parking stand is securely hooked to the bottom of the front weight bracket (B). -
Check that the parking stand top bar (A) rests on the top of the front weight bracket (B) with at least 25 mm (1 in) (D) of engagement.
If the engagement is not at least 25 mm (1 in), adjust the parking stand as follows:
-
Detach the loader. (See Detach Loader in Detach Loader section.)
-

W27937-UN-02AUG17Mounting Frame (3X20 Series, Left-Hand Side Shown
E - Mounting Frame Hardware
Loosen the mounting frame hardware (E) on both sides. -
Attach the loader (See Attach Loader in Attach Loader section.)
-
Adjust the parking stand to make sure that the top bar engagement with the front weight bracket is at least 25 mm (1 in). Tighten the mounting frame hardware on both sides. (See Every 50 Hours in Lubrication and Maintenance section.)
-
-
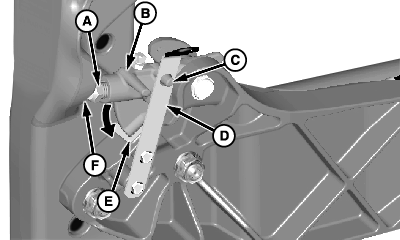
W28205-UN-21JUL17Left-Hand Side Shown
A - Cap Screw
B - Latch
C - Latch Pin
D - Leaf Spring
E - Brace Pad
F - Mast Pad
Make sure that the latch (B) is fully seated against the brace pad (E) and latch pin (C) is engaged with the leaf spring (D). Repeat on the opposite side.Place the latch (B) on both sides of the loader in the LOCKED position. Pull rearward on the handle to engage the latch pin (C) with the leaf spring (D). Cap screw (A) must contact the mast pad (F). If not (see Check Parking Latch Cap Screw Adjustment in Every 50 Hours of Lubrication and Maintenance section).
-
Start the engine and extend lift cylinders. Lift the bucket from the ground. Ensure that the loader is properly mounted.
-
Lower the loader to the ground, shut off the engine, and remove the ignition key.
|
OUO6064,0001B63-19-20180830 |