Attach Bucket or Attachment (440R Loader)
QUIK-CHANGE Attachment Carrier
W06637-UN-09MAR04
W06638-UN-09MAR04
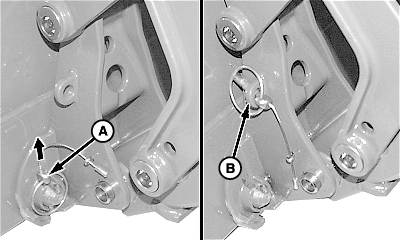
A - Quick-Lock Pin
B - Storage Position
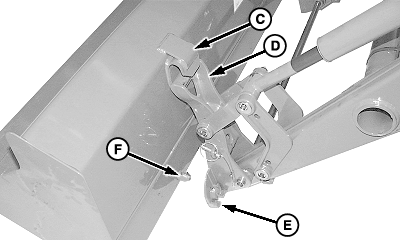
C - Hook
D - Holder
E - Holder Strap
F - Bucket Pin
-
The attaching procedure is the same for all attachments. Bucket attachment shown.
Start the engine.
-
Extend bucket cylinders to position the carrier forward.
-
Align holders (D) with hooks (C).
-
Raise the loader until the carrier engages hooks, then roll back the bucket.
-
Raise the loader high enough to check that straps (E) engage pins (F) on both sides.
-
Shut off the engine.
-
Remove quick-lock pins from the storage position (B).
-
Install quick-lock pins (A) through bucket pins.
-
 Prevent possible injury. Make sure that the bucket
is properly secured to the carrier.
Prevent possible injury. Make sure that the bucket
is properly secured to the carrier.Start the engine. Verify that the carrier is fully engaged. Extend bucket cylinders and apply down-pressure on the bucket against the ground.
-
Lower the loader to the ground and shut off the engine.
Skid-Steer Attachment Carrier
W08389-UN-29NOV06
Left-Hand Lock Pin
W08390-UN-28NOV06
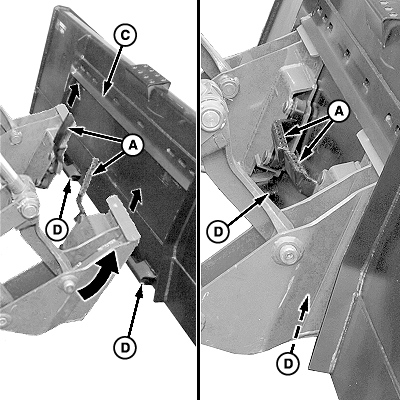
A - Latch Handles
B - Lock Pin (1 each side)
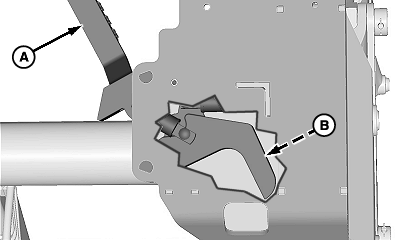
C - Lip
D - Latch (2 used)
-
Make sure that both latch handles (A) are up and lock pins (B) are fully retracted.
The attaching procedure is the same for all attachments. Bucket attachment shown.
Raise both latch handles (A) into the UP (unlatched) position.
-
Start the engine and raise the loader off the ground.
-
Extend bucket cylinders to tilt the carrier forward.
-
Slowly drive forward and raise the loader until carrier plates are positioned under the lip (C) on the bucket. Then roll back the bucket.
The bucket rests against carrier plates.
-
Lower the loader completely to the ground and shut off the engine.
-
Lower the latch handles (A) to engage pins (B) with latches (D) on the bucket.
-
Prevent possible injury. Make sure that the bucket
is properly secured to the carrier.
Start the engine. Verify that pins (B) are fully engaged in latches (D). Extend bucket cylinders and apply down-pressure on the bucket against the ground.
If the bucket is not securely attached to the skid steer carrier, repeat steps.
-
Lower loader to the ground and shut off the tractor engine.
X9811-UN-23AUG88
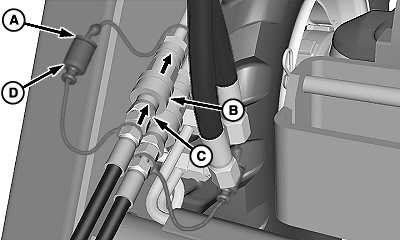
W23531-UN-22MAR13
A - Plug (1 per female coupler)
B - Coupler, Female (1 per connection)
C - Coupler, Male (1 per connection)
D - Cap (1 per male coupler)
Before connecting coupler halves, make sure that fittings are free of dirt and debris.If equipped with an attachment, such as a grapple bucket: Connect the hydraulic hoses as follows:
- Shut off engine and remove ignition key.
- Relieve the hydraulic pressure. (See Relieve Hydraulic Pressure in Controls section.)
- Push and hold the collar on the female coupler (B).
- Insert the male coupler (C).
- Release the collar on the female coupler.
- Connect the cap (D) and plug (A) together.
- Repeat for the remaining hydraulic hose connections.
|
OUO6064,0001BAE-19-20180829 |