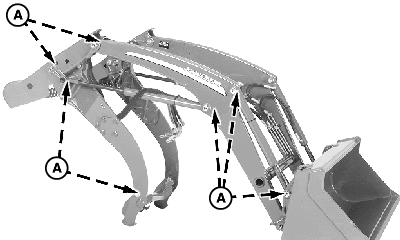
Every 50 Hours (300R and 320R Loaders)
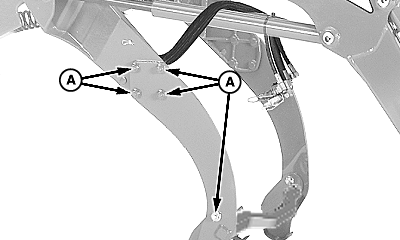
W23987-UN-07OCT13
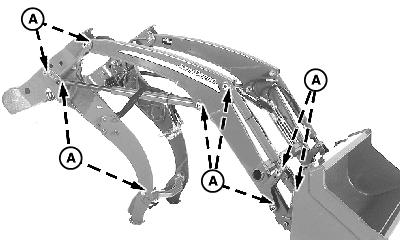
Loader Hardware (Right-Hand Side Shown)
W08997-UN-12SEP07
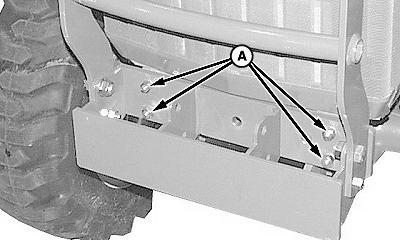
3X20, 4X00, 4X10 Series, and 3203 Mounting Frame (Right-Hand Side Shown)
W06988-UN-18AUG04
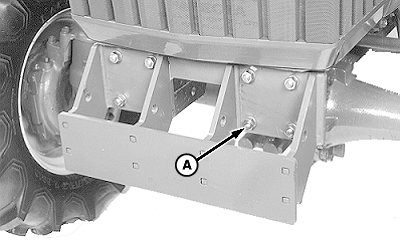
55 Series Mounting Frame (Left-Hand Side Shown)
A - Hardware, M16
B - Hardware, M12
Tighten the loader and mounting frame hardware (A and B) on both sides to specifications.3X20, 4X00, 4X10 Series, and 3203 tractors: Tighten the mounting frame hardware in the sequence shown.
| M16 Hardware (A) | Torque | 310 N·m (229 lb·ft) |
| M12 Hardware (B) | Torque | 140 N·m (103 lb·ft) |
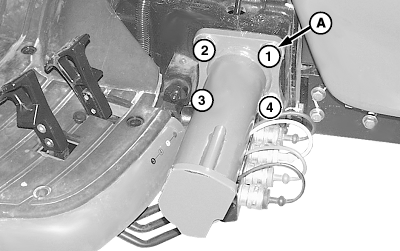
W08904-UN-17AUG07
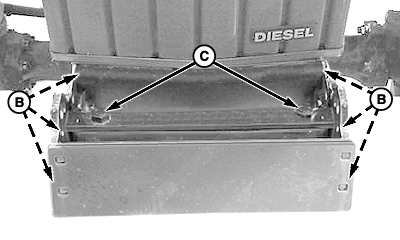
A - Hardware, M12 (6 on front)
B - Hardware, M12 (2 on each side)
4105 Tractor: Tighten the hood guard mounting hardware (A and B) to specification (ten locations).
| M12 Hardware | Torque | 140 N·m (103 lb·ft) |
W06990-UN-18AUG04
Weight Bracket—770, 790, 3005, and 4005
W06991-UN-18AUG04
Weight Bracket—870, 970, 1070, and 990
W06993-UN-18AUG04
Weight Bracket—855 and 955
A - Hardware, M12
B - Hardware, M12
C - Hardware, M16
55, 70 and 90 Series, 3005 and 4005 tractors: Tighten the front weight bracket mounting hardware (A, B, and C) to specifications.
| M12 Hardware (A and B) | Torque | 140 N·m (103 lb·ft) |
| M16 Hardware (C) | Torque | 80 N·m (59 lb·ft) |
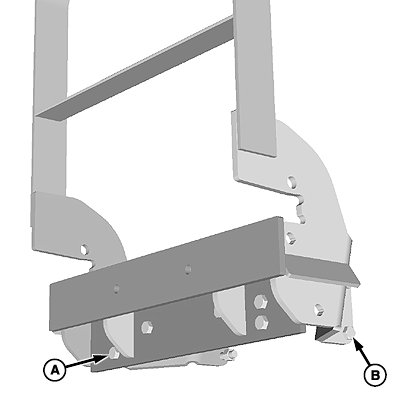
W28224-UN-21JUL17
A - Nut, M16 (7 per side)
300R Loader: Tighten nuts (A) (inside frame), on pivot pins and front frame on both sides to specification.
| Nut | Torque | 150 N·m (111 lb·ft) |
W28225-UN-21JUL17
A - Nut, M16 (9 per side)
320R Loader: Tighten nuts (A) (inside frame), on pivot pins and front frame on both sides to specification.
| Nut | Torque | 150 N·m (111 lb·ft) |
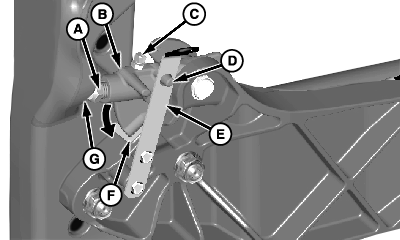
Check Parking Latch Cap Screw Adjustment
W28203-UN-21JUL17
W28226-UN-21JUL17
Left-Hand Side Shown
A - Cap Screw
B - Latch
C - Locking Screw
D - Latch Pin
E - Leaf Spring
F - Brace Pad
G - Mast Pad
-
Be sure that the loader is equipped with a materials bucket, 4-in-1 bucket, or a grapple bucket.
-
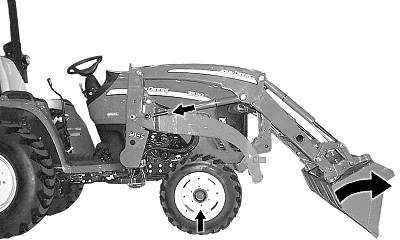
Attach the loader to the tractor. (See Attach Loader section.)
-
Start the engine and lower the ballast box or rear implement to the ground.
-
Dump the bucket 10°—20° and lower to the ground.
-
Retract lift cylinders, raising the front wheels 25—50 mm (1—2 in) off the ground. (Do not retract lift cylinders completely.)
-
Make sure that the latch (B) is fully seated against the brace pad (F) and latch pin (D) is engaged with the leaf spring (E). Repeat on the opposite side. Cap screw (A) must contact the mast pad (G). If not, adjust each cap screw as follows:
-
Loosen the locking screw (C).
-
Turn the cap screw (A) until it contacts the mast pad but the latch is still free to rotate.
-
Tighten the locking screw to specification.
Locking Screw Torque 25 N·m (221 lb·in)
To disable the quick park feature, loosen the locking screw (C), turn the cap screw (A) until it is tight against the mast pad (G). Latch (B) must not rotate freely. Tighten the locking screw to specification.
-
-
Extend lift cylinders to lower the tractor to the ground.
-
Shut off engine and remove ignition key.
Check Transmission/Hydraulic Oil Level
-
Cycle all cylinders three or four times.
-
Retract bucket cylinders completely and lower the loader to the ground.
-
Shut off engine and remove ignition key.
-
Check the tractor transmission/hydraulic oil level. See the tractor Operator’s Manual for more information.
|
OUO6064,00025C5-19-20180831 |